Dell Inspiron 7000 Dell Inspiron 7000 Service Manual - Page 33
nostics Menu, Run All Tests, Run Quick Tests, Run Specific Tests
 |
View all Dell Inspiron 7000 manuals
Add to My Manuals
Save this manual to your list of manuals |
Page 33 highlights
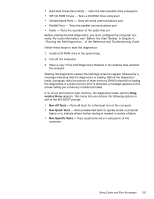
Hard-Disk Drives (Non-SCSI) - Tests the IDE hard-disk drive subsystem IDE CD ROM Drives - Tests a CD-ROM drive subsystem Serial/Infrared Ports - Tests the serial communications port Parallel Ports - Tests the parallel communications port Audio - Tests the operation of the audio chip set Before starting the Dell Diagnostics, you must configure the computer correctly. For more information, see "Before You Start Testing" in Chapter 4, "Running the Dell Diagnostics," of the Reference and Troubleshooting Guide. Follow these steps to start the diagnostics: 1. Install a CD-ROM drive in the options bay. 2. Turn off the computer. 3. Place a copy of the Dell Diagnostics Diskette in the diskette drive, and boot the computer. Starting the diagnostics causes the Dell logo screen to appear, followed by a message indicating that the diagnostics is loading. Before the diagnostics loads, a program tests the portion of main memory (RAM) required for loading the diagnostics. If a main memory error is detected, a message appears on the screen telling you a memory module has failed. If no errors are found in main memory, the diagnostics loads, and the Diagnostics Menu appears. This menu lets you choose the following options or exit to the MS-DOS® prompt: Run All Tests - Runs all tests for a thorough test of the computer Run Quick Tests - Runs preselected tests to quickly locate a computer failure or to indicate where further testing is needed to isolate a failure Run Specific Tests - Tests a particular area or subsystem of the computer Beep Codes and Error Messages 3-5
-
 1
1 -
2
-
3
-
4
-
5
-
6
-
7
-
8
-
9
-
10
-
11
-
12
-
13
-
14
-
15
-
16
-
17
-
18
-
19
-
20
-
21
-
22
-
23
-
24
-
25
-
26
-
27
-
 28
28 -
 29
29 -
 30
30 -
 31
31 -
 32
32 -
 33
33 -
 34
34 -
 35
35 -
 36
36 -
 37
37 -
 38
38 -
39
-
40
-
41
-
42
-
43
-
44
-
45
-
46
-
47
-
48
-
49
-
50
-
51
-
52
-
53
-
54
-
55
-
56
-
57
-
58
-
59
-
60
-
61
-
62
-
63
-
64
-
65
-
66
-
67
-
68
-
69
-
70
-
71
-
72
-
73
-
74
-
75
-
76
-
77
-
78
-
79
-
80
-
81
-
82
-
83
-
84
-
85
-
86
-
87
-
88
-
89
-
90
-
91
-
92
-
93
-
94
-
95
-
96
-
97
-
98
-
99
-
100
-
101
-
102
-
103
-
104
 |
 |