Dell Inspiron 7000 Dell Inspiron 7000 Service Manual - Page 91
board. Do not rock the board to remove it, because this may damage
 |
View all Dell Inspiron 7000 manuals
Add to My Manuals
Save this manual to your list of manuals |
Page 91 highlights
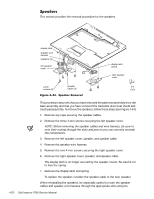
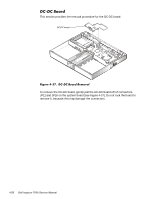
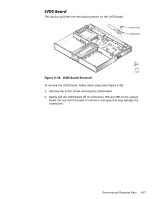
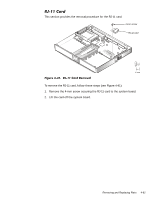
This section provides the removal procedure for the LVDS board. 4-mm screw LVDS board To remove the LVDS board, follow these steps (see Figure 4-38): 1. Remove the 4-mm screw securing the LVDS board. 2. Gently pull the LVDS board off of connectors JP9 and JP8 on the system board. Do not rock the board to remove it, because this may damage the connectors. Removing and Replacing Parts 4-57
-
 1
1 -
2
-
3
-
4
-
5
-
6
-
7
-
8
-
9
-
10
-
11
-
12
-
13
-
14
-
15
-
16
-
17
-
18
-
19
-
20
-
21
-
22
-
23
-
24
-
25
-
26
-
27
-
28
-
29
-
30
-
31
-
32
-
33
-
34
-
35
-
36
-
37
-
38
-
39
-
40
-
41
-
42
-
43
-
44
-
45
-
46
-
47
-
48
-
49
-
50
-
51
-
52
-
53
-
54
-
55
-
56
-
57
-
58
-
59
-
60
-
61
-
62
-
63
-
64
-
65
-
66
-
67
-
68
-
69
-
70
-
71
-
72
-
73
-
74
-
75
-
76
-
77
-
78
-
79
-
80
-
81
-
82
-
83
-
84
-
85
-
 86
86 -
 87
87 -
 88
88 -
 89
89 -
 90
90 -
 91
91 -
 92
92 -
 93
93 -
 94
94 -
 95
95 -
 96
96 -
97
-
98
-
99
-
100
-
101
-
102
-
103
-
104
 |
 |
Removing and Replacing Parts
4-57
/9’6±%RDUG
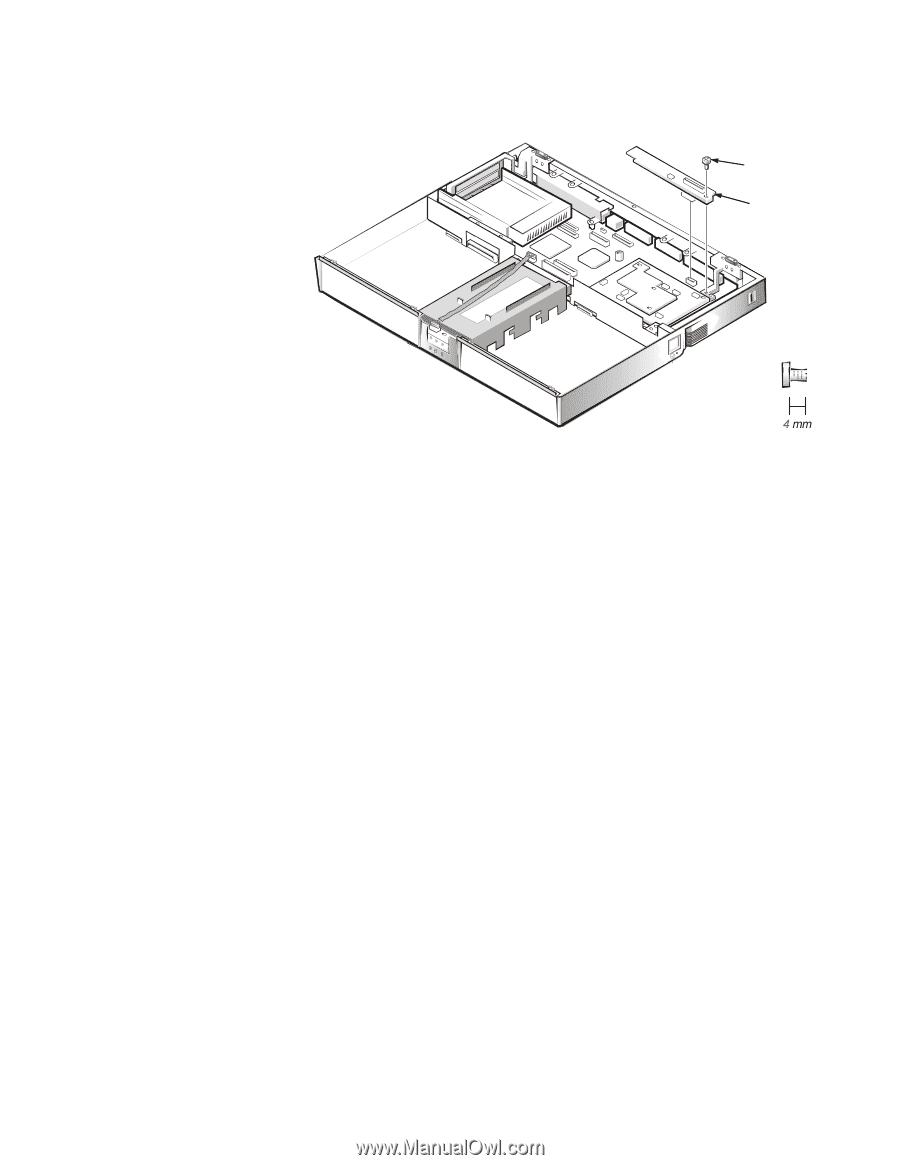
This section provides the removal procedure for the LVDS board.
)LJXUH±·´¶½³±±/9’6±%RDUG±5HPRYDO
To remove the LVDS board, follow these steps (see Figure 4-38):
1.
Remove the 4-mm screw securing the LVDS board.
2.
Gently pull the LVDS board off of connectors JP9 and JP8 on the system
board. Do not rock the board to remove it, because this may damage the
connectors.
4-mm screw
LVDS board