Denon AVR 4806 Owners Manual
Denon AVR 4806 - AV Receiver Manual
 |
UPC - 081757506465
View all Denon AVR 4806 manuals
Add to My Manuals
Save this manual to your list of manuals |
Denon AVR 4806 manual content summary:
- Denon AVR 4806 | Owners Manual - Page 1
AV SURROUND RECEIVER AVR-4806 OPERATING INSTRUCTIONS - Denon AVR 4806 | Owners Manual - Page 2
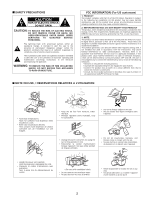
any interference received, including interference that may cause undesired operation. 2. IMPORTANT NOTICE: DO NOT MODIFY THIS PRODUCT This product, when installed as indicated in the instructions contained in this manual, meets FCC requirements. Modification not expressly approved by DENON may void - Denon AVR 4806 | Owners Manual - Page 3
2 System Setup Menu CH SEL ENTER CH SEL ENTER CH SEL ENTER CH SEL ENTER CH SEL ENTER CH SEL ENTER CH SEL ENTER 3 page 19~25 page 122 page 123 page 123, 124 page 124, 125 page 113, 114 page 114, 115 page 115, 116 page 116~118 page 118, 119 page 119, 120 page 120, 121 page 89, 90 page 90 page - Denon AVR 4806 | Owners Manual - Page 4
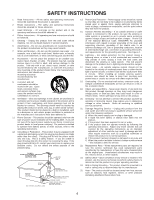
other sources, refer to the operating instructions. 12. the mast and supporting structure, grounding of instructions. Adjust only those controls that are covered by the operating instructions as an improper adjustment of other controls any service or repairs to this product, ask the service - Denon AVR 4806 | Owners Manual - Page 5
Thank you for choosing the DENON AVR-4806 Digital Surround A / V receiver. This remarkable component has been review the contents of this manual before proceeding. Contents Getting Started Accessories 7 Before using 7 Cautions on installation 7 Cautions on handling 8 Preparing the remote control - Denon AVR 4806 | Owners Manual - Page 6
radio Auto tuning 65 Manual tuning 65 Preset memory 66 Checking the preset stations 66 Recalling preset stations 66, 67 RDS (Radio Data System 67 RDS search 67 PTY search 68 TP search 69 RT (Radio Text 69 Advanced Operation Remote control unit Operating DENON audio components 70~72 Preset - Denon AVR 4806 | Owners Manual - Page 7
q Operating instructions 1 w Warranty (for North America model only 1 e Service station list 1 r Power supply cord 1 t Remote control unit (RC-995 1 y power supply cord and disconnect the connection cables between all other audio components when moving the set. • Before turning the Power - Denon AVR 4806 | Owners Manual - Page 8
say, a vacation. Preparing the remote control unit • The included remote control unit (RC-995) can be used to operate not only the AVR-4806 but other remote control compatible DENON components as well. In addition, the memory contains the control signals for other remote control units, so it can be - Denon AVR 4806 | Owners Manual - Page 9
there are obstacles in the way or if the remote control unit is not pointed directly at the remote sensor. • The remote control unit can be operated at a horizontal angle of • For details on the functions of these parts, refer to the pages given in parentheses ( ). !4 !3 !2 !1 !0 !5 !6 !7 !8 qw e - Denon AVR 4806 | Owners Manual - Page 10
USER MODE 3 button 59) !0 Master volume control knob 43) !1 Master volume indicator 43) !2 Display 11) !3 Remote control sensor 9) !4 FUNCTION knob 43, 67, 82, DSP SIMULATION button 61) #3 7CH STEREO button 61) #4 HOME THX CINEMA button 50, 51) #5 STANDARD button 53~57) #6 DIRECT/STEREO button - Denon AVR 4806 | Owners Manual - Page 11
etc. r Output signal channel indicator The audio channels that can be output light ZONE3/REC SELECT. !1 DENON LINK indicator This lights during playback in a DENON LINK connection. !2 RDS indicator This lights when RDS broadcast has been received. !5 AUTO indicator This lights when the broadcast - Denon AVR 4806 | Owners Manual - Page 12
) TEST TONE button 118) NOTE: • With the AVR-4806, the "Z4", "VCR4", "AUX", "M.SEL" and "SCALE" buttons cannot be used. • The AVR-4806's 7CH STEREO surround mode can be operated using the "9CH" button. • For instructions on setting the remote control unit back light's lighting time ( page 78). 12 - Denon AVR 4806 | Owners Manual - Page 13
AVR-4806 according to your listening room environment and the source equipment and loudspeakers you are using. • For optimum performance, we recommend using the Auto Setup function. • If you wish, you can set the various settings manually 2) Delay Time 3) Channel Level 4) Crossover Frequency - Denon AVR 4806 | Owners Manual - Page 14
are required to use the THX Ultra2 Cinema,THX Music mode and THX Games mode. Set the surround channel speakers (front left (FL) and front right (FR), surround left (SL) and surround right (SR), surround back left (SBL) and surround back right (SBR)) is less than 2 ft (60 cm). With the AVR-4806 - Denon AVR 4806 | Owners Manual - Page 15
switch the power back on. If the protection circuit is activated again even though there are no problems with the wiring or the ventilation around the unit, switch off the power and contact a DENON service center. Note on speaker impedance The protector circuit may be activated if the set is played - Denon AVR 4806 | Owners Manual - Page 16
AVR-4806 can be configured for 10 speaker playback using two pairs of surround speakers (A+B) and one pair of surround back speakers as shown below. • The output of each power amplifier can be assigned to any desired channel to best suit the application. For details, refer to "Setting the Channel - Denon AVR 4806 | Owners Manual - Page 17
more information about the video up conversion function ( page 27). • The AVR-4806 is equipped with HDMI connectors, so it can be connected to a DVD player or monitor TV using an HDMI cable. To connect it to a DVD player using a DVI-D cable ( page 36). • To connect the digital audio output from the - Denon AVR 4806 | Owners Manual - Page 18
manuals for other components for further information. • The COMPONENT MONITOR OUT-1 and the COMPONENT MONITOR OUT-2 can be used simultaneously. • Audio signals are only output from the HDMI monitor out connector when audio signals are input to the HDMI input connector. • When connecting the AVR-4806 - Denon AVR 4806 | Owners Manual - Page 19
Dolby Digital 5.1, DTS, DVDAudio and Super Audio CD. 2 About the main listening position (*M) • The main listening position is the point where a listener sits most often or the listening position when only one person is listening. Measurements on the AVR-4806 start from this point. Correction for - Denon AVR 4806 | Owners Manual - Page 20
a microphone 1 Connect the included microphone for Auto Setup to the SETUP MIC jack on the front panel of the unit. The standard microphone is DENON DM-S305. When using other microphone ( page 123, 124). 2 Mount the auto setup microphone onto a camera tripod, etc., and place it at ear height - Denon AVR 4806 | Owners Manual - Page 21
or unplug the cord when you leave home for, say, a vacation. 5 Press the AMP button to select the "AMP" (only when operating with the remote control unit). 1 Press the SETUP button. • Display the "System Setup Menu". 2 Press the CURSOR D or H button to select the "Auto Setup / Room EQ", then press - Denon AVR 4806 | Owners Manual - Page 22
Extra Setup Preliminary measurements • The AVR-4806 has seven available amplifier channels, some of which can be assigned button. • Switch to the setting screen. For instructions on making the "Channel Setup" settings ( page 105). For instructions on making the "Power Amp Assign" settings ( - Denon AVR 4806 | Owners Manual - Page 23
With these measurements, the "Speaker Configuration", "Delay Time", "Channel Level", "Crossover Frequency" and "Room EQ" are analyzed automatically. be taken. Place the microphone at the second listening position. For instructions on the position in which the microphone should be placed ( page 19 - Denon AVR 4806 | Owners Manual - Page 24
with the room, you may notice irregular results when setting the level and/or distance of the main speakers. If this happens, THX recommends setting them manually. • Please note that any THX main speakers should be set to Small (80 Hz). If you set up your speakers using Auto Setup, please make sure - Denon AVR 4806 | Owners Manual - Page 25
the following matters, reset the pertinent items, and measure again. Be sure to turn off the AVR-4806's power before checking properly detected. • Only one channel of the surround (A) and surround (B) speakers was detected. • Sound was output from the R channel when only one surround back speaker - Denon AVR 4806 | Owners Manual - Page 26
Digital RF Output The AVR-4806 does not have a DD RF demodulator function. Therefore, you need to use a commercially available outboard DD RF demodulator and connect its digital output to one of the AVR-4806 available digital inputs. Refer to the demodulator's owner's manual for further information - Denon AVR 4806 | Owners Manual - Page 27
the remote control unit. (HDMI / DVI-D terminals) (Component video terminals) (S-Video terminal) (HDMI terminal) (Component video terminals) (S-Video terminal) • If the monitor equipped with HDMI terminal is not compatible with the 480i/576i resolution, connect the player and the AVR-4806 using - Denon AVR 4806 | Owners Manual - Page 28
Multimedia Interface) terminals [To convert analog video signals to HDMI signals] • The AVR-4806 is equipped with a function for converting analog video signals into HDMI signals. You can do this by either a component or a video or a S-Video connection. • Audio signals are not output from the - Denon AVR 4806 | Owners Manual - Page 29
the coaxial connection, it needs to be assigned. For more information about Digital Input Assignment ( page 89). TV J COMPONENT VIDEO OUT Y PB PR H VIDEO OUT I S VIDEO OUT A AUDIO OUT L L L R R R D OPTICAL OUT Connecting a DBS tuner • For best picture quality choose the component - Denon AVR 4806 | Owners Manual - Page 30
's analog multi-channel output to the AVR-4806's EXT. IN terminals for playback. Also refer to your DVD player's operating instructions. Connecting a video camera component or video game component H A L R D I Video camera / Video game VIDEO OUT AUDIO OUT L L R R OPTICAL OUT S VIDEO OUT 30 - Denon AVR 4806 | Owners Manual - Page 31
PB PR H VIDEO IN I S VIDEO IN A AUDIO IN L L L R R R D OPTICAL IN D OPTICAL OUT A AUDIO OUT L L L R R R NOTE: • When recording to DVD recorder, it is necessary that the type of cable used with the playback source equipment be the same type that is connected to the AVR-4806 VCR - Denon AVR 4806 | Owners Manual - Page 32
. Video deck H VIDEO OUT I S VIDEO OUT H VIDEO IN I S VIDEO IN A AUDIO IN L L L R R R A AUDIO OUT L L L R R R NOTE: • When recording to VCR, it is necessary that the type of cable used with the playback source equipment be the same type that is connected to the AVR-4806 VCR - Denon AVR 4806 | Owners Manual - Page 33
addition to the digital audio connections. CD recorder / MD recorder A AUDIO OUT L L L R R R A AUDIO IN L L L R R R D OPTICAL OUT D OPTICAL IN NOTE: • Do not connect the output of the component connected to the OPTICAL 4 OUT terminal on the AVR-4806's rear panel to any terminal - Denon AVR 4806 | Owners Manual - Page 34
's analog multi-channel output to the AVR-4806's EXT. IN terminals for playback. Also refer to your DVD player's operating instructions. 2 DENON LINK 3rd Edition: Super Audio CDs have certain rules for digital signal transfer designed to protect copyrights. In order to receive permission for the - Denon AVR 4806 | Owners Manual - Page 35
of the partner equipment. The AVR-4806 supports HDCP. Please see the user's manual of your video display for more information about this. NOTE: • The audio signals on the multi/stereo area of Super Audio CDs are not output. If the Super Audio CD is a hybrid CD, only the audio signals in the CD area - Denon AVR 4806 | Owners Manual - Page 36
in 24-pin and 29-pin types. The AVR-4806 supports the 24-pin DVI-D cable. • The AVR-4806 supports HDCP. Use an HDCP-compatible HDMI monitor. 2 Connections with an HDMI/DVI-D conversion cable (adapter) • The HDMI video stream signals (video signals) are theoretically compatible with DVI-D. When - Denon AVR 4806 | Owners Manual - Page 37
received between interconnected IEEE1394-compatible equipment depends on the functions of the different equipment. Please read the operating instructions of the equipment to be connected. • Use an S400-compatible 4-pin IEEE1394 cable to connect. • Video signals are not transferred with the AVR-4806 - Denon AVR 4806 | Owners Manual - Page 38
/STANDBY button on the main unit and set the unit to the operating mode. 2. Perform the operation to turn off the power from the external control. 3. Check that the product has been set to the standby mode. After checking the above, check the connections of the external - Denon AVR 4806 | Owners Manual - Page 39
a different program source in ZONE2 (or ZONE3) the same time ( page 82, 83). • The ZONE2 (or ZONE3) video out is only for the ZONE2 (or ZONE3). • When a sold separately room-to-room remote control unit (DENON RC-616, 617 or 618) is wired and connected between the MAIN ZONE and ZONE2 (ZONE3), the - Denon AVR 4806 | Owners Manual - Page 40
terminals ( page 106, 107). • The connections diagram below is an example for when the surround back speaker is assigned to the ZONE2 stereo 2 channel. In this case, Surround Back Speaker OUT can not be used for MAIN ZONE. Front right speaker Center speaker Subwoofer Front left speaker Surround - Denon AVR 4806 | Owners Manual - Page 41
sound channels, or for between on and standby from the remote control unit. No power is supplied from these outlets when this unit's power is at standby. Never connect equipment whose total capacity is above 120 W (1 A.) NOTE: • Only use the AC OUTLETS for audio - Denon AVR 4806 | Owners Manual - Page 42
remote control unit • The RC-995 remote control has a backlit LCD screen whose contents change according to the mode or function selected, with the appropriate remote ZONE3, ZONE4* (* : This mode can not be used with the AVR-4806.) Press the NUMBER/SYSTEM CALL button to display the screen below. 2 - Denon AVR 4806 | Owners Manual - Page 43
18 dB - (Maximum value of channel level)".) (Main unit) (Remote control unit) (Remote control unit) To select the input source instructions, refer to the component's manual. 3 Adjust the volume. (Main unit) (Remote control unit) M.VOL. -80.0dB 2 To choose the surround sound mode Example: THX - Denon AVR 4806 | Owners Manual - Page 44
Cancelling simulcast playback: Select the "SOURCE" pressing the VIDEO SELECT button. • It is not possible to select HDMI and DVI-D input signals. • Cancelling MUTING mode: Press the MUTING button again, or press the VOLUME button on the remote control, or adjust the volume up or down via the front - Denon AVR 4806 | Owners Manual - Page 45
appears on the display connected to AVR4806's VIDEO MONITOR OUT terminal. Also, the AVR-4806 has an AUTO signal detection mode that automatically identifies the type of incoming audio signals, but is also equipped with a manual DTS, Dolby Digital or PCM (2 channel stereo) format. If no digital signal - Denon AVR 4806 | Owners Manual - Page 46
analog input. ANALOG (exclusive analog audio signal playback mode): The signals input input signal. • The "DSD" indicator lights when the DENON LINK or IEEE1394 have been connected and the DSD signals signals are being input with a player that supports HDCD playback. The "DIG." indicator lights when - Denon AVR 4806 | Owners Manual - Page 47
all speakers flat. This is suitable for multi-channel music reproduction, from discrete music sources such as Dolby Digital 5.1, DTS, DVD-Audio and Super Audio CD. Manual: Selects the setting value that was set in the Manual EQ Setup. For details of the "Manual EQ Setup" ( page 103, 104). Press the - Denon AVR 4806 | Owners Manual - Page 48
to achieve the maximum effect for the specific signal source. is a 6.1-channel/7.1-channel surround mode. Sources recorded in Dolby Digital Surround EX THX SURROUND EX ( page 51) • Maximum performance for playing movies on the AVR- 4806. DOLBY DIGITAL EX / +PLIIx*2 ( page 53) • This mode is - Denon AVR 4806 | Owners Manual - Page 49
DIRECT STEREO Playing audio sources (CDs and DVDs) 2-channel playback modes • The AVR-4806 is equipped with three 2-channel playback modes DIRECT mode. • If the HDMI input terminal is selected, video outputs are outputted in the PURE DIRECT mode. • The channel level and surround parameters in the - Denon AVR 4806 | Owners Manual - Page 50
: q THX Surround EX (THX Ultra2 Cinema) w Home THX CINEMA (PLIIx C + THX) e THX 5.1 r ES DSCRT 6.1 +THX, ES MTRX 6.1 + THX When the HOME THX CINEMA mode THX CINEMA button to select the "Home THX Cinema" mode. 2 Play a program source with the mark. For operating instructions, refer to the manuals - Denon AVR 4806 | Owners Manual - Page 51
THX Cinema" mode. 2 Play a program source with the mark. • The Dolby Digital indicator lights when playing Dolby Digital sources. • The DTS indicator lights when playing DTS sources. , lights For operating instructions, refer to lights the manuals of the respective components. The channel - Denon AVR 4806 | Owners Manual - Page 52
channel playback method or mode. (1) (Multi channel source) THX Surround EX: Dolby Digital signals are played in the "THX Surround EX" mode. Ultra2 Cinema: The signals are played in the THX Ultra2 is recorded. This software is scheduled to go on sale in the future. This is a function for - Denon AVR 4806 | Owners Manual - Page 53
button to complete the setting. • When "Default" is selected and the CURSOR F button is pressed, "CINEMA EQ." and "D.COMP." are automatically turned off, "LFE" is reset, and "TONE" is set to the default value. 53 - Denon AVR 4806 | Owners Manual - Page 54
for correct DTS playback. TONE: This adjusts the tone control ( page 63). This can be set individually for the separate surround mode other than PURE DIRECT, DIRECT and Home THX Cinema mode. 2 Dialogue Normalization The dialogue normalization function is activated - Denon AVR 4806 | Owners Manual - Page 55
each time the STANDARD button is pressed. lights DOLBY PLIIx DTS NEO:6 2 Play a program source with the mark. For operating instructions, refer to the manuals of the respective components. 3 Press the SURROUND PARAMETER button. • Display the "Surround Parameter" menu. 4 Press the CURSOR F or - Denon AVR 4806 | Owners Manual - Page 56
Pro Logic modes (NORMAL, PHANTOM, WIDE and 3 STEREO). The AVR-4806 sets the mode automatically according to the types of speakers set during the system setup process ( page 113, 114). When set with the on screen display using the remote control unit while in the MUSIC mode, set the " " mark to - Denon AVR 4806 | Owners Manual - Page 57
selected and the CURSOR F button is pressed, "MODE" and "TONE" are automatically reset to the default values and "CINEMA EQ." is set to "OFF". • When playing signals output from the center (C) and surround (SL, SR and SB) channels add a natural sense of expansion to the sound field. CENTER IMAGE (0.0 - Denon AVR 4806 | Owners Manual - Page 58
PARAMETER button to complete the setting. 2 Parameters MODE: • DH1: Reference room (small room with weak reverberations). • DH2: Live room (room • OFF: The signals are played in the Dolby Headphone mode as such (2 channels). - Recording - When RECOUT mode is set to "SOURCE", with this amplifier - Denon AVR 4806 | Owners Manual - Page 59
Memory and call-out functions (USER MODE function) • The AVR-4806 is equipped with a function for storing the selected input source, the auto surround mode and input mode in the memory and selecting these settings when - Denon AVR 4806 | Owners Manual - Page 60
DENON original surround modes • The AVR-4806 Use this to enjoy video game sources. Select channel (left or right), so input signals to both channels. If you have a source component with only one audio control settings and playback level balance for the different output channels are memorized for each - Denon AVR 4806 | Owners Manual - Page 61
PARAMETER DSP surround simulation 1 Select the surround mode for each input channel. Example: DSP surround simulation mode (Remote control unit) (Remote control unit) Example: 7CH STEREO mode (Remote control unit) (Remote control unit) The surround mode switches in the following order each time - Denon AVR 4806 | Owners Manual - Page 62
when playing in the EXT. IN input mode. Depending on the player you are using, the dubwoofer channel's playback level may seem too high. If so, set "SW ATT" to "ON". For DENON players, use with the default settings ("OFF"). Subwoofer ON/OFF: The subwoofer output can be controlled directly. 62 - Denon AVR 4806 | Owners Manual - Page 63
setting to adjust the bass and treble as desired. • The tone control function will not work in the PURE DIRECT, DIRECT or Home THX Cinema mode. 2 Adjusting the tone 1 Press the SURROUND PARAMETER button. • Display the surround parameter menu. Basic Operation 5 Press the CURSOR D or H button to - Denon AVR 4806 | Owners Manual - Page 64
CURSOR F or G button to adjust the level. The adjustment range for the different channels is +12 dB to -12 dB in step of 0.5 dB. The sound from subwoofer) setting one additional from -12 dB (setting it to "OFF"). The channel switches in the order shown below each time the ENTER button is pressed. FL - Denon AVR 4806 | Owners Manual - Page 65
does not affect the subwoofer channel. Listening to the Radio • Check that the remote control unit is set to AMP or TUNER. Auto tuning Manual tuning 1 Set the input off. • When the manual tuning mode is set, FM stereo broadcasts are received in monaural and the "STEREO" indicator turns off. 65 - Denon AVR 4806 | Owners Manual - Page 66
PRESET CHANNEL RDS SHIFT ON SCREEN MEMORY MEMORY BLOCK Preset memory Checking the preset stations 1 Use the "Auto tuning" or "Manual tuning" the remote control unit • Preset stations can be chosen directly preset channel and channel range button ( page 72). • To preset other channels, repeat - Denon AVR 4806 | Owners Manual - Page 67
service which allows station to send additional information along with the regular radio program signal. • The following three types of RDS information can be received on this unit: (Main unit) (Remote control unit) (Remote control TP SEARCH 3 Press the CHANNEL button. • Automatically begin the - Denon AVR 4806 | Owners Manual - Page 68
type (PTY). • For a description of each program type, refer to "Program Type (PTY)". 4 Press the CHANNEL button. • Automatically begin the PTY search operation. 1 Set the input source to "TUNER". (Main unit) (Remote control unit) (Remote control unit) 2 Press the RDS button until "PTY SEARCH - Denon AVR 4806 | Owners Manual - Page 69
stations). received. 1 Set the input source to "TUNER". 1 Set the input source to "TUNER". (Main unit) (Remote control unit) (Remote control unit) SEARCH 3 Press the CHANNEL button. • Automatically begin the TP search operation. (Main unit) (Remote control unit) (Remote control unit) 2 Press - Denon AVR 4806 | Owners Manual - Page 70
Advanced Operation Remote control unit MODE SELECTOR 2 Operate the audio component. For details, refer to the component's operating instructions. It may not be possible to operate some models. 3 2 SOURCE MENU • Operate the source. Operating DENON audio components 1 Press the MODE SELECTOR - Denon AVR 4806 | Owners Manual - Page 71
search (forward and reverse) : Stop : Play : Auto search (to beginning of track) : Pause : Number 6, 7 2 1 8, 9 3 0 ~ 9, +10 : Manual search (forward and reverse) : Stop : Play : Auto search (to beginning of track) : Pause : Number The preset codes of an MD or tape player can be - Denon AVR 4806 | Owners Manual - Page 72
MANUAL : Preset memory : Switch preset channel range : Preset channel up/down : Preset channel range : Preset channel : RDS search Preset memory • The included remote control your device's remote control signals in the included remote control unit. For instructions on resetting the preset memory - Denon AVR 4806 | Owners Manual - Page 73
the MODE SELECTOR button for the component you want to operate. 2 Operate the component. For details, refer to the component's operating instructions. Some models cannot be operated with this remote control unit. NOTE: • Depending on the model and year of manufacture, this function cannot be used - Denon AVR 4806 | Owners Manual - Page 74
2. Video disc player (VDP) system buttons RC-995 SRC ON : Power on OFF : Power off (DENON DVD only) 6, 7 : Manual search audio language DISP : Display SUB : Switch the subtitle AGL : Switch the angle 0 ~ 9, +10 : Number RC-995 SRC ON 6, 7 2 1 8, 9 3 0 ~ 9, +10 : Power on/Standby : Manual - Denon AVR 4806 | Owners Manual - Page 75
3. Video deck (VCR-1/VCR-2) system buttons Advanced Operation 4. Monitor TV (TV),digital broadcast satellite (DBS) tuner and cable (CABLE) system buttons RC-995 SRC ON 6, 7 2 1 3 0 ~ 9, +10 : Power on / Standby : Manual search (forward and reverse) : Stop : Play : Pause : Number RC-995 SRC ON - Denon AVR 4806 | Owners Manual - Page 76
function • If an AV component is not a DENON product, or if it cannot be operated via codes provided in the AVR-4806 remote control's internal preset memory, or if its codes cannot be successfully learned by the AVR-4806 remote control, then you should use the remote control that was supplied with - Denon AVR 4806 | Owners Manual - Page 77
changeover to the system call registration screen. NOTE: • The remote control signals of the buttons pressed while registering the system call to the punch through mode in the AMP mode, the CD mode's PLAY, STOP, MANUAL SEARCH, AUTO SEARCH and PAUSE buttons' signals are sent in the AMP mode. - - Denon AVR 4806 | Owners Manual - Page 78
sec Setting the brightness • The brightness of the display can be adjusted in 3 levels. 2 For 1 brightness step increase Hold the ENTER button and press the CHANNEL + button. Resetting 2 Resetting the preset memory 1 Press the ON and OFF button at the same time. 2 Press the 6 button to select - Denon AVR 4806 | Owners Manual - Page 79
Operation 1 Press the ON and OFF button at the same time. 2 Press the 6 button to select resetting. 3 Press the +10 button. • Clear the entire system memory, which will restore the remote control unit to the factory default settings. This operation will take approximately 20 seconds. Only use this - Denon AVR 4806 | Owners Manual - Page 80
7.1-channel system Monitor FL DVD player C AVR-4806 FR SW ZONE3 VIDEO OUT ZONE2 VIDEO OUT ZONE 2 Monitor Power Amplifer B RC-617 Input SL RC-616 ZONE2 AUDIO OUT (VARIABLE OUT) SR PROGRAMMABLE REMOTE CONTROL UNIT ZONE 3 Monitor RC-617 Power Amplifer B PROGRAMMABLE REMOTE CONTROL UNIT - Denon AVR 4806 | Owners Manual - Page 81
5.1-channel systems Monitor FL DVD player B C AVR-4806 Input FR SW SL RC-616 ZONE2 AUDIO OUT (VARIABLE OUT) ZONE2 VIDEO OUT SR SYSTEM REMOTE CONTROL UNIT RC-995 MULTI ZONE SPEAKER OUT ZONE3 VIDEO OUT FL DVD player B C AVR-4806 Input FR SW SL RC-616 SR SYSTEM REMOTE CONTROL UNIT RC-995 - Denon AVR 4806 | Owners Manual - Page 82
instructions, refer to the manuals refer to the manuals of the respective components. • The signals of the source selected in the ZONE3 mode are also output from the VCR-1, VCR-2, VCR-3 and CDR/TAPE recording output terminals. • Digital signals are not output from the ZONE2 and ZONE3 audio - Denon AVR 4806 | Owners Manual - Page 83
want to operate pressing the MODE SELECTOR buttons. Example: ZONE2 (Remote control unit) 2 Press the SOURCE ON button to turn on the zone • Press the MUTING button to mute the audio temporarily. The muting level is same as set with "Volume Control". • Cancelling muting mode: Press the MUTING button - Denon AVR 4806 | Owners Manual - Page 84
MODE MODE Playing Super Audio CDs with an IEEE1394 channel signals are played in the ROCK ARENA mode (Main unit) (Remote control unit) (Remote control unit) 3 Start playback on the selected component. • The DSD indicator lights. Lights For operating instructions, refer to the component's manual - Denon AVR 4806 | Owners Manual - Page 85
converted into 2-channel analog signals. recording mode. For operating instructions, refer to the manual of the component on audio/video output terminals. • When the REC OUT mode is selected, the ZONE3 button on the remote control set to "SOURCE", with the AVR4806 it is possible to output signals - Denon AVR 4806 | Owners Manual - Page 86
switched off. This function eliminates the need to perform complicated resetting when the power is switched on. • The unit is also disconnected. Initialization of the Microprocesssor • In very rare instances, the AVR-4806 internal microprocessor might lock up, or otherwise cause mis-operation. This - Denon AVR 4806 | Owners Manual - Page 87
front panel or remote control unit. CURSOR D CURSORF ENTER AMP SETUP CURSORH CURSORG ENTER CURSORF SETUP 1 Press the AMP button on the remote control unit. 2 D CURSOR G CURSOR H [ Display ] *System Setup Audio In Setup *Audio In Setup Digital In *Digital In CD : COAX1 *System Setup Exit - Denon AVR 4806 | Owners Manual - Page 88
1 On screen display and front display • The AVR-4806 is equipped with an intuitive and easy-to-understand No. *System Setup Auto Set/RoomEQ Screen title Sub-menu title *System Setup Speaker Setup Main menu *Audio In Setup Digital In To select a menu, press the CURSOR D or H button. No. Screen - Denon AVR 4806 | Owners Manual - Page 89
"Yes" is selected for "Default", the settings are automatically reset to the default values. 4 Press the ENTER button to enter the setting. • The "Audio Input Setup" menu reappears. • The OPTICAL 2, 3 and 4 terminals on the AVR-4806's rear panel are equipped with an optical digital output terminal - Denon AVR 4806 | Owners Manual - Page 90
Refer to "Connecting the external inputs (EXT. IN) terminals" ( page 30). 1 Press the CURSOR D or H button to select the "EXT. IN Setup" at the "Audio playback of signals that cannot be transferred by DENON LINK. 2 Press the CURSOR D or used. Also refer to the player's operating instructions. +15dB - Denon AVR 4806 | Owners Manual - Page 91
12 dB and +12 dB in units of 1 dB. If "Yes" is selected for "Default", the settings are automatically reset to the default values. 3 Press the ENTER button to enter the setting. • The "Audio Input Setup" menu reappears. 2 Press the CURSOR D or H button to select the input source whose name you want - Denon AVR 4806 | Owners Manual - Page 92
selected for "Default", the setting are automatically reset to the default name. Setting the IEEE1394 Assign the ENTER button to enter the setting. • The "Audio Input Setup" menu reappears. • If you do not the power of the connected device or the AVR-4806 is turned off, so the selection procedure - Denon AVR 4806 | Owners Manual - Page 93
this to automatically search for FM broadcasts and store up to 56 stations at preset channels A1 to 8, B1 to 8, C1 to 8, D1 to 8, E1 to refer to the player's operating instructions. 3 Press the ENTER button to enter the setting. • The "Audio the "Manual tuning" operation ( page 65) to tune in - Denon AVR 4806 | Owners Manual - Page 94
" at the "Tuner Presets" screen, then press the ENTER button. • Switch to the "Preset Name" screen. 2 Press the CURSOR D or H button to select the preset channel you want to skip, then press the CURSOR F or G button to select the "ON" or "OFF". 2 Press the CURSOR D or H button to select the preset - Denon AVR 4806 | Owners Manual - Page 95
was initially, press the CURSOR H button with the preset channel name highlighted. If "Yes" is selected for "Default", the setting are automatically reset to the default name. Advanced Setup - Part 1 . 8 Press the ENTER button to enter the setting. • The "Audio Input Setup" menu reappears. 95 - Denon AVR 4806 | Owners Manual - Page 96
Video Setup" menu screen. 4 Press the CURSOR D or H button to select the method for playing the audio signals included in the HDMI input signal, then press the CURSOR F or G button to select the "TV" or "AMP". TV: Play the audio signals on a monitor TV connected to the AVR-4806. AMP: Play the audio - Denon AVR 4806 | Owners Manual - Page 97
cable but the monitor is not compatible with HDMI audio signal playback, only the video signals are output to the monitor from the AVR-4806 (DVI mode). Press the STATUS button to check which mode is set for outputting HDMI signals from the AVR-4806 (HDMI and DVI modes). • Input signals input from - Denon AVR 4806 | Owners Manual - Page 98
button. • Display the "HDMI Out Setup" screen. • Down-converting from the component video signal to the SVideo and composite video signal is possible only when the resolution of a component video signal is 480i / 576i. • For optimum video performance, THX recommends that video pass through (bypass - Denon AVR 4806 | Owners Manual - Page 99
"Color Space" setting. • To view the on-screen display using an HDMI monitor, set "Analog to HDMI Convert" at "HDMI Out Setup" to "ON" (default). Advanced Setup - Part 1 Setting the Audio Delay • When watching a DVD or other video source, the picture on the monitor may seem delayed with respect to - Denon AVR 4806 | Owners Manual - Page 100
the CURSOR D or H button to select the "On Screen Display" at the "Video Setup" menu, then press the ENTER button. • Display the "On Screen Display" screen Mode 1: Prevents flickering of the on screen display when there is no video signal. • Mode 2: Flickering is not prevented. Use this mode if - Denon AVR 4806 | Owners Manual - Page 101
Advanced Playback • Makes more detailed audio playback settings. Advanced Setup - Part 1 Setting the 2ch Direct/Stereo • Set this when you want to change the speaker settings when the surround mode is set to the 2-channel Direct or Stereo mode. 3 Press the CURSOR F or G button to select the " - Denon AVR 4806 | Owners Manual - Page 102
input level exceeds the allowable input for the front speakers. When a center speaker or surround speakers are not connected, the sounds in those channels are directed to the front speakers. 3 Press the ENTER button to enter the setting. • The "Advanced Playback" menu reappears. 1 Press the CURSOR - Denon AVR 4806 | Owners Manual - Page 103
Playback" menu, then press the ENTER button. • Display the "Manual EQ" screen. 2 Press the CURSOR F or G button to select the adjustment mode, then press the ENTER button. All CH: All channels can be adjusted simultaneously. L/R CH: The left and right channels of the pair of speakers can be adjusted - Denon AVR 4806 | Owners Manual - Page 104
Yes 0", then press the CURSOR F button. 2 Press the CURSOR F button to select the "Yes". 3 Press the ENTER button to enter the setting. • The "Manual EQ" screen reappears. The type of the copied correction curve is displayed in the upper right of this screen. • If the "Auto Setup" procedure has - Denon AVR 4806 | Owners Manual - Page 105
Setup • With this setting it is possible to change the number of channels played in the different zones according to the purpose. This configures the AVR-4806 according to whether or not you have surround "B" speakers connected, and whether or not you have surround back (SB) speaker(s) connected - Denon AVR 4806 | Owners Manual - Page 106
Advanced Setup - Part 1 Setting the Power Amplifier Assignment • AVR-4806's power amplifiers for seven channels (except the front channel), can be assigned to any channels in the MAIN ZONE, ZONE2 or ZONE3 and output to the speakers. In this way, power amplifiers not being used in the MAIN ZONE can - Denon AVR 4806 | Owners Manual - Page 107
Amp Assign mode allows you to power bi-amp-capable speakers with two amplifier channels. Be sure to consult the owner's manual of your bi-amp-capable speakers for further information before proceeding. AVR-4806 SPEAKER NOTE: • When making bi-amp connections, be sure to remove the short-circuiting - Denon AVR 4806 | Owners Manual - Page 108
, the volume can be set to the AVR4806's maximum volume (output) level of +18 on. • LAST The volume set when the AVR-4806 was last used is stored in the memory and be adjusted freely using buttons on the remote control unit. • -40 dB, 0 dB channels at "Power Amp Assign", "-VAR-" (only variable) - Denon AVR 4806 | Owners Manual - Page 109
trigger inputs, such as motorized screens, motorized screen masking, motorized drapes, and other trigger-controlled devices. • Set the DC output supplied from the trigger out terminals for the various input is selected for "Default", the setting are automatically reset to the default values. 109 - Denon AVR 4806 | Owners Manual - Page 110
Advanced Setup - Part 1 ZONE2 and ZONE3 tone control and channel level setting • Adjust the sound output from ZONE2 and ZONE3. 1 Press the CURSOR D or H button to select the "Zone2/3 Tone/Ch Lev." at the "Option - Denon AVR 4806 | Owners Manual - Page 111
Setting the Digital Out Assignment User Memory Advanced Setup - Part 1 • The optical digital output connectors on the AVR-4806's rear panel (OPTICAL2 to 4 OUT) normally function in association with the ZONE3/REC SELECT mode. With this setting, the OPTICAL 2 OUT connector can be used - Denon AVR 4806 | Owners Manual - Page 112
be changed, and "Setup Locked" is displayed when related buttons are operated. • System setup settings • Surround parameter settings • Tone control settings • Channel level settings (including test tones) • RoomEQ • To unlock, press the SETUP button again and display the "Setup Lock" screen, then - Denon AVR 4806 | Owners Manual - Page 113
this setting. • Perform this setting if you wish to make the settings for your speaker systems manually. CURSOR Setting the type of speakers • The composition of the signals output to each channels and the frequency response are adjusted according to the combination of speakers actually being used - Denon AVR 4806 | Owners Manual - Page 114
directed to that loudspeaker only. Low frequencies that are directed to the subwoofer(s) are from the program source LFE channel, and from other channels where the speakers are set to SMALL. THX is recommended in this play mode so that bass interference is less likely to occur in the room. LFE+Main - Denon AVR 4806 | Owners Manual - Page 115
Ultra2 Cinema, THX Music mode and THX Games mode. Set the surround back speakers so that the distance to the listening position is the same for both the left and right speakers. It is also recommended that the deviations of the distance from the listening position to L and R channel speakers (front - Denon AVR 4806 | Owners Manual - Page 116
is selected for "Default", the settings are automatically reset to the default values. When "Step" is selected AVR-4806 automatically sets the optimum surround delay time for the listening room. Setting the Channel are automatically emitted from each speaker. Manual: Select the speaker from which you - Denon AVR 4806 | Owners Manual - Page 117
speaker, then press the CURSOR F or G button to adjust all the speakers to the same volume. Example: "Manual" mode is selected. 6 Press the ENTER button to enter the setting. • The "Channel Level" screen reappears. 5 When "Auto" mode is selected: Press the CURSOR F or G button to adjust all -1 the - Denon AVR 4806 | Owners Manual - Page 118
just that mode will be recalled. Check the instructions for adjusting channel levels within each surround mode ( page 64, 65). • You can adjust the channel levels for each of the following surround modes: PURE DIRECT/DIRECT, STEREO, DOLBY/DTS SURROUND, HOME THX CINEMA, 7CH STEREO, WIDE SCREEN, SUPER - Denon AVR 4806 | Owners Manual - Page 119
section "Speaker Configuration" settings ( page 113, 114). • If "LFE-THX-" is selected at "Subwoofer Setup", the frequencies can only be selected for at "Speaker Configuration". Setting the crossover frequency individually for the different channels • If "LFE+Main" is set at "Subwoofer Setup", the - Denon AVR 4806 | Owners Manual - Page 120
Ultra2 compatible subwoofer • Make these settings when "Yes" is selected for the subwoofer in the "Speaker Configuration" settings. There is not displayed when "No" selected ( page 113, 114). 4 Press the ENTER button. • Return to the "THX Audio Setup" screen. 1 Press the CURSOR D or H button to - Denon AVR 4806 | Owners Manual - Page 121
is necessary to achieve the optimum effect in the THX Surround EX, THX Ultra2 Cinema, THX Music mode and THX Games mode. It is recommended that SBL/SBR ( page 112 : L11 ), then press the ENTER button. • Return to the "THX Audio Setup" screen. 3 Press the CURSOR D or H button to select the "Exit", - Denon AVR 4806 | Owners Manual - Page 122
of all speakers to the flattest response. This mode is suitable for multi-channel music surround sound sources. Manual: Selects the setting value that was set in the Manual EQ Setup. For details of the "Manual EQ Setup" ( page 103, 104). 3 When "Assign" is selected: After completing system setup - Denon AVR 4806 | Owners Manual - Page 123
channel DENON Microphone Required Microphone for DENON Auto-Setup Room EQ : Product name Countryman B3 Required Microphone Amplifier Specification for DENON video monitor (for the on screen display) with the AVR-4806. (2) Connect the microphone with the microphone amplifier. (3) Turn on the AVR-4806 - Denon AVR 4806 | Owners Manual - Page 124
"Test Tone" to "Manual" and "Test Tone Start" to "Yes" at "Channel Level" ( page 116 AVR-4806. (11) Connect the output of the microphone amplifier to the AVR-4806's front panel "V.AUX" Left channel audio button. • Display the verification screen. For instructions on checking the results of each item - Denon AVR 4806 | Owners Manual - Page 125
Setup - Part 2 8 The results of the "Auto Setup" procedure can be reset even if the settings have been changed after performing the "Auto Setup" procedure: all frequencies. 5 Press the CURSOR F or G button to select the speaker channel. 6 If the check ends, pressing the CURSOR D or H button to select - Denon AVR 4806 | Owners Manual - Page 126
MUSIC DOLBY GAME SCREEN STEREO SIMULATION MODE A A A A A A A 119, 120 Boundary Gain compensation When using a THX Ultra2 compatible subwoofer, set the subwoofer's frequency response. THX Ultra2 Subwoofer = NO 120 Surround Back Speaker Position When using two surround back speakers, set - Denon AVR 4806 | Owners Manual - Page 127
set the color format and video range of the signals output from the HDMI terminal. Set the audio delay timing to synchronize the sound and video. This sets whether or not to display the on-screen display that appears on the monitor screen when the controls on the remote control unit or main unit are - Denon AVR 4806 | Owners Manual - Page 128
channel, and the front channel bi-amp playback, or the ZONE2 or ZONE3 playback channel can be output from the AVR-4806 volume. Power On Level: 3 Volume Control This sets the volume level upon switching on This sets the amount of attenuation of the audio output when each zone is muted. Volume - Denon AVR 4806 | Owners Manual - Page 129
player's audio output setting is not set to • Make the DVD player's initial settings. - No DTS sound is produced. bit stream. • DVD player is not DTS-compatible. • Use a DTS-compatible player. - • AVR-4806's input setting is set to analog. • Set to AUTO or DTS. 45 Ultra2 Cinema / THX Music - Denon AVR 4806 | Owners Manual - Page 130
monitor matches the supported input format of equipments. connected monitor equipments. The HDMI audio is not output. • The AVR-4806 does not play HDMI audio • Set the HDMI audio playback setting at the signals. "HDMI/DVI In Assign" settings to "AMP". • The HDMI audio signals are not - Denon AVR 4806 | Owners Manual - Page 131
Audio, and Super Audio CD. Note on the above: MUSE 3.1 and MPEG multi-channel audio are not available to North American consumers - same is true for Dolby's AAC. "Source" here does not refer in order to achieve the ideal sound. The AVR-4806's surround speaker selection function makes it possible to - Denon AVR 4806 | Owners Manual - Page 132
from SR to SL Change of positioning and acoustic image with THX Surround EX system FL SW C FR SL ch SR ch Speaker(s) for one or two channels are required in order to achieve a THX Surround EX system with the AVR-4806. Adding these, however, allows you to achieve stronger surround effects not - Denon AVR 4806 | Owners Manual - Page 133
channel signals from reflecting off the monitor or screen at the front center, resulting in interference and making the sense of movement from the front to the back less sharp. • Connect the surround speakers to the surround speaker A terminals on the AVR-4806 Consult the owner's manual for your - Denon AVR 4806 | Owners Manual - Page 134
for watching movies to the surround speaker A terminals on the AVR-4806, the surround speakers for playing multi-channel music to the surround speaker B terminals. Set the surround speaker selection on the setup menu. (For instructions ( page 119, 120).) • To activate the appropriate speakers for - Denon AVR 4806 | Owners Manual - Page 135
the front speakers. • Consult the owner's manual for your subwoofer for advice on speakers to the surround speaker A terminals on the AVR-4806 and set settings on the setup menu to "A". channels 5.1 ch 4 ch Playback channels (max.) L, R, C, SL, SR, SW L, R, C, S (SW - recommended) Audio - Denon AVR 4806 | Owners Manual - Page 136
refer to the player's operating instructions. Media DVD 1 Dolby Digital output Playback method terminals (reference AVR-4806. w Dolby Pro Logic II • Dolby Pro Logic II is a new multi-channel theaters. This technology is mainly for multichannel audio/video equipment with Dolby Digital or Dolby Pro - Denon AVR 4806 | Owners Manual - Page 137
channel surround signals (compared to two channels refer to the player's operating instructions a special way so this problem does not occur. 2: the DTS indicator on the AVR-4806 ( page 53) lights before DENON DVD player models feature DTS-compatible digital output - consult the player's owner's manual - Denon AVR 4806 | Owners Manual - Page 138
Surround Back, sometimes also referred to as "surround center") channel for surround playback with a total of 6.1 channels. DTS-ES Extended detected as having a 5.1-channel format, so the DTS-ES Matrix 6.1 mode must be set manually to play these sources. (For instructions on selecting the surround - Denon AVR 4806 | Owners Manual - Page 139
of 5.1 channels, so sources recorded using DTS 96/24 can be played in high sampling frequency, multiple channel audio with such normal media as DVD videos and CDs and spatial errors that occur. On the AVR-4806, when the Home THX Cinema mode is on, THX post-processing is automatically added after the - Denon AVR 4806 | Owners Manual - Page 140
becomes "boomy". THX Ultra2 receivers and controllers contain the BGC (Boundary Gain Compensation) feature to provide an improved bass balance. BGC can be selected by choosing "THX Ultra2 Subwoofer-Yes" from the "Boundary Gain Compensation" section of the THX Audio setup menu. "THX", "Home THX", "Re - Denon AVR 4806 | Owners Manual - Page 141
SB channels and output as 6.1 channels of signals. With the AVR-4806, the signals further undergo Home THX Cinema processing to achieve a THX Surround in the frequency range below 250 Hz. The solution to this problem is to apply room correction after precisely measuring how each loudspeaker interacts - Denon AVR 4806 | Owners Manual - Page 142
) High-grade LPCM 24-bit, 96-kHz, 6-channel or 24-bit, 192-kHz, 2-channel digital input is possible when the AVR-4806 is connected via a shielded twisted pair (STP) cable to a DENON DVD player that supports Denon Digital Link, Since DENON Digital Link uses low-voltage differential signaling (LVDS - Denon AVR 4806 | Owners Manual - Page 143
player and receiver must be compatible with the DTCP (Digital Transmission Content Protection) system. DTCP is a copy protection technology that involves data encryption and authentication of the other device. Refer to your player's operating instructions. The AVR-4806's IEEE1394 device interface - Denon AVR 4806 | Owners Manual - Page 144
Channel output CENTER SURROUND SURROUND SUB- L/R BACK L/R WOOFER Signals and adjustability in the different modes Parameter (default values are shown in parentheses) When playing Dolby Digital and DTS signals SB CH OUT TONE D. COMP LFE AFDM (MODE) CONTROL ) C (10) VIDEO GAME C B B - Denon AVR 4806 | Owners Manual - Page 145
TIME SUBWOOFER ON/OFF PANORAMA DIMENSION CENTER WIDTH NEO:6 MUSIC MODE WIDE SCREEN E E E E E E E HOME THX CINEMA (2ch) E E E E E E E HOME THX CINEMA (5.1ch) E E E E E E E E E E E MONO MOVIE E E E E E E E VIDEO GAME E E E E E E E MATRIX C (30 msec) - Denon AVR 4806 | Owners Manual - Page 146
THX CINEMA ES DSCRT6.1 + THX ES MTRX6.1 + THX THX SURROUND EX THX Ultra2 Cinema THX Music Mode THX Games mode THX 5.1 PLIIx C + THX PLII C + THX DOLBY PL + THX NEO:6 + THX IN + PLIIx MUSIC Input signals DTS DOLBY DIGITAL DVD-AUDIO Super Audio CD Note ANALOG LINEAR PCM DTS ES DSCRT (With Flag - Denon AVR 4806 | Owners Manual - Page 147
SUPER STADIUM ROCK ARENA JAZZ CLUB CLASSIC CONCERT MONO MOVIE VIDEO GAME MATRIX 7CH STEREO *3 STEREO STEREO 4 : Mode AUDIO DVD-Audio (multi ch) DVDAudio (2ch) 176.4/ 192kHz Super Audio CD DSD DSD (multi ch) (2ch signals other than 2-channel signals, this mode cannot be selected when surround back speaker - Denon AVR 4806 | Owners Manual - Page 148
to the video convert mode settings Video convert mode AUTO Video convert mode S-VIDEO Video convert mode VIDEO HDMI E E E E E E E E E E E E E E E E C C C C C C C C C C C C HDMI E E E E E E E E C C C C C C C C HDMI E E E E E E E E C C C C C C C C Input signals COMPONENT E E E E C (1080p) C (480p - Denon AVR 4806 | Owners Manual - Page 149
C (480i/576i) C (1080p) C (480p ~ 720p) C (480i/576i) E E E E C (1080p) C (480p ~ 720p) C (480i/576i) C (1080p) C (480p ~ 720p) C (480i/576i) C (1080p) C (480p ~ 720p) C (480i/576i) C (1080p) C (480p ~ 720p) C (480i/576i) Additional Information MONITOR OUT S-VIDEO VIDEO HDMI COMPONENT S-VIDEO - Denon AVR 4806 | Owners Manual - Page 150
ratio - 110 dB Dynamic range - 108 dB Digital input: Format - Digital audio interface • Phono equalizer (PHONO input - REC OUT) Input sensitivity: 2.5 mV 3 V) 2 Video section • Standard video terminals Input / output level and impedance: Frequency response: • S-Video terminals Input / - Denon AVR 4806 | Owners Manual - Page 151
2 Tuner section Receiving Range: Usable Sensitivity: 50 dB Quieting Sensitivity: S/N (IHF-A): Total Harmonic (17-3/32" x 7-0" x 19-11/16") 23.8 kg (52 lbs 8 oz) 2 Remote control unit (RC-995) Batteries: External dimensions: Mass: R03/AAA Type (four batteries) 72 (W) x 238 (H) x 25.5 (D) mm - Denon AVR 4806 | Owners Manual - Page 152
MEMO: 152 - Denon AVR 4806 | Owners Manual - Page 153
MEMO: 153 - Denon AVR 4806 | Owners Manual - Page 154
TOKYO, JAPAN www.denon.com Denon Brand Company, D&M Holdings Inc. Printed in Japan 00D 511 4294 008
-
 1
1 -
 2
2 -
 3
3 -
 4
4 -
 5
5 -
 6
6 -
 7
7 -
8
-
9
-
10
-
11
-
12
-
13
-
14
-
15
-
16
-
17
-
18
-
19
-
20
-
21
-
22
-
23
-
24
-
25
-
26
-
27
-
28
-
29
-
30
-
31
-
32
-
33
-
34
-
35
-
36
-
37
-
38
-
39
-
40
-
41
-
42
-
43
-
44
-
45
-
46
-
47
-
48
-
49
-
50
-
51
-
52
-
53
-
54
-
55
-
56
-
57
-
58
-
59
-
60
-
61
-
62
-
63
-
64
-
65
-
66
-
67
-
68
-
69
-
70
-
71
-
72
-
73
-
74
-
75
-
76
-
77
-
78
-
79
-
80
-
81
-
82
-
83
-
84
-
85
-
86
-
87
-
88
-
89
-
90
-
91
-
92
-
93
-
94
-
95
-
96
-
97
-
98
-
99
-
100
-
101
-
102
-
103
-
104
-
105
-
106
-
107
-
108
-
109
-
110
-
111
-
112
-
113
-
114
-
115
-
116
-
117
-
118
-
119
-
120
-
121
-
122
-
123
-
124
-
125
-
126
-
127
-
128
-
129
-
130
-
131
-
132
-
133
-
134
-
135
-
136
-
137
-
138
-
139
-
140
-
141
-
142
-
143
-
144
-
145
-
146
-
147
-
148
-
149
-
150
-
151
-
152
-
153
-
154
 |
 |

AV SURROUND RECEIVER
AVR-4806
OPERATING INSTRUCTIONS