Denon AVR 4806 Owners Manual - Page 20
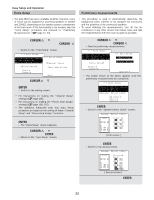
Setup Mic, On/standby, Power, Cursor, Setup, Enter
 |
UPC - 081757506465
View all Denon AVR 4806 manuals
Add to My Manuals
Save this manual to your list of manuals |
Page 20 highlights
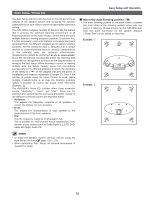
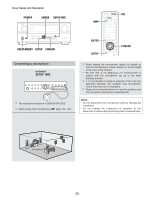
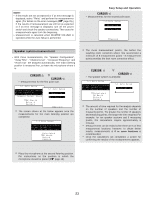
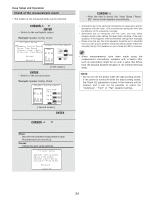
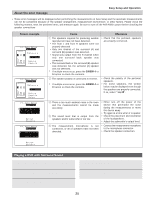
Easy Setup and Operation POWER ENTER SETUP MIC ON AMP ON/STANDBY SETUP CURSOR ENTER SETUP CURSOR Connecting a microphone 1 Connect the included microphone for Auto Setup to the SETUP MIC jack on the front panel of the unit. The standard microphone is DENON DM-S305. When using other microphone ( page 123, 124). 2 Mount the auto setup microphone onto a camera tripod, etc., and place it at ear height at the main listening position in the listening room with the sound receptor facing the ceiling. When placing the microphone, adjust the height so that the microphone's sound receptor is at the height of the ears of the listener. Be sure that at the beginning, the measurement is started with the microphone set up at the main listening position. It is not possible to measure properly if there are any obstacles between the speakers and microphone. Check that there are no obstacles. Please do not stand between or near the speakers and the microphone during the measurements. NOTE: • Do not disconnect the microphone until the settings are completed. • Do not change the connection of speakers or the subwoofer's volume after performing these measurements. Microphone 20
-
 1
1 -
2
-
3
-
4
-
5
-
6
-
7
-
8
-
9
-
10
-
11
-
12
-
13
-
14
-
 15
15 -
 16
16 -
 17
17 -
 18
18 -
 19
19 -
 20
20 -
 21
21 -
 22
22 -
 23
23 -
 24
24 -
 25
25 -
26
-
27
-
28
-
29
-
30
-
31
-
32
-
33
-
34
-
35
-
36
-
37
-
38
-
39
-
40
-
41
-
42
-
43
-
44
-
45
-
46
-
47
-
48
-
49
-
50
-
51
-
52
-
53
-
54
-
55
-
56
-
57
-
58
-
59
-
60
-
61
-
62
-
63
-
64
-
65
-
66
-
67
-
68
-
69
-
70
-
71
-
72
-
73
-
74
-
75
-
76
-
77
-
78
-
79
-
80
-
81
-
82
-
83
-
84
-
85
-
86
-
87
-
88
-
89
-
90
-
91
-
92
-
93
-
94
-
95
-
96
-
97
-
98
-
99
-
100
-
101
-
102
-
103
-
104
-
105
-
106
-
107
-
108
-
109
-
110
-
111
-
112
-
113
-
114
-
115
-
116
-
117
-
118
-
119
-
120
-
121
-
122
-
123
-
124
-
125
-
126
-
127
-
128
-
129
-
130
-
131
-
132
-
133
-
134
-
135
-
136
-
137
-
138
-
139
-
140
-
141
-
142
-
143
-
144
-
145
-
146
-
147
-
148
-
149
-
150
-
151
-
152
-
153
-
154
 |
 |
