HP Color LaserJet CM4730 HP Color LaserJet CM4730 MFP - User Guide - Page 76
Use Windows-sharing on a network - mfp ip configuration
 |
View all HP Color LaserJet CM4730 manuals
Add to My Manuals
Save this manual to your list of manuals |
Page 76 highlights
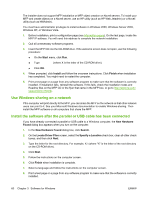
The installer does not support MFP installation or MFP object creation on Novell servers. To install your MFP and create objects on a Novell server, use an HP utility (such as HP Web Jetadmin) or a Novell utility (such as NWAdmin). You must have administrator privileges to install software in Windows 2000, Windows Server 2003, Windows XP, or Windows Vista. 1. Before installation, print a configuration page (see Information pages). On the last page, locate the MFP IP address. You will need this address to complete the network installation. 2. Quit all unnecessary software programs. 3. Insert the MFP CD into the CD-ROM drive. If the welcome screen does not open, use the following procedure: ● On the Start menu, click Run. ● Type X:\setup (where X is the letter of the CD-ROM drive). ● Click OK. 4. When prompted, click Install and follow the onscreen instructions. Click Finish when installation has completed. You might need to restart the computer. 5. Print a test page or a page from any software program to make sure that the software is correctly installed. If installation fails, reinstall the software. If this fails, check the installation notes and Readme files on the MFP CD or the flyer that came in the MFP box, or go to http://www.hp.com/ support/ljcm4730mfp. Use Windows-sharing on a network If the computer will print directly to the MFP, you can share the MFP on the network so that other network users can print to it. See your Microsoft Windows documentation to enable Windows-sharing. Then install the MFP software on all computers that share the MFP. Install the software after the parallel or USB cable has been connected If you have already connected a parallel or USB cable to a Windows computer, the New Hardware Found dialog box appears when you turn on the computer. 1. In the New Hardware Found dialog box, click Search. 2. On the Locate Driver Files screen, select the Specify a Location check box, clear all other check boxes, and then click Next. 3. Type the letter for the root directory. For example, X:\ (where "X" is the letter of the root directory on the CD-ROM drive). 4. Click Next. 5. Follow the instructions on the computer screen. 6. Click Finish when installation is complete. 7. Select a language and follow the instructions on the computer screen. 8. Print a test page or a page from any software program to make sure that the software is correctly installed. 60 Chapter 3 Software for Windows ENWW
-
 1
1 -
2
-
3
-
4
-
5
-
6
-
7
-
8
-
9
-
10
-
11
-
12
-
13
-
14
-
15
-
16
-
17
-
18
-
19
-
20
-
21
-
22
-
23
-
24
-
25
-
26
-
27
-
28
-
29
-
30
-
31
-
32
-
33
-
34
-
35
-
36
-
37
-
38
-
39
-
40
-
41
-
42
-
43
-
44
-
45
-
46
-
47
-
48
-
49
-
50
-
51
-
52
-
53
-
54
-
55
-
56
-
57
-
58
-
59
-
60
-
61
-
62
-
63
-
64
-
65
-
66
-
67
-
68
-
69
-
70
-
 71
71 -
 72
72 -
 73
73 -
 74
74 -
 75
75 -
 76
76 -
 77
77 -
 78
78 -
 79
79 -
 80
80 -
 81
81 -
82
-
83
-
84
-
85
-
86
-
87
-
88
-
89
-
90
-
91
-
92
-
93
-
94
-
95
-
96
-
97
-
98
-
99
-
100
-
101
-
102
-
103
-
104
-
105
-
106
-
107
-
108
-
109
-
110
-
111
-
112
-
113
-
114
-
115
-
116
-
117
-
118
-
119
-
120
-
121
-
122
-
123
-
124
-
125
-
126
-
127
-
128
-
129
-
130
-
131
-
132
-
133
-
134
-
135
-
136
-
137
-
138
-
139
-
140
-
141
-
142
-
143
-
144
-
145
-
146
-
147
-
148
-
149
-
150
-
151
-
152
-
153
-
154
-
155
-
156
-
157
-
158
-
159
-
160
-
161
-
162
-
163
-
164
-
165
-
166
-
167
-
168
-
169
-
170
-
171
-
172
-
173
-
174
-
175
-
176
-
177
-
178
-
179
-
180
-
181
-
182
-
183
-
184
-
185
-
186
-
187
-
188
-
189
-
190
-
191
-
192
-
193
-
194
-
195
-
196
-
197
-
198
-
199
-
200
-
201
-
202
-
203
-
204
-
205
-
206
-
207
-
208
-
209
-
210
-
211
-
212
-
213
-
214
-
215
-
216
-
217
-
218
-
219
-
220
-
221
-
222
-
223
-
224
-
225
-
226
-
227
-
228
-
229
-
230
-
231
-
232
-
233
-
234
-
235
-
236
-
237
-
238
-
239
-
240
-
241
-
242
-
243
-
244
-
245
-
246
-
247
-
248
-
249
-
250
-
251
-
252
-
253
-
254
-
255
-
256
-
257
-
258
-
259
-
260
-
261
-
262
-
263
-
264
-
265
-
266
-
267
-
268
-
269
-
270
-
271
-
272
-
273
-
274
-
275
-
276
-
277
-
278
-
279
-
280
-
281
-
282
-
283
-
284
-
285
-
286
-
287
-
288
-
289
-
290
-
291
-
292
-
293
-
294
-
295
-
296
-
297
-
298
-
299
-
300
-
301
-
302
-
303
-
304
-
305
-
306
-
307
-
308
-
309
-
310
-
311
-
312
-
313
-
314
-
315
-
316
-
317
-
318
-
319
-
320
-
321
-
322
-
323
-
324
-
325
-
326
-
327
-
328
-
329
-
330
-
331
-
332
-
333
-
334
-
335
-
336
-
337
-
338
-
339
-
340
-
341
-
342
-
343
-
344
-
345
-
346
-
347
-
348
-
349
-
350
-
351
-
352
-
353
-
354
-
355
-
356
-
357
-
358
-
359
-
360
-
361
-
362
-
363
-
364
-
365
-
366
-
367
-
368
-
369
-
370
 |
 |