HP ProLiant DL288 HP ProLiant DL288 G6 Server Maintenance and Service Guide - Page 104
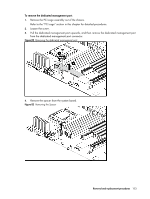
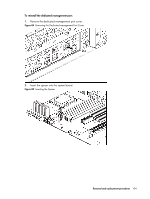
Pushing the optical disc drive ROM, Tighten the screw that secures the, to the ODD PCI cage.
 |
View all HP ProLiant DL288 manuals
Add to My Manuals
Save this manual to your list of manuals |
Page 104 highlights
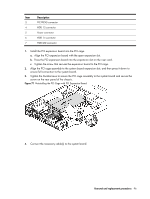
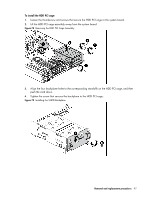
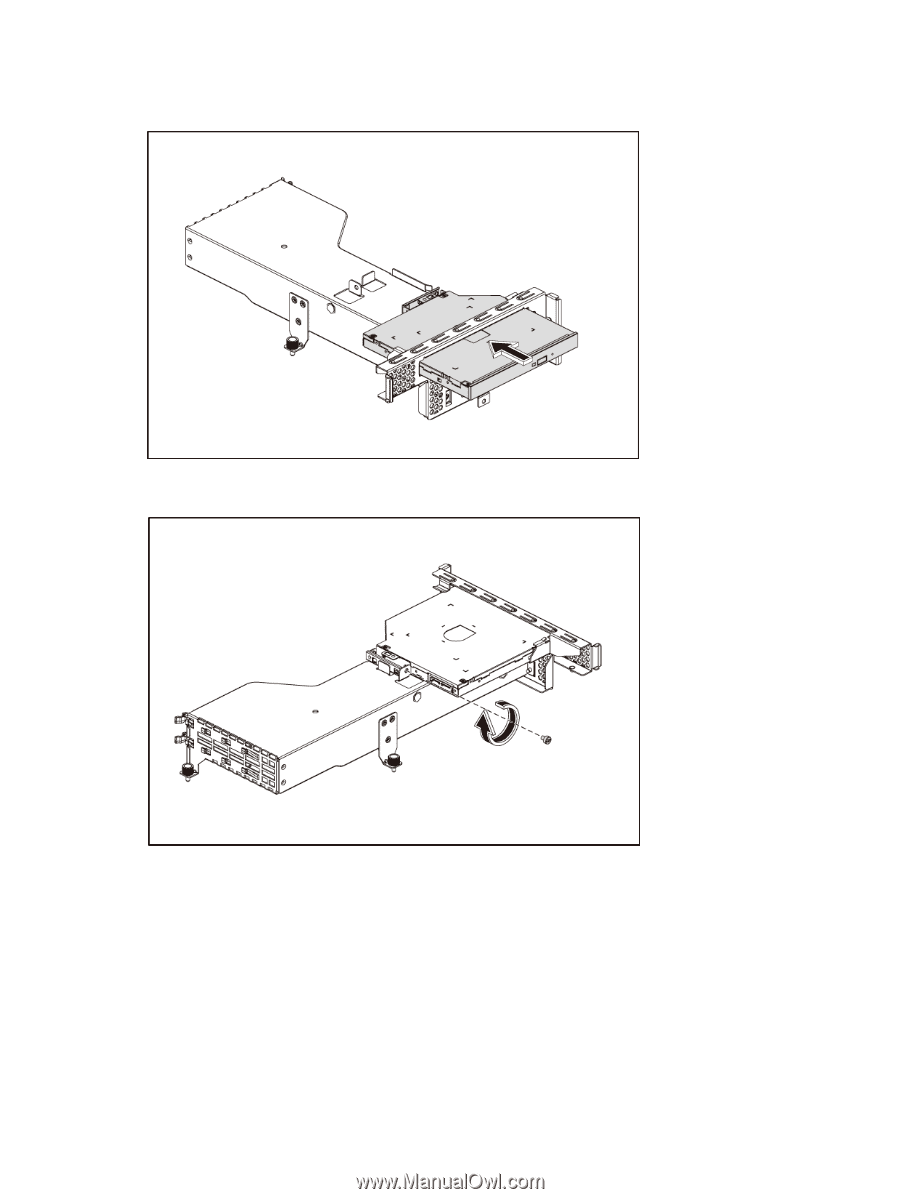
3. Pushing the optical disc drive ROM into the ODD PCI cage. Figure 78 Pushing the optical disc drive DVD-ROM into the ODD PCI Cage 4. Tighten the screw that secures the optical disc drive to the ODD PCI cage. Figure 79 Securing the Optical Disc Drive Removal and replacement procedures 100
-
 1
1 -
2
-
3
-
4
-
5
-
6
-
7
-
8
-
9
-
10
-
11
-
12
-
13
-
14
-
15
-
16
-
17
-
18
-
19
-
20
-
21
-
22
-
23
-
24
-
25
-
26
-
27
-
28
-
29
-
30
-
31
-
32
-
33
-
34
-
35
-
36
-
37
-
38
-
39
-
40
-
41
-
42
-
43
-
44
-
45
-
46
-
47
-
48
-
49
-
50
-
51
-
52
-
53
-
54
-
55
-
56
-
57
-
58
-
59
-
60
-
61
-
62
-
63
-
64
-
65
-
66
-
67
-
68
-
69
-
70
-
71
-
72
-
73
-
74
-
75
-
76
-
77
-
78
-
79
-
80
-
81
-
82
-
83
-
84
-
85
-
86
-
87
-
88
-
89
-
90
-
91
-
92
-
93
-
94
-
95
-
96
-
97
-
98
-
 99
99 -
 100
100 -
 101
101 -
 102
102 -
 103
103 -
 104
104 -
 105
105 -
 106
106 -
 107
107 -
 108
108 -
 109
109 -
110
-
111
-
112
-
113
-
114
-
115
-
116
-
117
-
118
-
119
-
120
-
121
-
122
-
123
-
124
-
125
-
126
-
127
-
128
-
129
-
130
-
131
-
132
-
133
-
134
-
135
-
136
-
137
-
138
-
139
-
140
-
141
-
142
-
143
-
144
-
145
-
146
-
147
-
148
-
149
-
150
-
151
-
152
-
153
-
154
-
155
-
156
-
157
-
158
-
159
-
160
-
161
-
162
-
163
 |
 |
Removal and replacement procedures
100
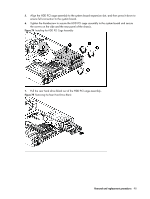
3.
Pushing the optical disc drive ROM
into the ODD PCI cage
.
Figure 78
Pushing the optical disc drive DVD-ROM into the ODD PCI Cage
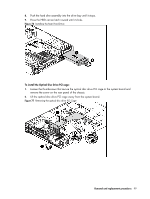
4.
Tighten the screw that secures the
optical disc drive
to the ODD PCI cage.
Figure 79
Securing the Optical Disc Drive