HP StorageWorks 2/32 HP StorageWorks SAN Switch 2/32 V4.2.X Installation Guide - Page 23
Locating SAN Switch 2/32 Serial Numbers, Installation Guidelines, Selecting an Operating Location
 |
View all HP StorageWorks 2/32 manuals
Add to My Manuals
Save this manual to your list of manuals |
Page 23 highlights
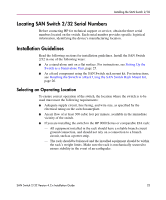
Installing the SAN Switch 2/32 Locating SAN Switch 2/32 Serial Numbers Before contacting HP for technical support or service, obtain the three serial numbers located on the switch. Each serial number provides specific logistical information, identifying the device's manufacturing location. Installation Guidelines Read the following sections for installation guidelines. Install the SAN Switch 2/32 in one of the following ways: ■ As a stand-alone unit on a flat surface. For instructions, see Setting Up the Switch as a Stand-alone Unit, page 25. ■ As a fixed component using the SAN Switch rack mount kit. For instructions, see Installing the Switch in a Rack Using the SAN Switch Rack Mount Kit, page 26. Selecting an Operating Location To ensure correct operation of the switch, the location where the switch is to be used must meet the following requirements: ■ Adequate supply circuit, line fusing, and wire size, as specified by the electrical rating on the switch nameplate. ■ An air flow of at least 300 cubic feet per minute, available in the immediate vicinity of the switch. ■ If you are installing the switch in the HP 9000 Series or comparable EIA rack: - All equipment installed in the rack should have a reliable branch circuit ground connection, and should not rely on a connection to a branch circuit, such as a power strip. - The rack should be balanced and the installed equipment should be within the rack's weight limits. Make sure the rack is mechanically secured to ensure stability in the event of an earthquake. SAN Switch 2/32 Version 4.2.x Installation Guide 23
-
 1
1 -
2
-
3
-
4
-
5
-
6
-
7
-
8
-
9
-
10
-
11
-
12
-
13
-
14
-
15
-
16
-
17
-
 18
18 -
 19
19 -
 20
20 -
 21
21 -
 22
22 -
 23
23 -
 24
24 -
 25
25 -
 26
26 -
 27
27 -
 28
28 -
29
-
30
-
31
-
32
-
33
-
34
-
35
-
36
-
37
-
38
-
39
-
40
-
41
-
42
-
43
-
44
-
45
-
46
-
47
-
48
-
49
-
50
-
51
-
52
-
53
-
54
-
55
-
56
-
57
-
58
-
59
-
60
-
61
-
62
-
63
-
64
-
65
-
66
-
67
-
68
-
69
-
70
-
71
-
72
-
73
-
74
-
75
-
76
-
77
-
78
-
79
-
80
-
81
-
82
-
83
-
84
-
85
-
86
-
87
-
88
-
89
-
90
-
91
-
92
-
93
-
94
-
95
-
96
-
97
-
98
-
99
-
100
 |
 |
