Huawei M920 User Guide - Page 57
Customizing the Account, Synchronization Settings - factory data reset
 |
View all Huawei M920 manuals
Add to My Manuals
Save this manual to your list of manuals |
Page 57 highlights
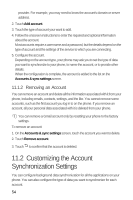
provider. For example, you may need to know the account's domain or server address. 2. Touch Add account. 3. Touch the type of account your want to add. 4. Follow the onscreen instructions to enter the required and optional information about the account. Most accounts require a user name and a password, but the details depend on the type of account and the settings of the service to which you are connecting. 5. Configure the account. Depending on the account type, your phone may ask you to set the type of data you want to synchronize to your phone, to name the account, or to provide other details. When the configuration is complete, the account is added to the list on the Accounts & sync settings screen. 11.1.2 Removing an Account You can remove an account and delete all the information associated with it from your phone, including emails, contacts, settings, and the like. You cannot remove some accounts, such as the first account you log in to on the phone. If you remove an account, all your personal data associated with it is deleted from your phone. You can remove a Gmail account only by resetting your phone to the factory settings. To remove an account: 1. On the Accounts & sync settings screen, touch the account you want to delete. 2. Touch Remove account. 0 3. Touch to confirm that the account is deleted. 11.2 Customizing the Account Synchronization Settings You can configure background data synchronization for all the applications on your phone. You can also configure the type of data you want to synchronize for each account. 54
-
 1
1 -
2
-
3
-
4
-
5
-
6
-
7
-
8
-
9
-
10
-
11
-
12
-
13
-
14
-
15
-
16
-
17
-
18
-
19
-
20
-
21
-
22
-
23
-
24
-
25
-
26
-
27
-
28
-
29
-
30
-
31
-
32
-
33
-
34
-
35
-
36
-
37
-
38
-
39
-
40
-
41
-
42
-
43
-
44
-
45
-
46
-
47
-
48
-
49
-
50
-
51
-
 52
52 -
 53
53 -
 54
54 -
 55
55 -
 56
56 -
 57
57 -
 58
58 -
 59
59 -
 60
60 -
 61
61 -
 62
62 -
63
-
64
-
65
-
66
-
67
-
68
-
69
-
70
-
71
-
72
-
73
-
74
-
75
 |
 |