Kyocera ECOSYS FS-2020D FS-2020D/3920DN/4020DN Operation Guide (Advanced) - Page 106
Installing the Memory Module, Removing a Memory Module, Verifying the expanded memory
 |
View all Kyocera ECOSYS FS-2020D manuals
Add to My Manuals
Save this manual to your list of manuals |
Page 106 highlights
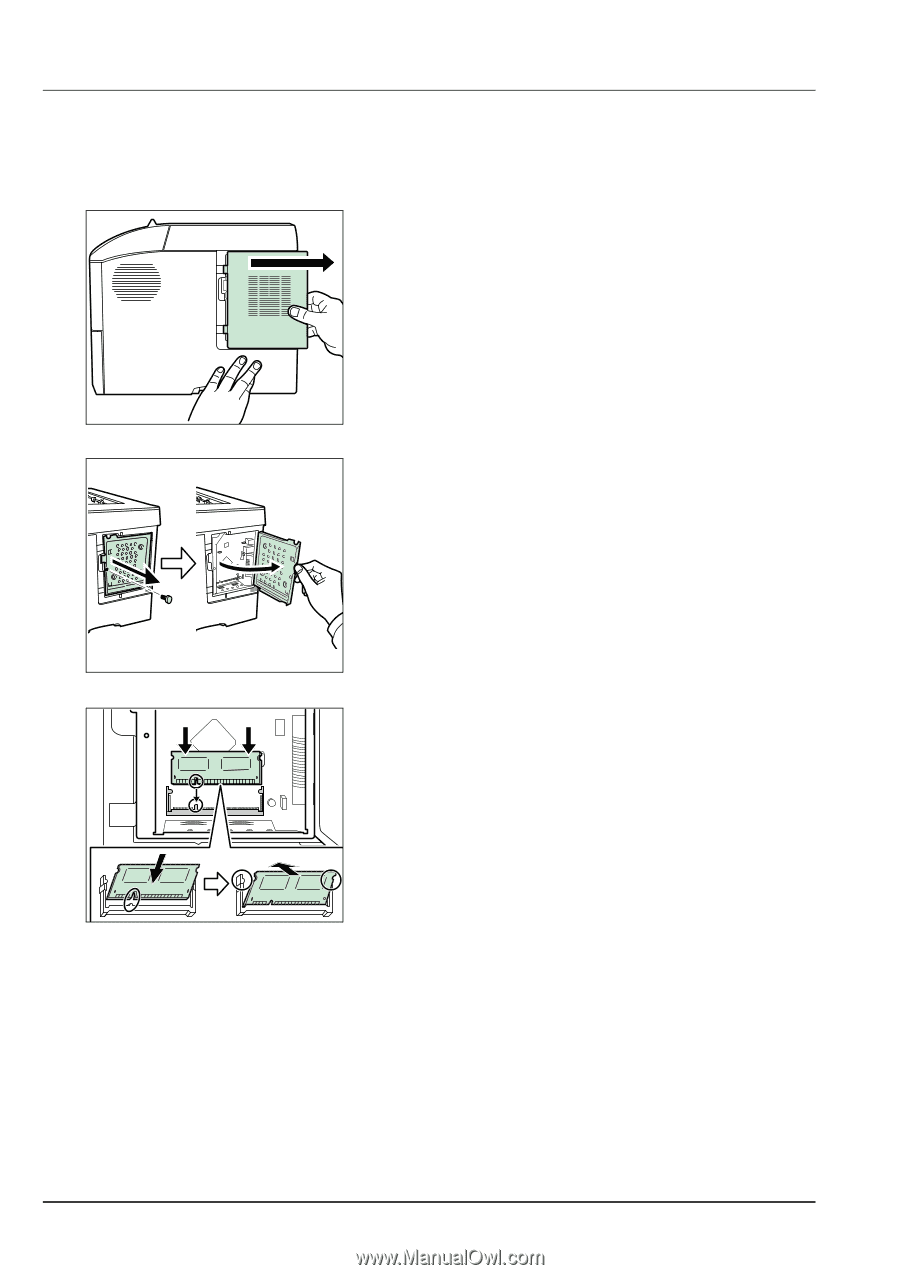
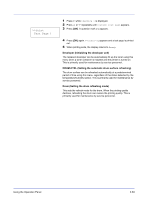
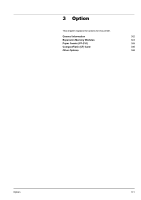
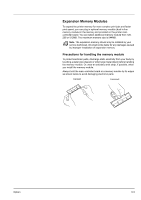
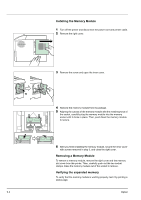
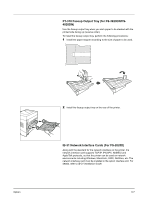
Installing the Memory Module 1 Turn off the printer and disconnect the power cord and printer cable. 2 Remove the right cover. 3 Remove the screw and open the inner cover. 4 Remove the memory module from its package. 5 Aligning the cutouts of the memory module with the matching keys of the socket, carefully plug the memory module into the memory socket until it clicks in place. Then, push down the memory module to secure. 6 After you finish installing the memory module, secure the inner cover with screws removed in step 3, and close the right cover. Removing a Memory Module To remove a memory module, remove the right cover and the memory slot cover from the printer. Then, carefully push out the two socket clamps. Ease the memory module out of the socket to remove. Verifying the expanded memory To verify that the memory module is working properly, test it by printing a status page. 3-4 Option
-
 1
1 -
2
-
3
-
4
-
5
-
6
-
7
-
8
-
9
-
10
-
11
-
12
-
13
-
14
-
15
-
16
-
17
-
18
-
19
-
20
-
21
-
22
-
23
-
24
-
25
-
26
-
27
-
28
-
29
-
30
-
31
-
32
-
33
-
34
-
35
-
36
-
37
-
38
-
39
-
40
-
41
-
42
-
43
-
44
-
45
-
46
-
47
-
48
-
49
-
50
-
51
-
52
-
53
-
54
-
55
-
56
-
57
-
58
-
59
-
60
-
61
-
62
-
63
-
64
-
65
-
66
-
67
-
68
-
69
-
70
-
71
-
72
-
73
-
74
-
75
-
76
-
77
-
78
-
79
-
80
-
81
-
82
-
83
-
84
-
85
-
86
-
87
-
88
-
89
-
90
-
91
-
92
-
93
-
94
-
95
-
96
-
97
-
98
-
99
-
100
-
 101
101 -
 102
102 -
 103
103 -
 104
104 -
 105
105 -
 106
106 -
 107
107 -
 108
108 -
 109
109 -
 110
110 -
 111
111 -
112
-
113
-
114
-
115
-
116
-
117
-
118
-
119
-
120
-
121
-
122
-
123
-
124
-
125
-
126
 |
 |