Kyocera ECOSYS FS-2020D FS-2020D/3920DN/4020DN Operation Guide (Advanced) - Page 46
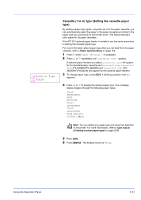
Cassette (1 to 4) Size (Setting the cassette paper size), >MP Tray Type, PLAIN
 |
View all Kyocera ECOSYS FS-2020D manuals
Add to My Manuals
Save this manual to your list of manuals |
Page 46 highlights
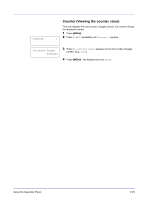
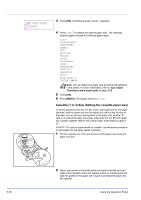
>MP Tray Type ? PLAIN 3 Press [OK]. A blinking question mark (?) appears. 4 Press U or V to display the desired paper type. The message display toggles through the following paper types: PLAIN TRANSPARENCY PREPRINTED LABELS BOND RECYCLED VELLUM ROUGH LETTERHEAD COLOR PREPUNCHED ENVELOPE CARDSTOCK THICK HIGH QUALITY CUSTOM 1 (to 8) Note You can define any paper type and store that definition in the printer. For more information, refer to Type Adjust (Creating custom paper type) on page 2-32. 5 Press [OK]. 6 Press [MENU]. The display returns to Ready. Cassette (1 to 4) Size (Setting the cassette paper size) To set the standard sizes A5, A4, B5, Letter, and Legal size for the paper cassette, load the paper and turn the paper size dial so that the size of the paper you are going to use appears in the paper size window. To load a non-standard paper size (sizes other than A5, A4, B5 and Letter) into a paper cassette, refer to the custom paper sizes listed on page 229. If the PF-310 optional paper feeder is installed, use the same procedure to load paper into the paper feeder cassettes. 1 Pull the cassette out of the printer and set the paper size using the paper size dial. 2-28 2 Adjust the position of the width guides located on the left and right sides of the cassette. Press the release button on the left guide and slide the guides to the paper size required, and load the paper into the cassette. Using the Operation Panel
-
 1
1 -
2
-
3
-
4
-
5
-
6
-
7
-
8
-
9
-
10
-
11
-
12
-
13
-
14
-
15
-
16
-
17
-
18
-
19
-
20
-
21
-
22
-
23
-
24
-
25
-
26
-
27
-
28
-
29
-
30
-
31
-
32
-
33
-
34
-
35
-
36
-
37
-
38
-
39
-
40
-
 41
41 -
 42
42 -
 43
43 -
 44
44 -
 45
45 -
 46
46 -
 47
47 -
 48
48 -
 49
49 -
 50
50 -
 51
51 -
52
-
53
-
54
-
55
-
56
-
57
-
58
-
59
-
60
-
61
-
62
-
63
-
64
-
65
-
66
-
67
-
68
-
69
-
70
-
71
-
72
-
73
-
74
-
75
-
76
-
77
-
78
-
79
-
80
-
81
-
82
-
83
-
84
-
85
-
86
-
87
-
88
-
89
-
90
-
91
-
92
-
93
-
94
-
95
-
96
-
97
-
98
-
99
-
100
-
101
-
102
-
103
-
104
-
105
-
106
-
107
-
108
-
109
-
110
-
111
-
112
-
113
-
114
-
115
-
116
-
117
-
118
-
119
-
120
-
121
-
122
-
123
-
124
-
125
-
126
 |
 |