Kyocera TASKalfa 2550ci 2550ci Printer Driver User Guide - Page 16
Optional Printer Components, The Add Printer Wizard
 |
View all Kyocera TASKalfa 2550ci manuals
Add to My Manuals
Save this manual to your list of manuals |
Page 16 highlights
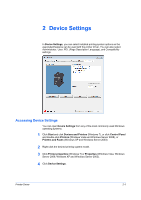
Installation This selection lets you define basic print options into group profiles that can be accessed easily. The Show Quick Print tab option also appears in the Administrator Settings in Device Settings. When the installation completes successfully, click Finish to exit the installation wizard. A message may appear if there is a software installation failure. Click Finish, and retry the installation. If the same message appears again, contact your system administrator. The installation of the printer is now complete. If prompted, restart your computer. Optional Printer Components You can expand the functionality of your printer driver by installing optional components. Installing Optional Printer Components 1 On the Product Library disc menu > Advanced Tools menu, select Optional Printer Components. 2 Select a printer to install optional components, and click Next. 3 On all Select pages, choose your components, and click Next. 4 On the Confirm Settings page, click Install if the displayed settings are correct. Click Back to correct any settings. 5 The Printer Components Installation Completed page appears. Click Finish. When you have completed installing printers and optional components, restart your computer if prompted. The Add Printer Wizard The Add Printer Wizard displays a series of pages that guide you through printer installation. You are prompted to make installation choices on each page. Installing a Printer Driver in Windows 7 and Windows Vista This section describes how to install a printer driver using the Add Printer Wizard in Windows 7 and Windows Vista. 1 Click Start and click Devices and Printers (Windows 7), or click Control Panel and double-click Printers (Windows Vista). 2 Click Add a printer. 1-10 User Guide
-
 1
1 -
2
-
3
-
4
-
5
-
6
-
7
-
8
-
9
-
10
-
 11
11 -
 12
12 -
 13
13 -
 14
14 -
 15
15 -
 16
16 -
 17
17 -
 18
18 -
 19
19 -
 20
20 -
 21
21 -
22
-
23
-
24
-
25
-
26
-
27
-
28
-
29
-
30
-
31
-
32
-
33
-
34
-
35
-
36
-
37
-
38
-
39
-
40
-
41
-
42
-
43
-
44
-
45
-
46
-
47
-
48
-
49
-
50
-
51
-
52
-
53
-
54
-
55
-
56
-
57
-
58
-
59
-
60
-
61
-
62
-
63
-
64
-
65
-
66
-
67
-
68
-
69
-
70
-
71
-
72
-
73
-
74
-
75
-
76
-
77
-
78
-
79
-
80
-
81
-
82
-
83
-
84
-
85
-
86
-
87
-
88
-
89
-
90
-
91
-
92
-
93
-
94
-
95
-
96
-
97
-
98
-
99
-
100
-
101
-
102
-
103
-
104
-
105
-
106
 |
 |