Lenovo ThinkPad 770 ThinkPad 770 User's Guide - Page 48
Using the Personalization Editor, Spacebar, Enter, Start, Programs, ThinkPad, Personalization Editor
 |
View all Lenovo ThinkPad 770 manuals
Add to My Manuals
Save this manual to your list of manuals |
Page 48 highlights
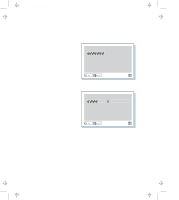
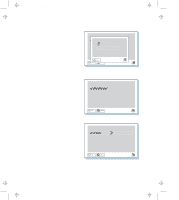
Title: C79DMMST CreationDate: 07/16/97 13:09:22 2 Remove the device from the UltraBay II and install the hard disk drive with the old supervisor password. 3 Turn on the computer. The hard disk password prompt appears. 4 Do one of the following: If you changed the supervisor password in step 1, change the old password on the hard disk drive to the new supervisor password by doing the following: a) Typing your old password and pressing the Spacebar. b) Typing your new password and pressing the Spacebar. c) Typing your new password again. If you removed the supervisor password in step 1, type the old supervisor password; then press the Spacebar. 5 Press Enter. 6 Turn off the computer. To change or remove the supervisor password for each hard disk drive, repeat steps 2 through 6. Using the Personalization Editor When you use the Personalization Editor, you can display such personal information as your name and address on the screen each time you power on your computer. To display this information, the power-on password must already have been set. This feature helps you to identify your computer when identical computers are being used in your location, or to deter theft. To register your name, address, and company on the Personalization Editor, do the following: 1 Click on Start, select Programs and ThinkPad, and click on Personalization Editor. The following window appears: 2-24
-
 1
1 -
2
-
3
-
4
-
5
-
6
-
7
-
8
-
9
-
10
-
11
-
12
-
13
-
14
-
15
-
16
-
17
-
18
-
19
-
20
-
21
-
22
-
23
-
24
-
25
-
26
-
27
-
28
-
29
-
30
-
31
-
32
-
33
-
34
-
35
-
36
-
37
-
38
-
39
-
40
-
41
-
42
-
 43
43 -
 44
44 -
 45
45 -
 46
46 -
 47
47 -
 48
48 -
 49
49 -
 50
50 -
 51
51 -
 52
52 -
 53
53 -
54
-
55
-
56
-
57
-
58
-
59
-
60
-
61
-
62
-
63
-
64
-
65
-
66
-
67
-
68
-
69
-
70
-
71
-
72
-
73
-
74
-
75
-
76
-
77
-
78
-
79
-
80
-
81
-
82
-
83
-
84
-
85
-
86
-
87
-
88
-
89
-
90
-
91
-
92
-
93
-
94
-
95
-
96
-
97
-
98
-
99
-
100
-
101
-
102
-
103
-
104
-
105
-
106
-
107
-
108
-
109
-
110
-
111
-
112
-
113
-
114
-
115
-
116
-
117
-
118
-
119
-
120
-
121
-
122
-
123
-
124
-
125
-
126
-
127
-
128
-
129
-
130
-
131
-
132
-
133
-
134
-
135
-
136
-
137
-
138
-
139
-
140
-
141
-
142
-
143
-
144
-
145
-
146
-
147
-
148
-
149
-
150
-
151
-
152
-
153
-
154
-
155
-
156
-
157
-
158
-
159
-
160
-
161
-
162
-
163
-
164
-
165
-
166
-
167
-
168
-
169
-
170
-
171
-
172
-
173
-
174
-
175
-
176
-
177
-
178
-
179
-
180
-
181
-
182
 |
 |
