Lenovo ThinkPad 770 ThinkPad 770 User's Guide - Page 81
Setting the Date and Time, Changing the Drive Startup Sequence, Date/Time, Cancel, Attention
 |
View all Lenovo ThinkPad 770 manuals
Add to My Manuals
Save this manual to your list of manuals |
Page 81 highlights
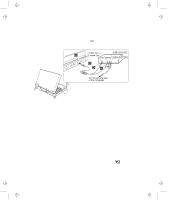
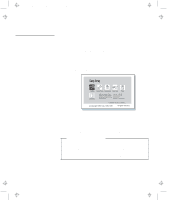
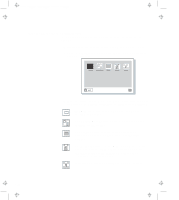
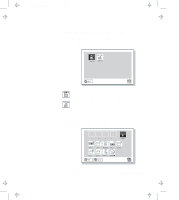
Title: C79DMMST CreationDate: 07/16/97 13:09:22 4 Click on Exit to exit from the submenus, or press Esc to cancel the selection. Setting the Date and Time To change the date and time, do the following: 1 Start Easy-Setup (refer to "Using Easy-Setup" on page 2-54). 2 Click on Date/Time on the "Easy-Setup" menu. The "Date/Time" submenu appears: 3 Move the cursor to any field (year, month, date, hour, minute, or second) and place the pointer on any of the arrow icons ( , , , or ) to adjust the date and time. Clicking on the double-arrow icon scrolls the numbers faster. 4 Click on OK to save the changes or on Cancel to cancel it. Changing the Drive Startup Sequence This feature enables you to change the startup sequence of the drives in your computer. It is useful when you have different operating systems on different replaceable hard disk drives or in PC cards. You can have the system boot up from these devices. Attention You must be extremely careful not to specify a wrong device during a copy, save, or a format operation after you change your startup sequence. If you do, your data and programs will be erased or overwritten. Chapter 2. Fine-Tuning Your Computer 2-57
-
 1
1 -
2
-
3
-
4
-
5
-
6
-
7
-
8
-
9
-
10
-
11
-
12
-
13
-
14
-
15
-
16
-
17
-
18
-
19
-
20
-
21
-
22
-
23
-
24
-
25
-
26
-
27
-
28
-
29
-
30
-
31
-
32
-
33
-
34
-
35
-
36
-
37
-
38
-
39
-
40
-
41
-
42
-
43
-
44
-
45
-
46
-
47
-
48
-
49
-
50
-
51
-
52
-
53
-
54
-
55
-
56
-
57
-
58
-
59
-
60
-
61
-
62
-
63
-
64
-
65
-
66
-
67
-
68
-
69
-
70
-
71
-
72
-
73
-
74
-
75
-
 76
76 -
 77
77 -
 78
78 -
 79
79 -
 80
80 -
 81
81 -
 82
82 -
 83
83 -
 84
84 -
 85
85 -
 86
86 -
87
-
88
-
89
-
90
-
91
-
92
-
93
-
94
-
95
-
96
-
97
-
98
-
99
-
100
-
101
-
102
-
103
-
104
-
105
-
106
-
107
-
108
-
109
-
110
-
111
-
112
-
113
-
114
-
115
-
116
-
117
-
118
-
119
-
120
-
121
-
122
-
123
-
124
-
125
-
126
-
127
-
128
-
129
-
130
-
131
-
132
-
133
-
134
-
135
-
136
-
137
-
138
-
139
-
140
-
141
-
142
-
143
-
144
-
145
-
146
-
147
-
148
-
149
-
150
-
151
-
152
-
153
-
154
-
155
-
156
-
157
-
158
-
159
-
160
-
161
-
162
-
163
-
164
-
165
-
166
-
167
-
168
-
169
-
170
-
171
-
172
-
173
-
174
-
175
-
176
-
177
-
178
-
179
-
180
-
181
-
182
 |
 |
