Lexmark C534n User's Guide - Page 70
Cleaning the printhead lenses, Ordering supplies, Set A, Submitting Selection, Exit Config Menu - toner cartridge
 |
UPC - 734646258524
View all Lexmark C534n manuals
Add to My Manuals
Save this manual to your list of manuals |
Page 70 highlights
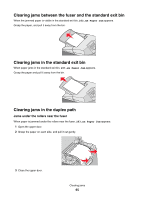
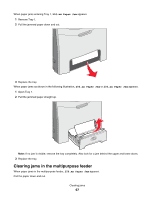
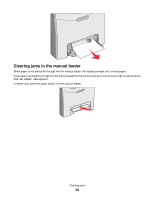
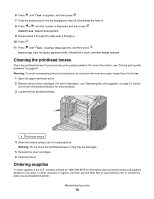
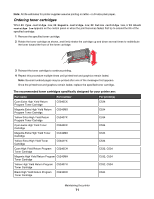
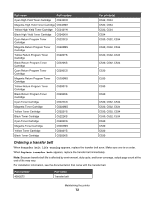
6 Press until Set A appears, and then press . 7 From the printed sheet, find the straightest of the 20 lines beside the letter A. 8 Press or until that number is displayed, and then press . Submitting Selection appears. 9 Repeat steps 6 through 8 to align sets A through L. 10 Press . 11 Press until Exit Config Menu appears, and then press . Resetting the Printer appears briefly, followed by a clock, and then Ready appears. Cleaning the printhead lenses Clean the printhead lenses if you encounter print quality problems. For more information, see "Solving print quality problems" on page 87. Warning: To avoid overexposing the photoconductors, do not leave the inner door open longer than 10 minutes. 1 Open the upper and inner doors. 2 Remove all four toner cartridges. For more information, see "Removing the color supplies" on page 51, but do not remove the photoconductors for this procedure. 3 Locate the four printhead lenses. 1 1 Printhead lenses 4 Clean the lenses using a can of compressed air. Warning: Do not touch the printhead lenses or they may be damaged. 5 Reinstall the toner cartridges. 6 Close the doors. Ordering supplies To order supplies in the U.S., contact Lexmark at 1-800-539-6275 for information about Lexmark authorized supplies dealers in your area. In other countries or regions, visit the Lexmark Web Site at www.lexmark.com or contact the place you purchased the printer. Maintaining the printer 70
-
 1
1 -
2
-
3
-
4
-
5
-
6
-
7
-
8
-
9
-
10
-
11
-
12
-
13
-
14
-
15
-
16
-
17
-
18
-
19
-
20
-
21
-
22
-
23
-
24
-
25
-
26
-
27
-
28
-
29
-
30
-
31
-
32
-
33
-
34
-
35
-
36
-
37
-
38
-
39
-
40
-
41
-
42
-
43
-
44
-
45
-
46
-
47
-
48
-
49
-
50
-
51
-
52
-
53
-
54
-
55
-
56
-
57
-
58
-
59
-
60
-
61
-
62
-
63
-
64
-
 65
65 -
 66
66 -
 67
67 -
 68
68 -
 69
69 -
 70
70 -
 71
71 -
 72
72 -
 73
73 -
 74
74 -
 75
75 -
76
-
77
-
78
-
79
-
80
-
81
-
82
-
83
-
84
-
85
-
86
-
87
-
88
-
89
-
90
-
91
-
92
-
93
-
94
-
95
-
96
-
97
-
98
-
99
-
100
-
101
-
102
-
103
-
104
-
105
-
106
-
107
-
108
-
109
-
110
 |
 |