Lexmark E360d Service Manual - Page 68
Demo Mode, Factory Defaults, Energy Conserve, Font Sharpening
 |
View all Lexmark E360d manuals
Add to My Manuals
Save this manual to your list of manuals |
Page 68 highlights
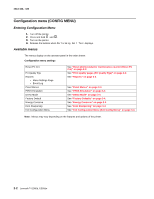
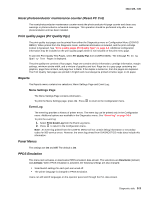
4513-420, -430 Demo Mode This setting contains a built-in demonstration mode. The settings allow you to turn the Demo Mode Off (default) or On. While Demo Mode is set, the printer will start in Demo Mode until you change the setting. Note: While Demo Mode is set to On, only demonstration files can print. Files received across the network or from the host computer are ignored. Factory Defaults This setting enables a user to restore all the printer settings to the original factory settings. The selections are Do not restore (default) and Restore now. Network does not appear unless you have a network printer. The following settings are not changed: • Display language • Settings in the NETWORK/PORTS MENU group. Energy Conserve This menu controls what values appear on the Power Saver menu. If Off is selected in the Energy Conserve menu, then the Power Saver can be turned off. If On (default) is set in Energy Conserve, then the Power Saver feature cannot be turned off. Font Sharpening This menu allows a user to set a text point-size value below which the high frequency screens will be used when printing font data. For example, if this setting's value is "24," then all fonts sized 24 points or less will use the high-frequency screens. To increase this setting's value by 1, press . To decrease this setting's value by 1, press . Exit Configuration Menu (Exit Config Menu) Press to exit the Configuration menu. The printer performs a POR and restarts in normal mode. 3-4 Lexmark™ E360d, E360dn
-
 1
1 -
2
-
3
-
4
-
5
-
6
-
7
-
8
-
9
-
10
-
11
-
12
-
13
-
14
-
15
-
16
-
17
-
18
-
19
-
20
-
21
-
22
-
23
-
24
-
25
-
26
-
27
-
28
-
29
-
30
-
31
-
32
-
33
-
34
-
35
-
36
-
37
-
38
-
39
-
40
-
41
-
42
-
43
-
44
-
45
-
46
-
47
-
48
-
49
-
50
-
51
-
52
-
53
-
54
-
55
-
56
-
57
-
58
-
59
-
60
-
61
-
62
-
 63
63 -
 64
64 -
 65
65 -
 66
66 -
 67
67 -
 68
68 -
 69
69 -
 70
70 -
 71
71 -
 72
72 -
 73
73 -
74
-
75
-
76
-
77
-
78
-
79
-
80
-
81
-
82
-
83
-
84
-
85
-
86
-
87
-
88
-
89
-
90
-
91
-
92
-
93
-
94
-
95
-
96
-
97
-
98
-
99
-
100
-
101
-
102
-
103
-
104
-
105
-
106
-
107
-
108
-
109
-
110
-
111
-
112
-
113
-
114
-
115
-
116
-
117
-
118
-
119
-
120
-
121
-
122
-
123
-
124
-
125
-
126
-
127
-
128
-
129
-
130
-
131
-
132
-
133
-
134
-
135
-
136
-
137
-
138
-
139
-
140
-
141
-
142
-
143
-
144
-
145
-
146
-
147
-
148
-
149
-
150
-
151
-
152
-
153
-
154
-
155
-
156
-
157
-
158
-
159
-
160
-
161
-
162
-
163
-
164
-
165
-
166
-
167
-
168
-
169
-
170
 |
 |
