Lexmark E360d Service Manual - Page 72
Hardware tests, LCD Test, Button Test, DRAM Test - e360dn error messages
 |
View all Lexmark E360d manuals
Add to My Manuals
Save this manual to your list of manuals |
Page 72 highlights
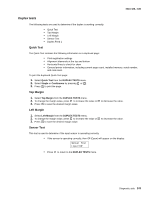
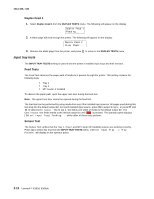
4513-420, -430 Hardware tests This setting contains the following tests: • LCD Test • Button Test • DRAM Test Press or to scroll through the Hardware Tests menu, and then press LCD Test to select the desired test. Once the LCD Test setting is selected, the printer automatically performs the operator panel test. This test toggles each pixel in the operator panel through every contrast level, beginning with the darkest and ending with the lightest. Once the pixels are toggled, the backlight of the operator panel comes on, and then goes off. Non- functioning pixels will appear as blank spaces during the test's darker stages. Press anytime to cancel the LCD Test. Once the test is canceled, the display returns to the initial Hardware Tests screen. Button Test The Button Test verifies the operation of each button on the operator panel. Press to select the Button Test from the HARDWARE TESTS menu. All of the buttons and the backlight illuminate, and PANEL TEST Press Count: 0 displays. Press , , or to increase the value of the Press count field by one. If the final Press count does not match the total number of buttons that are pressed, then one or more buttons are malfunctioning. Press to return to the HARDWARE TESTS menu screen. DRAM Test The purpose of this test is to check the validity of DRAM, both standard and optional. The test writes patterns of data to SDRAM to verify that each bit in memory can be set and read correctly. To run the SDRAM Memory Test: 1. Select DRAM Test from the menu. The power indicator blinks, indicating the test is in progress. DRAM Test P:###### xxxMb F:##### xxxMb represents the amount of installed DRAM memory in MB. P:###### represents the number of times the memory test has passed and finished successfully. Initially, 000000 displays with the maximum pass count being 999,999. F:##### represents the number of times the memory test has failed and finished with errors. Initially, 00000 displays with the maximum fail count being 99,999. 2. Once the maximum pass count or fail count is reached, the test stops, the power indicator is turned on solid, and the final results display. If the test fails, then the message DRAM Error displays for approximately three seconds and the failure count increases by 1. 3. To stop the test before it completes, turn off the printer. 3-8 Lexmark™ E360d, E360dn
-
 1
1 -
2
-
3
-
4
-
5
-
6
-
7
-
8
-
9
-
10
-
11
-
12
-
13
-
14
-
15
-
16
-
17
-
18
-
19
-
20
-
21
-
22
-
23
-
24
-
25
-
26
-
27
-
28
-
29
-
30
-
31
-
32
-
33
-
34
-
35
-
36
-
37
-
38
-
39
-
40
-
41
-
42
-
43
-
44
-
45
-
46
-
47
-
48
-
49
-
50
-
51
-
52
-
53
-
54
-
55
-
56
-
57
-
58
-
59
-
60
-
61
-
62
-
63
-
64
-
65
-
66
-
 67
67 -
 68
68 -
 69
69 -
 70
70 -
 71
71 -
 72
72 -
 73
73 -
 74
74 -
 75
75 -
 76
76 -
 77
77 -
78
-
79
-
80
-
81
-
82
-
83
-
84
-
85
-
86
-
87
-
88
-
89
-
90
-
91
-
92
-
93
-
94
-
95
-
96
-
97
-
98
-
99
-
100
-
101
-
102
-
103
-
104
-
105
-
106
-
107
-
108
-
109
-
110
-
111
-
112
-
113
-
114
-
115
-
116
-
117
-
118
-
119
-
120
-
121
-
122
-
123
-
124
-
125
-
126
-
127
-
128
-
129
-
130
-
131
-
132
-
133
-
134
-
135
-
136
-
137
-
138
-
139
-
140
-
141
-
142
-
143
-
144
-
145
-
146
-
147
-
148
-
149
-
150
-
151
-
152
-
153
-
154
-
155
-
156
-
157
-
158
-
159
-
160
-
161
-
162
-
163
-
164
-
165
-
166
-
167
-
168
-
169
-
170
 |
 |