NEC e232 User Guide - Page 63
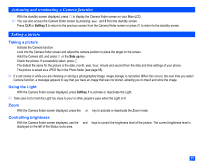
Activating and terminating a Camera function, Taking a picture
 |
View all NEC e232 manuals
Add to My Manuals
Save this manual to your list of manuals |
Page 63 highlights
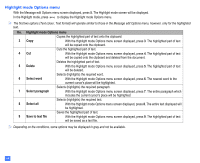
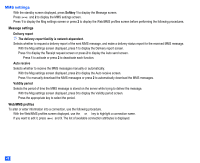
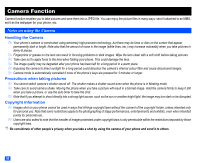
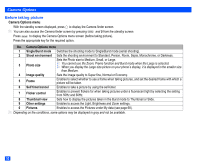
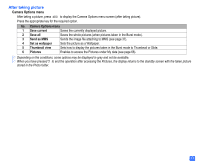
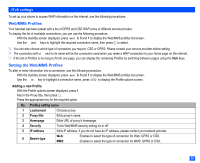
Activating and terminating a Camera function ☛ With the standby screen displayed, press to display the Camera finder screen on your Main-LCD. 2 You can also access the Camera finder screen by pressing and 5 from the standby screen. ☛ Press CLR or Softkey 2 to return to the previous screen from the Camera finder screen or press to return to the standby screen. Taking a picture Taking a picture ☛ Activate the Camera function. ☛ Look into the Camera finder screen and adjust the camera position to place the target on the screen. ☛ Hold the Camera still, and press or the Side up key. ☛ Check the picture. If successfully taken, press . The default file name for the picture is the date, month, year, hour, minute and second from the date and time settings of your phone. ☛ The picture is saved as a JPEG file in the Photo folder (see page 68). 2 If a call comes in while you are checking or storing a photographed image, image storage is cancelled. When this occurs, the next time you select Camera function, a message appears to say that you have an image that was not stored, allowing you to check and store the image. Using the Light ☛ With the Camera finder screen displayed, press Softkey 1 to activate or deactivate the Light. 2 Take care not to hold the Light too close to your or other people's eyes when the Light is lit. Zoom ☛ With the Camera finder screen displayed, press the ▲ or ▼ key to activate or deactivate the Zoom mode. Controlling brightness ☛ With the Camera finder screen displayed, use the and keys to control the brightness level of the picture. The current brightness level is displayed on the left of the Status icons area. ▼ ▼ 51
-
 1
1 -
2
-
3
-
4
-
5
-
6
-
7
-
8
-
9
-
10
-
11
-
12
-
13
-
14
-
15
-
16
-
17
-
18
-
19
-
20
-
21
-
22
-
23
-
24
-
25
-
26
-
27
-
28
-
29
-
30
-
31
-
32
-
33
-
34
-
35
-
36
-
37
-
38
-
39
-
40
-
41
-
42
-
43
-
44
-
45
-
46
-
47
-
48
-
49
-
50
-
51
-
52
-
53
-
54
-
55
-
56
-
57
-
 58
58 -
 59
59 -
 60
60 -
 61
61 -
 62
62 -
 63
63 -
 64
64 -
 65
65 -
 66
66 -
 67
67 -
 68
68 -
69
-
70
-
71
-
72
-
73
-
74
-
75
-
76
-
77
-
78
-
79
-
80
-
81
-
82
-
83
-
84
-
85
-
86
-
87
-
88
 |
 |
