NEC e232 User Guide - Page 64
Camera Options
 |
View all NEC e232 manuals
Add to My Manuals
Save this manual to your list of manuals |
Page 64 highlights
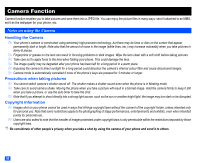
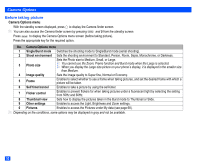
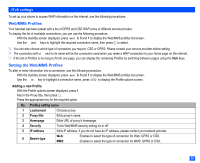
Camera Options Before taking picture Camera Options menu ☛ With the standby screen displayed, press to display the Camera finder screen. 2 You can also access the Camera finder screen by pressing and 5 from the standby screen. ☛ Press to display the Camera Options menu screen (before taking picture). ☛ Press the appropriate key for the required option. No. Camera Options menu 1 Single/Burst mode Switches the shooting mode to Single/Burst mode (serial shooting). 2 Shoot environment Sets the shooting environment to Standard, Person, Room, Sepia, Monochrome, or Darkness. 3 Photo size Sets the Photo size to Medium, Small, or Large. 2 You cannot use the Zoom, Frame function and Burst mode when the Large is selected. 2 When you display the Large size picture on your phone's display, it is displayed in the smaller size than Medium. 4 Image quality Sets the image quality to Super fine, Normal or Economy. 5 Frame Enables to select whether to use a frame when taking pictures, and set the desired frame with which a picture will be taken. 6 Self timer/cancel Enables to take a picture by using the self-timer. 7 Flicker control Enables to prevent flickers for when taking pictures under a fluorescent light by selecting the setting from 50Hz and 60Hz. 8 Thumbnail view Sets how to display the pictures taken in the Burst mode to Thumbnail or Slide. 9 Other settings Enables to access the Light, Brightness and Zoom settings. 0 Pictures Enables to access the Pictures under My data (see page 68). 2 Depending on the conditions, some options may be displayed in gray and not be available. 52
-
 1
1 -
2
-
3
-
4
-
5
-
6
-
7
-
8
-
9
-
10
-
11
-
12
-
13
-
14
-
15
-
16
-
17
-
18
-
19
-
20
-
21
-
22
-
23
-
24
-
25
-
26
-
27
-
28
-
29
-
30
-
31
-
32
-
33
-
34
-
35
-
36
-
37
-
38
-
39
-
40
-
41
-
42
-
43
-
44
-
45
-
46
-
47
-
48
-
49
-
50
-
51
-
52
-
53
-
54
-
55
-
56
-
57
-
58
-
 59
59 -
 60
60 -
 61
61 -
 62
62 -
 63
63 -
 64
64 -
 65
65 -
 66
66 -
 67
67 -
 68
68 -
 69
69 -
70
-
71
-
72
-
73
-
74
-
75
-
76
-
77
-
78
-
79
-
80
-
81
-
82
-
83
-
84
-
85
-
86
-
87
-
88
 |
 |