Panasonic AG-AC160A Operating Instructions Advanced - Page 27
Optical image stabilizer function, Adding effects to images, Using USER buttons
 |
View all Panasonic AG-AC160A manuals
Add to My Manuals
Save this manual to your list of manuals |
Page 27 highlights
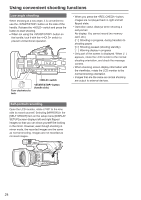
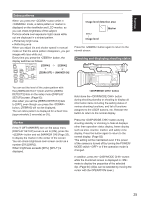
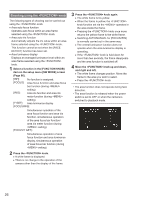
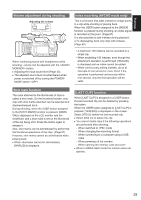
Shooting Optical image stabilizer function When shooting with the camera hand held, you can reduce camera shake by using the optical image stabilizer function. The optical image stabilizer can be switched ON/ OFF with the button. [ ] is displayed in the viewfinder and the LCD monitor when the optical image stabilizer is ON. When using a tripod, natural images can be obtained by turning the optical image stabilizer function OFF. button Using USER buttons You can assign a single function from among 16 types of functions to each USER button. Use these buttons to change shooting conditions quickly or add the fade effect to images to match the subject. In the factory settings, the following functions are assigned to each of the buttons. : [BACKLIGHT] : [D.ZOOM] : [SHOT MARK] For details, see the [USER1] - [USER3] items on the setup menu [SW MODE] screen (Page 87). If you press a USER button to which one of the functions has been assigned, and then turn OFF the power or change the mode during operation of the USER button function, it will return to the previous state. ••When tracking a moving subject or there is a lot of camera shake, stabilization may not work. Adding effects to images Effects can be added to images by pressing the USER buttons assigned the [BLACKFADE] function and the [WHITEFADE] function. The buttons are forcibly disabled during playback, REC CHECK, and thumbnail display. [BLACKFADE]: Press the button to fade out to black. At this time audio fades out in the same way. Also, continue to press the button and the image fades out, release the button and it fades in. [WHITEFADE]: Press the button to fade out to white. At this time audio fades out in the same way. Also, continue to press the button and the image fades out, release the button and it fades in. Backlight compensation When shooting subjects in backlight, press the USER button to which the [BACKLIGHT] function has been assigned. [BACKLIGHT] will be displayed on the screen. Auto iris control for backlight compensation will prevent the image of the subject from becoming dark. Press the USER button again to release backlight compensation. (In the manual iris mode, the iris status is retained at the corresponding point even when backlight compensation is canceled.) 27
-
 1
1 -
2
-
3
-
4
-
5
-
6
-
7
-
8
-
9
-
10
-
11
-
12
-
13
-
14
-
15
-
16
-
17
-
18
-
19
-
20
-
21
-
 22
22 -
 23
23 -
 24
24 -
 25
25 -
 26
26 -
 27
27 -
 28
28 -
 29
29 -
 30
30 -
 31
31 -
 32
32 -
33
-
34
-
35
-
36
-
37
-
38
-
39
-
40
-
41
-
42
-
43
-
44
-
45
-
46
-
47
-
48
-
49
-
50
-
51
-
52
-
53
-
54
-
55
-
56
-
57
-
58
-
59
-
60
-
61
-
62
-
63
-
64
-
65
-
66
-
67
-
68
-
69
-
70
-
71
-
72
-
73
-
74
-
75
-
76
-
77
-
78
-
79
-
80
-
81
-
82
-
83
-
84
-
85
-
86
-
87
-
88
-
89
-
90
-
91
-
92
-
93
-
94
-
95
-
96
-
97
-
98
-
99
-
100
-
101
-
102
-
103
-
104
-
105
-
106
-
107
-
108
-
109
-
110
 |
 |