Panasonic DMREZ485V Dvd Recorder - English/spanish - Page 61
Multi-channel TV Sound Analog, Digital Audio Output, Sound Digital, then
 |
View all Panasonic DMREZ485V manuals
Add to My Manuals
Save this manual to your list of manuals |
Page 61 highlights
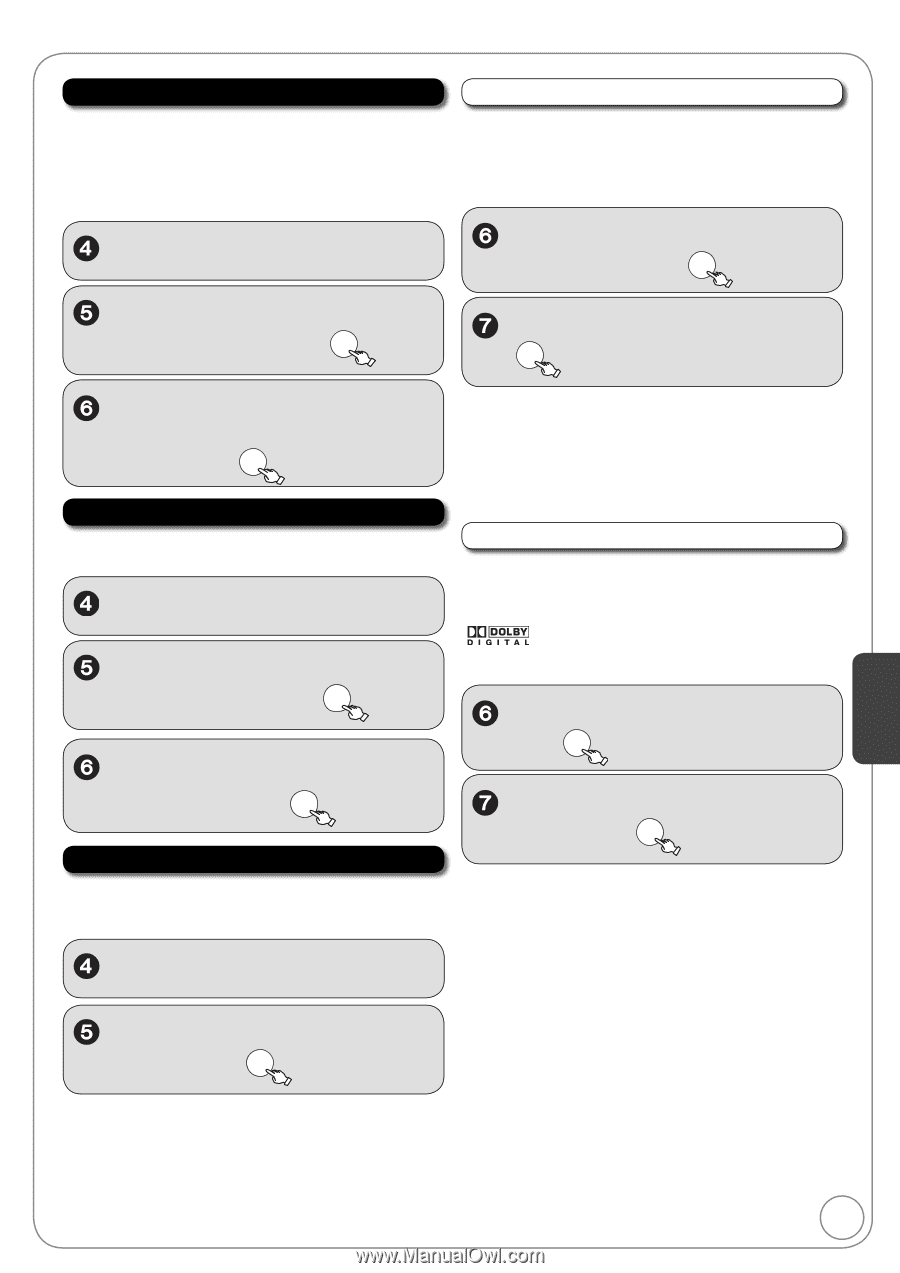
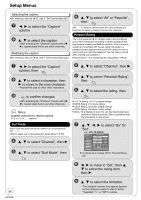
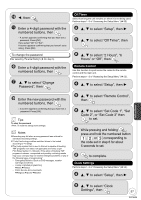
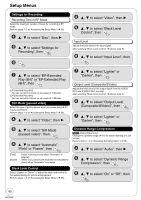
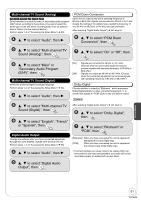
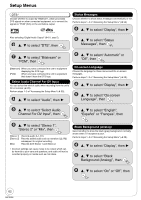
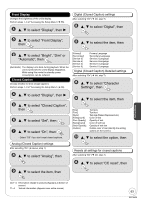
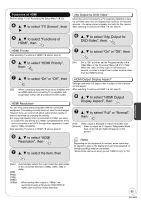
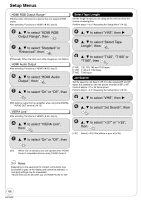
Multi-channel TV Sound (Analog) [-R] [-R]DL] [-RW‹V›] [+R] [+R]DL] [+RW] Select whether to record the main or secondary audio program (SAP) when recording to these discs. (You cannot select the audio type on the unit when recording audio from an external device. Select it on the external device.) Perform steps 1−3 of "Accessing the Setup Menu" ( 55). PCM Down Conversion Select how to output audio with a sampling frequency of 96 kHz or 88.2 kHz. Signals are converted to 48 kHz or 44.1 kHz despite the settings if the signals have a sampling frequency of over 96 kHz or 88.2 kHz, or the disc has copy protection. After selecting "Digital Audio Output" ( left, step 5). , to select "Audio", then , to select "PCM Down Conversion", then OK , to select "Multi-channel TV Sound (Analog)", then OK , to select "On" or "Off", then OK , to select "Main" or "Secondary Audio Program (SAP)", then OK Multi-channel TV Sound (Digital) Select the preferred digital broadcast language. Perform steps 1−3 of "Accessing the Setup Menu" ( 55). , to select "Audio", then [On] Signals are converted to 48 kHz or 44.1 kHz. (Choose when the connected equipment cannot process signals with sampling frequency of 96 kHz or 88.2 kHz.) [Off] Signals are output as 96 kHz or 88.2 kHz. (Choose when the connected equipment can process signals with sampling frequency of 96 kHz or 88.2 kHz.) Dolby Digital Choose whether to output by "Bitstream", which processes Dolby Digital signals on other connected equipment, or to convert the signals to "PCM" (2ch) on the unit before output. , to select "Multi-channel TV Sound (Digital)", then OK , to select "English", "French" or "Spanish", then OK Digital Audio Output Change the settings when you have connected equipment through the unit's DIGITAL AUDIO OUT terminal ( 72). Perform steps 1−3 of "Accessing the Setup Menu" ( 55). , to select "Audio", then After selecting "Digital Audio Output" ( left, step 5). , to select "Dolby Digital", then OK , to select "Bitstream" or "PCM", then OK [Bitstream] When you have connected the unit to equipment displaying the Dolby Digital logo. [PCM] When you have connected the unit to equipment that doesn't have Dolby Digital logo. Incorrect settings can cause noise to be output which can be harmful to your ears and speakers, and audio will not be recorded properly on media such as mini discs. , to select "Digital Audio Output", then OK Setting Menus 61 RQT9056
-
 1
1 -
2
-
3
-
4
-
5
-
6
-
7
-
8
-
9
-
10
-
11
-
12
-
13
-
14
-
15
-
16
-
17
-
18
-
19
-
20
-
21
-
22
-
23
-
24
-
25
-
26
-
27
-
28
-
29
-
30
-
31
-
32
-
33
-
34
-
35
-
36
-
37
-
38
-
39
-
40
-
41
-
42
-
43
-
44
-
45
-
46
-
47
-
48
-
49
-
50
-
51
-
52
-
53
-
54
-
55
-
 56
56 -
 57
57 -
 58
58 -
 59
59 -
 60
60 -
 61
61 -
 62
62 -
 63
63 -
 64
64 -
 65
65 -
 66
66 -
67
-
68
-
69
-
70
-
71
-
72
-
73
-
74
-
75
-
76
-
77
-
78
-
79
-
80
-
81
-
82
-
83
-
84
-
85
-
86
-
87
-
88
-
89
-
90
-
91
-
92
-
93
-
94
-
95
-
96
-
97
-
98
-
99
-
100
 |
 |