Pioneer AVIC-X920BT Owner's Manual - Page 169
Changing the wide screen mode, Setting the rear output
 |
UPC - 884938104241
View all Pioneer AVIC-X920BT manuals
Add to My Manuals
Save this manual to your list of manuals |
Page 169 highlights
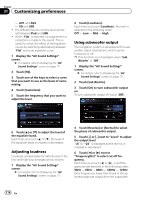
Customizing preferences Chapter 31 Customizing preferences 1 Display the "AV System Settings" screen. = For details, refer to Displaying the "AV System Settings" screen on the previous page. 2 Touch [AV2 Input]. Each touch of [AV2 Input] changes the setting as follows: ! Off: No video component is connected. ! EXT: Pioneer external unit connected with the RCA video cable ! Video: External video component Changing the wide screen mode 1 Display the "AV System Settings" screen. = For details, refer to Displaying the "AV System Settings" screen on the previous page. 2 Touch [Wide Mode]. Each touch of [Wide Mode] changes the setting as follows: ! Full (full) A 4:3 picture is enlarged in the horizontal direction only, enabling you to enjoy a 4:3 TV picture (normal picture) without any omissions. ! Cinema (cinema) A picture is enlarged by the same proportion as Full or Zoom in the horizontal direction and by an intermediate proportion between Full and Zoom in the vertical direction; ideal for a cinema-sized picture (wide screen picture) where captions lie outside the frame. ! Zoom (zoom) A 4:3 picture is enlarged in the same proportion both vertically and horizontally; ideal for a cinema-sized picture (wide screen picture). ! Normal (normal) A 4:3 picture is displayed normally, giving you no sense of disparity since its proportions are the same as that of the normal picture. p Different settings can be stored for each video source. p The same setting is automatically applied for the following grouping. ! DVD-V and DivX ! AV1 and AV2 ! EXT1 and EXT2 p When video is viewed in a wide screen mode that does not match its original aspect ratio, it may look strange. p Remember that use of this system for commercial or public viewing purposes may constitute an infringement on the author's rights protected by the Copyright Law. p The navigation map and the rear view camera picture is always viewed at Full. Setting the rear output The navigation system's rear output can be used for a full-range speaker or subwoofer connection. If you switch Rear SP to Sub. W, you can connect a rear speaker lead directly to a subwoofer without using an auxiliary amp. Initially, the navigation system is set for a rear full-range speaker connection (Full). p Both rear speaker leads output and RCA rear output are switched simultaneously in this setting. (When you use the product without RCA rear output, this setting only applies to the rear speaker leads.) p "Rear SP" can be set only when the source is selected to "Off". 1 Display the "AV System Settings" screen. = For details, refer to Displaying the "AV System Settings" screen on the previous page. 2 Touch [Rear SP]. Each touch of [Rear SP] changes the settings as follows: ! Full When no subwoofer is connected to the rear output, select "Full". ! Sub. W When a subwoofer is connected to the rear output, select "Sub. W". En 169
-
 1
1 -
2
-
3
-
4
-
5
-
6
-
7
-
8
-
9
-
10
-
11
-
12
-
13
-
14
-
15
-
16
-
17
-
18
-
19
-
20
-
21
-
22
-
23
-
24
-
25
-
26
-
27
-
28
-
29
-
30
-
31
-
32
-
33
-
34
-
35
-
36
-
37
-
38
-
39
-
40
-
41
-
42
-
43
-
44
-
45
-
46
-
47
-
48
-
49
-
50
-
51
-
52
-
53
-
54
-
55
-
56
-
57
-
58
-
59
-
60
-
61
-
62
-
63
-
64
-
65
-
66
-
67
-
68
-
69
-
70
-
71
-
72
-
73
-
74
-
75
-
76
-
77
-
78
-
79
-
80
-
81
-
82
-
83
-
84
-
85
-
86
-
87
-
88
-
89
-
90
-
91
-
92
-
93
-
94
-
95
-
96
-
97
-
98
-
99
-
100
-
101
-
102
-
103
-
104
-
105
-
106
-
107
-
108
-
109
-
110
-
111
-
112
-
113
-
114
-
115
-
116
-
117
-
118
-
119
-
120
-
121
-
122
-
123
-
124
-
125
-
126
-
127
-
128
-
129
-
130
-
131
-
132
-
133
-
134
-
135
-
136
-
137
-
138
-
139
-
140
-
141
-
142
-
143
-
144
-
145
-
146
-
147
-
148
-
149
-
150
-
151
-
152
-
153
-
154
-
155
-
156
-
157
-
158
-
159
-
160
-
161
-
162
-
163
-
 164
164 -
 165
165 -
 166
166 -
 167
167 -
 168
168 -
 169
169 -
 170
170 -
 171
171 -
 172
172 -
 173
173 -
 174
174 -
175
-
176
-
177
-
178
-
179
-
180
-
181
-
182
-
183
-
184
-
185
-
186
-
187
-
188
-
189
-
190
-
191
-
192
-
193
-
194
-
195
-
196
-
197
-
198
-
199
-
200
-
201
-
202
-
203
-
204
-
205
-
206
-
207
-
208
-
209
-
210
-
211
-
212
-
213
-
214
-
215
-
216
-
217
-
218
-
219
-
220
-
221
-
222
-
223
-
224
-
225
-
226
-
227
-
228
 |
 |
