Ricoh GR Digital User Guide
Ricoh GR Digital - Digital Camera - 8.1 Megapixel Manual
 |
UPC - 026649732430
View all Ricoh GR Digital manuals
Add to My Manuals
Save this manual to your list of manuals |
Ricoh GR Digital manual content summary:
- Ricoh GR Digital | User Guide - Page 1
Camera User Guide The serial number of this product is given on the bottom face of the camera. Quick Guide A Variety of Shooting Techniques/Playback Changing Camera Settings Installing Software Troubleshooting Caution! Do not connect the USB cable yet! If you connect the camera to a computer - Ricoh GR Digital | User Guide - Page 2
thoroughly before use. Please keep this manual handy for ease of reference. Ricoh Co., Ltd. Safety Precautions Test shooting Copyright Exemption from Liability Warranty Radio Interference For the safe use of your camera, be sure to read the safety precautions thoroughly. Please be sure to do - Ricoh GR Digital | User Guide - Page 3
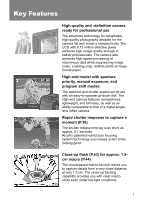
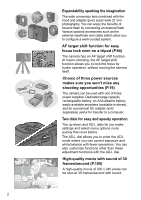
, and slimness, as well as an ability comparable to that of a digital singlelens reflex camera. Rapid shutter response to capture a moment (P.36) The shutter release time lag is as short as approx. 0.1 seconds. Ricoh's patented hybrid auto focusing system technology even keeps action shots looking - Ricoh GR Digital | User Guide - Page 4
of bounce flash by connecting an external flash. Various optional accessories such as the external viewfinder and cable switch allow you to configure a well-rounded moving the camera itself. Choice of three power sources makes sure you won't miss any shooting opportunities (P.19) The camera can be - Ricoh GR Digital | User Guide - Page 5
" that helps in not only managing shot images in an album, but also editing images and sounds, and creating video CDs For the integrated handling of images, this software has a input function to download still images, movies, and sounds from a digital camera or music CD, an album function to - Ricoh GR Digital | User Guide - Page 6
Accessories...11 About Options for GR DIGITAL Only 12 Accessories ...30 Setting the date and time 31 Changing Hold the Camera 34 Preventing camera shake 35 image you just took (Quick Review 48 Viewing Your Images 49 Playing back in the three-frame view 50 Thumbnail Display...52 Magnifying Images - Ricoh GR Digital | User Guide - Page 7
Function...60 Connecting the Camera to a Printer 60 Printing Still Images...61 A Variety of Image with Sound (IMAGE WITH SOUND 85 Inserting the Date into a Still Image (DATE IMPRINT Shooting with the Aperture and Shutter Speed Set (Manual Exposure Mode 97 Shooting with the Aperture and Shutter - Ricoh GR Digital | User Guide - Page 8
(AF AUX. LIGHT 145 Setting Whether to Use Digital Zooming (DIGITAL ZOOM 146 Changing the Zoom Button Setting (ZOOM the Camera to Your Computer 161 Downloading Images from an Troubleshooting Troubleshooting 180 Troubleshooting the Camera 180 Warning Messages Under Windows XP Service Pack - Ricoh GR Digital | User Guide - Page 9
195 I. Care and Storage ...196 J. Error Messages ...197 K. Warranty and Servicing 198 Index...200 Using Manuals The two manuals included are for your GR DIGITAL. Camera User Guide (This booklet) This guide explains the usage and functions of the camera.You will also see how to install the provided - Ricoh GR Digital | User Guide - Page 10
The camera is provided with software (ImageMixer) that allows you to display and edit images from your computer. For how to use ImageMixer, click the [?] button on the ImageMixer window and see the displayed manual. For more information on the ImageMixer, contact the Customer Support Center - Ricoh GR Digital | User Guide - Page 11
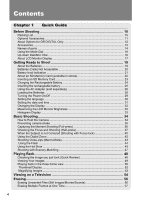
1 Chapter Quick Guide If you are using the camera for the first time, read from this chapter. Before Shooting 10 Getting Ready to Shoot 19 Basic Shooting 34 Playing Back 48 Viewing on a Television 54 Erasing 56 - Ricoh GR Digital | User Guide - Page 12
Open the package and make sure all the items are included. • GR DIGITAL • Rechargeable Battery • AV Cable Used when viewing your images on a TV unit. • Battery Charger • USB Cable Used to connect the camera to a computer or Direct Print supported printer. Note Attaching the hand strap to the - Ricoh GR Digital | User Guide - Page 13
Quick Guide • Camera User Guide (This booklet) • Warranty • Safety Precautions Optional Accessories • Cable switch (CA-1) 1 • AC Adapter (AC-4c) • Rechargeable Battery (DB-60) • Battery Charger (BJ-6) • Caplio Software CD-ROM The provided software and the Software User Guide are included on this - Ricoh GR Digital | User Guide - Page 14
to 35 mm). The hood & adapter (with case) is used in combination. • Hood & adapter (GH-1) This is a set of a hood to prevent lens exposure to sunlight and an adapter used to attach a ij37 mm general-purpose filter. • External Viewfinder (GV-1) This optical viewfinder is to be attached to the hot - Ricoh GR Digital | User Guide - Page 15
Accessories Filter ij37mm Wide-conversion lens (GW-1) Computer (USB cable) 1 Quick Guide Macro light External flash Sigma EF-500 DG SUPER EF-500 DG ST (Recommended) Hood & adapter (GH-1) TV/Video (AV cable) Direct printer (USB cable) External Viewfinder (GV-1) Camera body AC Adapter (AC-4c) - Ricoh GR Digital | User Guide - Page 16
Names of parts Camera Front View Item Name 1 Strap Eyelet 2 Unlock Button 3 Mode Dial 4 Shutter Release Button 5 AF Window 6 Power Button 7 Hot Shoe 8 Flash 9 Up-down Dial P.54 P.161 Caution To avoid damaging the connectors, do not plug any objects into the camera's microphone or speaker holes. 14 - Ricoh GR Digital | User Guide - Page 17
Rear View 1 Quick Guide Item Name 1 LCD M/O Button P.68 P.110 9 6 (Playback) Button P.49 10 # /Q(Quick Review)Button P.48 Item Name 11 D (Delete) / T (Self-timer) Button DC in) Cable Cover 17 Battery/Card Cover 18 Release lever 19 Tripod Screw Hole (underside) Refer to P.56 P.95 P.43 P.32 - Ricoh GR Digital | User Guide - Page 18
Priority mode P Program Shift mode 5 Still Image mode 3 Movie mode Function Refer to Use this to record sounds or to shoot text. P.47 Use this to set the shutter speed and aperture P.97 manually. Use this to set the aperture manually. The camera P.96 automatically sets the shutter speed - Ricoh GR Digital | User Guide - Page 19
P.192 8 Picture Quality P.69 9 Image Size P.69 10 Digital zoom P.42 11 Focus P.72 12 Auto Bracket P.80 13 White Balance P.88 Item Name 14 Photometry 15 Image Setting 16 Exposure 17 ISO Setting 18 Date/Time 19 Battery 20 Interval 21 Histogram 22 Camera Shake 23 Aperture Value 24 Shutter - Ricoh GR Digital | User Guide - Page 20
49 - - Item Name 8 Picture Quality 9 Image Size 10 File No. 11 Battery 12 Date at Shooting 13 Recording Time or Lapsed Time 14 Indicator Refer to P.69 P.69 P.19 P.86 P.134 - Note The LCD monitor may display messages to inform you of operational instructions or the camera's status while in use. 18 - Ricoh GR Digital | User Guide - Page 21
Make sure the protective lens barrier is closed. For how to turn the camera off, see P.29. Quick Guide About the Batteries The following batteries can be used in the camera. Please choose which kind to use according to your needs. • Rechargeable Battery DB-60 This is a lithium-ion battery. This is - Ricoh GR Digital | User Guide - Page 22
month. In such a case, recharge the battery two or three times before use. The battery self-discharges with time even if the camera is not used, so The camera does not accept the following batteries (cells): • Manganese dry cell (R03) • Ni-Cd battery Note Indication of the number of images you - Ricoh GR Digital | User Guide - Page 23
Quick Guide Caution • Please remove the batteries if you are not going to use the camera for a long period of time. • The life of an AAA alkaline battery depends on the brand and the storage time from the date of production. In addition, the life of an AAA alkaline battery becomes shorter at - Ricoh GR Digital | User Guide - Page 24
sounds at high resolutions, use a high-capacity SD Memory Card. Note Where images are recorded When no SD memory card is inserted, the camera records images in the internal memory; when an SD memory card is inserted, it records images on the memory card. When no memory card is loaded When an SD - Ricoh GR Digital | User Guide - Page 25
Quick Guide Inserting an SD Memory Card If you have already used this camera, make sure it is turned off before loading an SD memory card. 1. Slide the release lever to the 1 OPEN side to open the battery/ card cover. 2. Make sure the card is facing the right way and push the card all - Ricoh GR Digital | User Guide - Page 26
Charging the Rechargeable Battery The rechargeable battery needs to be charged before use. 1. Insert the battery, making sure that the and markings on the battery match with those on the battery charger. The - Ricoh GR Digital | User Guide - Page 27
used over and over again by recharging, and the battery power lasts long. If you have already used this camera, make sure it is turned off 1 before loading batteries. 1. Slide the release lever to the OPEN side to open the battery/ card cover. 2. Insert the rechargeable battery. 3. Close the - Ricoh GR Digital | User Guide - Page 28
) When shooting or viewing still images for a long time, or when connecting to your computer, using the AC Adapter (sold separately) is recommended. If you have already used this camera, make sure it is turned off before loading the AC Adapter Battery. 1. Slide the release lever to the OPEN side to - Ricoh GR Digital | User Guide - Page 29
Quick Guide 4. Close the battery/card cover and slide the release lever to the side opposite to OPEN to lock the cover. 5. Plug the power cord into an outlet. 1 Removing the AC Adapter If you have already used this camera, make sure it is turned off before removing the AC Adapter Battery. 1. - Ricoh GR Digital | User Guide - Page 30
Loading the Batteries If you have already used this camera, make sure it is turned off before loading batteries. 1. Slide the release lever to the OPEN side to open the battery/ card cover. 2. Insert the two batteries, making sure they are facing the correct way. 3. Close the - Ricoh GR Digital | User Guide - Page 31
Quick Guide Turning the Power On/Off To turn the power on: 1. Press the Power button. After the start sound, the auto-focus/flash 1 lamp blinks for several seconds. Using the Camera in Playback Mode Pressing the Playback button for more than one second turns on the camera in Playback Mode, - Ricoh GR Digital | User Guide - Page 32
setting the language, go on to the date/time setting (for printing the date and time on your photos). You can sure to set the language, and the date/time later. Use the SETUP screen for set, and the date/ time setting screen appears. Reference For how to set the display language and date/time on the - Ricoh GR Digital | User Guide - Page 33
at shipping Note • If the batteries are removed for more than one week, the date and time settings will be lost. These settings must be made again. • To retain the date and time settings, load a fully charged battery in the camera for more than two hours. Reference • For how to correct the set - Ricoh GR Digital | User Guide - Page 34
the LCD monitor off except when the camera is operated. This mode is effective for saving power consumption. With this mode, half-pressing the shutter release button turns the LCD monitor on. Subsequently, full-pressing the shutter release button displays the shot image on the LCD monitor, and then - Ricoh GR Digital | User Guide - Page 35
Quick Guide Histogram Display When histogram display is on, a histogram appears in level indicated in the histogram may not correspond to the brightness of the shot image. • Exposure compensation has its limitation. It does not necessarily achieve the best possible result. • The histogram having - Ricoh GR Digital | User Guide - Page 36
Basic Shooting Now you are ready. Let's shoot! How to Hold the Camera Hold the camera as illustrated below for best results. 1. Hold the camera with both hands and lightly press both elbows against your body. 2. Put your finger on the shutter button. Note Be careful when you are shooting - Ricoh GR Digital | User Guide - Page 37
Guide Preventing camera shake If the camera moves when you press the shutter button, the still image might not come out clearly (due to camera shake). The mark displayed on the LCD monitor indicates that camera shake should be avoided under the current shooting condition. 1 To prevent camera - Ricoh GR Digital | User Guide - Page 38
shooting opportunity. 1. Make sure the camera power is on and turn the mode dial to 5, P, A, or M. 2. Compose your shot by looking at the LCD monitor. 3. Put the subject of your photo right in the middle and press the shutter release button fully. While the shot image is being written onto the card - Ricoh GR Digital | User Guide - Page 39
the camera power is on and turn the mode dial to 5, P, A, or M. 2. Compose your shot by looking at the LCD monitor. 3. Put the subject of your photo right in the middle and press the shutter release button half in the upper right of the viewfinder blinks in green. Auto Focus/Flash Lamp Frame 37 - Ricoh GR Digital | User Guide - Page 40
position at macro shooting, use the AF target shift function. (P.94) 4. Gently press the shutter button all the way. While the shot image is being written onto the card, the auto-focus/flash lamp blinks. The still image you have taken freezes for a moment on the LCD Monitor and is recorded. 38 - Ricoh GR Digital | User Guide - Page 41
Guide (see P.40) • Press gently to prevent camera shake when you press the shutter release button. • During distance measurement for auto focusing, the setup screen, the still image shot will not be displayed on the LCD monitor. Reference • For how to change the image confirmation time, see P.131 - Ricoh GR Digital | User Guide - Page 42
in front. Shooting range Subject to be focused on Final still image 1. Make sure the camera power is on and turn the mode dial to 5, P, A, or M. 2. Put the subject of your photo right in the center of the LCD Monitor or the Viewfinder and press the shutter button half-way. The F-value (aperture - Ricoh GR Digital | User Guide - Page 43
Quick Guide 4. Gently press the shutter button all the way. 1 Note At macro shooting, the AF target shift function allows you to lock the focus without moving the camera. This function is useful when a tripod is used. Reference • For details about macro shooting, see P.43. • For details about the - Ricoh GR Digital | User Guide - Page 44
original size. 1. With the camera ready to shoot, press the 8 or 9 button. The magnification is displayed on the LCD monitor. 2. Compose your picture and half- press the shutter release button. 3. Press the shutter release button all the way. Note • When the digital zoom function is off, selecting - Ricoh GR Digital | User Guide - Page 45
range: approx. 31 x 23 mm). • During Macro Shooting, the Viewfinder cannot be used. Use the LCD Monitor. • The AF target shift function enables you to lock the focus for macro shooting only by button operation without moving the camera. This function is useful for shooting on a tripod. (P.94) 43 - Ricoh GR Digital | User Guide - Page 46
red-eye phenomenon, in which people's eyes appear red when shooting images of people. The flash fires, whatever the light conditions are, recommended to use a tripod. Indicates that the external flash is attached. 1. Make sure the camera power is on and turn the mode dial to 5, P, A, M, or SCENE. 2. - Ricoh GR Digital | User Guide - Page 47
has a hot shoe, allowing you to attach an external flash (available in stores). X contact 1 Quick Guide Certain models of external flashes are recommended for the camera. When using a recommended external flash, follow the operation procedure described on P.189. When using an external flash - Ricoh GR Digital | User Guide - Page 48
on the market rarely have an X contact of the opposite polarity. This kind of flash may not only not work but also cause a problem to the camera. For the terminal specifications, contact the manufacturer of the external flash. • Use an external flash of a lighting angle covering the angle of view - Ricoh GR Digital | User Guide - Page 49
Guide is displayed on the upper part of the LCD monitor. 5. Press the shutter release button. Now you can shoot texts using Text mode. For how to record sounds appears and you can change the mode. Reference • For how to change the image quality and size, see P.69. • For how to change the text density - Ricoh GR Digital | User Guide - Page 50
M/O button. Note • Once the power is turned off, the image you took cannot be displayed in the still image mode even if you press the Q button. • If you use Quick Review to view the image taken in Text mode (see P.47), the displayed image may have slightly lower quality than the recorded one. 48 - Ricoh GR Digital | User Guide - Page 51
is displayed. You can view your pictures in order by using the #$ button. To switch the camera from playback mode to still image mode (or movie or voice memo mode), press the Playback button again. Quick Guide Caution If you happen to delete a JPEG file corresponding to the DNG file shot in RAW - Ricoh GR Digital | User Guide - Page 52
view A playback view can be divided into three frames. The three-frame view allows you to select a still image to enlarge or delete it. 1. Press the 6 (Playback) button. The last image you took is displayed. 2. Press the 9 (Thumbnail Display) button. The screen changes to the three-frame view. The - Ricoh GR Digital | User Guide - Page 53
Quick Guide About Screen Switching at Playback The playback screen changes as follows: 1 Note If one of the following operations is display) and the operation is executed. • Deletion (P.56) • Movie playback (P.107) • Sound playback (P.109) Reference For how to erase unwanted Images, see P.56. 51 - Ricoh GR Digital | User Guide - Page 54
Press the 9 (Thumbnail Display) button. The screen is divided into 12 frames and displays 12 still images at once. Selected still image To display just one photo 1. Use the !"#$ buttons to select an image. 2. Press the 8 (Enlarged Display) button twice. Reference • For how to erase the selected - Ricoh GR Digital | User Guide - Page 55
Quick Guide Magnifying Images You can enlarge a still image displayed on the LCD Monitor. 3264 X 2448, 3264 X 2176, 2592 X 1944, 2048 X 1536 8 times 1280 X 960 640 X 480 6.7 times 3.4 times 1 1. Press the 6 (Playback) button. The last image you took is displayed. 2. Press the #$ buttons to - Ricoh GR Digital | User Guide - Page 56
TV screen just as it would on the LCD Monitor. To use your television for viewing, connect your camera to the television with the AV cable that came with your camera. To view still images on a television, follow the steps below. 1. Securely connect the AV cable to the Video In terminal on the - Ricoh GR Digital | User Guide - Page 57
Guide 5. Press the Power button or keep pressing the Playback button for more than one second to turn the camera on. 1 Caution Connecting the AV cable to the camera terminal, you can record what you have shot onto video. • Your camera is set to NTSC playback format (used in Japan and other countries - Ricoh GR Digital | User Guide - Page 58
three ways: • One file at a time • Deleting all frames at once • Select multiple frames and erase together 1. Press the 6 (Playback) button. 2. To erase images one at a time, press the #$ buttons to display the file you want to erase. 3. Press the D (Delete) button. 4. Press the !" buttons to select - Ricoh GR Digital | User Guide - Page 59
Quick Guide Erasing Multiple Frames at One Time 1. Press the 6 (Playback) button. 1 2. Press the 9 (Thumbnail) button twice. The screen is divided into 12 frames and displays 12 still images at once. 3. Press the !"#$ buttons to select the image you want to erase and press the D (Delete) button. - Ricoh GR Digital | User Guide - Page 60
58 - Ricoh GR Digital | User Guide - Page 61
Chapter 2 A Variety of Shooting Techniques/Playback Direct Printing 60 A Variety of Shooting Techniques 65 Shooting with Multi-Shot 101 Shooting/Playing Back Movies 105 Recording/Playing Back Sound 108 Other Functions Available in Playback Mode.......110 - Ricoh GR Digital | User Guide - Page 62
be printed quickly and easily from your digital camera without using a computer. Caution • You cannot print movies (.AVI) with this function. For still images with sounds (.JPG and .WAV), only the still images (.JPG) are printed. • Some printer does not support images taken in Text mode (TIFF). Even - Ricoh GR Digital | User Guide - Page 63
A Variety of Shooting Techniques/Playback Printing Still Images You can send still images from the camera to a PictBridge compatible printer to print them. Still images are sent from the internal memory when no SD memory card is loaded or from an SD memory card when one is loaded. Caution 2 Do - Ricoh GR Digital | User Guide - Page 64
the connection is complete. The following items can be selected. Each item appears only when supported by the printer. Item Name PAPER SIZE PAPER TYPE LAYOUT DATE PRINT FILE NAME PRINT OPTIMIZE IMAGE FIXED-SIZE PRINT PRINT QUALITY FORMS PRINT Function Sets the paper size. Sets the paper type - Ricoh GR Digital | User Guide - Page 65
screen at right, select [Set] and press the M/O button. Select [Cancel] to return to the default setting. 2 10.Press the M/O button. The selected still images are sent to the printer and the "Connecting" screen appears. Press the DISP. button to cancel the operation. At the end of transmission, the - Ricoh GR Digital | User Guide - Page 66
appears. Press the M/O button to cancel the operation. When all the selected still images have been sent from the camera to the printer, the camera display returns to the Direct Print playback mode screen. Note • Only images with a printer mark ( ) are printed. When you cancel printing and then try - Ricoh GR Digital | User Guide - Page 67
allows you to register two functions other than 2 exposure correction and white balancing functions. Operation Flow in ADJ. Mode 1. Press the ADJ. dial. The camera enters the ADJ. mode, and the functions that can be set in this mode are displayed. 2. Turn the ADJ. dial until the function you - Ricoh GR Digital | User Guide - Page 68
menu. (P.127) Settings that can be made with the ADJ. dial Settings that can be made differ between the Scene mode and Movie mode. Still Image Mode Movie Mode Scene Mode (Text Mode) Scene Mode (other than Text Mode) Exposure, White Balance, ISO Setting, Pic Quality/Size, Focus - Ricoh GR Digital | User Guide - Page 69
PHOTOMETRY CONT. MODE IMG SET AUTO BRACKET INTERVAL IMAGE WITH SOUND DATE IMPRINT EXPOSURE COMP. WHITE BALANCE ISO SETTING RESTORE DEFAULTS 3 hours [OFF], ON [OFF], DATE, TIME -2.0 to +2.0 [AUTO], (Daylight), (Overcast), (Tungsten light), (Fluorescent light), (Manual Setting), (Detail) [AUTO], ISO64 - Ricoh GR Digital | User Guide - Page 70
Using the Shooting Setting Menu 1. With the camera ready to shoot, press the M/O button. The Shooting Setting menu appears. 2. Press the !" buttons 6. If you pressed the # button in step 5, press also the M/ O button. The Shooting Setting menu disappears and the camera becomes ready for shooting. 68 - Ricoh GR Digital | User Guide - Page 71
degrading the initial image quality of the shot images. The aspect ratio of 3:2 can be used in RAW and Fine modes. (Default aspect ratio = 4:3) Note The DNG files created in the RAW mode store the raw data from the camera's sensor. The data close to the original can be edited as desired using - Ricoh GR Digital | User Guide - Page 72
N2592 (5M) N2048 (3M) N1280 (1M) N640 (VGA) Images can be created with less quality degradation. This mode is suitable for highlevel image correction and editing on the computer. Suitable for downloading images to your computer and correcting the images or printing them in large sizes. Suitable for - Ricoh GR Digital | User Guide - Page 73
A Variety of Shooting Techniques/Playback 1. Make sure the camera power is on and turn the mode dial to 5, P, A or 2 picture quality/size. 5. Press the M/O or # button. Picture Quality/Image Size settings are completed. Still Image Mode 6. If you pressed the # button in step 5, press also the - Ricoh GR Digital | User Guide - Page 74
LCD monitor to allow the camera to focus on this area (SPOT AF). Five different focusing modes are supported. Selective focusing modes Mark the subject to adjust the focus automatically. MANUAL FOCUS (MF) Allows you to adjust the focus manually. SNAP Fixes the shooting distance to short - Ricoh GR Digital | User Guide - Page 75
Changing the Auto Focusing Mode (MULTI AF/SPOT AF) 1. Make sure the camera power is on and turn the mode dial to 5, P, A, M or 3. 2. Press the M/O button. shooting distance to Snapshot or Infinity ( Ʈ .), see P.76. • For details about manual focusing (shooting with manual focusing), see P.74. 73 - Ricoh GR Digital | User Guide - Page 76
distance, it can be set to either Snapshot or Infinity (∞). Note • Manual focus cannot be used in Scene Mode. • Manual focusing can focus the camera also on an object that requires macro shooting. Setting Manual Focusing 1. Make sure the camera power is on and turn the mode dial to 5, P, A, M or - Ricoh GR Digital | User Guide - Page 77
from you. Pressing the 9 button brings the focus closer to you. Until the setting is changed the next time, pictures are shot by manual focusing. 4. Press the shutter button for shooting. A Variety of Shooting Techniques/Playback Reference • For details about setting to Auto Focus (Multi AF - Ricoh GR Digital | User Guide - Page 78
or infinity. Infinity is useful to shoot a distant view. To shoot with the shooting distance fixed, follow the steps below. 1. Make sure the camera power is on and turn the mode dial to 5, P, A, M or 3. 2. Press the M/O button. The Shooting Setting menu appears. 3. Press the " button to select - Ricoh GR Digital | User Guide - Page 79
you want to use the brightness of the center. It is useful if there is marked difference in contrast or backlighting. 1. Make sure the camera power is on and turn the mode dial to 5, P, A or M. 2. Press the M/O button. The Shooting Setting menu appears. 3. Press the " button to select [PHOTOMETRY - Ricoh GR Digital | User Guide - Page 80
a contrast level, sharpness level, and color depth level from among five levels respectively to set the image quality of the original as required. Selecting the Image Quality 1. Make sure the camera power is on and turn the mode dial to 5, P, A or M. 2. Press the M/O button. The Shooting Setting - Ricoh GR Digital | User Guide - Page 81
A Variety of Shooting Techniques/Playback Setting the Values for [SETTING 1] or [SETTING 2] 1. Make sure the camera power is on and turn the mode dial to 5, P, A or M. 2. Press the M/O button. The Shooting Setting menu appears. 3. Press the " button to select [IMG SET] - Ricoh GR Digital | User Guide - Page 82
[PIC QUALITY/SIZE] is set to RAW. 1. Make sure the camera power is on and turn the mode dial to 5, P, A or also the M/O button. 7. Press the shutter release button. Three consecutive shots are taken, with the and +0.5EV. After shooting, three still images are displayed on the LCD Monitor. They are - Ricoh GR Digital | User Guide - Page 83
images are automatically recorded - a reddish image, a bluish image, and an image of the current white balance. This is useful if the appropriate white balance cannot be judged. 2 1. Make sure the camera [WB-BKT]. 7. Press the shutter release button. Three images (reddish, bluish, and equal to the - Ricoh GR Digital | User Guide - Page 84
used. • If [B&W] is set for [IMG SET], the white balance bracket can be set but does not become valid. • This function cannot be used when [IMAGE QUALITY/SIZE] is set to RAW. Reference For how to change the White Balance, see P.88. 82 - Ricoh GR Digital | User Guide - Page 85
Pictures Automatically at Set Intervals (INTERVAL) You can set the camera to automatically take pictures at fixed intervals. You can set the length from 5 seconds to 3 hours, in increments of 5 seconds. 2 1. Make sure the camera power is on and turn the mode dial to 5, P, A or M. 2. Press the - Ricoh GR Digital | User Guide - Page 86
8. Press the shutter release button. A picture is taken every time the fixed interval elapses. 9. separately) is recommended. • Even during Interval Shooting, if you press the shutter button, the camera will shoot as usual. However, Interval Shooting Mode is unaffected. After shooting, once the time - Ricoh GR Digital | User Guide - Page 87
stop recording. Note • This function cannot be used when [IMAGE QUALITY/SIZE] is set to RAW. • When playing back a still image with sound, display the image in the same way as an ordinary image without voice. Pressing the shutter release button plays back the sound. Press the !" buttons to display - Ricoh GR Digital | User Guide - Page 88
(YY/MM/ DD hh:mm) at the lower right of a still image. 1. Make sure the camera power is on and turn the mode dial to 5, P, A or M. 2. Press the M/O button. The Shooting Setting menu appears. 3. Press the " button to select [DATE IMPRINT] and press the $ button. 4. Press the !" buttons to select the - Ricoh GR Digital | User Guide - Page 89
correct exposure. However, in the following cases, or when you intentionally want to see "Using the Shooting Setting Menu" ( P.68). 1. Make sure the camera power is on and turn the mode dial to 5, P or A. 2. function cannot be used in Manual Exposure mode. • When shooting in particularly bright - Ricoh GR Digital | User Guide - Page 90
White Balance is set to "AUTO"; normally you do not need to change the setting, but if the camera is having difficulty determining the white balance when shooting an object and White Balance fails to adjust properly. Manual Setting Make adjustments manually. Detail Select a setting value from 16 - Ricoh GR Digital | User Guide - Page 91
ADJ. mode. 3. Turn the ADJ. dial. 4. Press the #$ buttons until the White Balance menu appears. 5. Press the !" buttons to select (Manual Setting). 6. Point the camera at a piece of paper or something white under the lighting conditions for your picture. 7. Press the DISP. button. White Balance - Ricoh GR Digital | User Guide - Page 92
the mode dial to 5, P, A or M. 2. Press the ADJ. dial. The camera enters the ADJ. mode. 3. Turn the ADJ. dial. 4. Press the #$ buttons adjusted correctly for a subject that is mostly dark. In this case, add something white as the subject. Caution When shooting with flash, white balance may not - Ricoh GR Digital | User Guide - Page 93
film is. A greater value means higher sensitivity. High sensitivity is suitable for shooting an object in a dark place or moving fast and suppresses blurring. However, the images , and macro settings. Usually, use your camera in AUTO mode. 1. Make sure the camera power is on and turn the mode dial - Ricoh GR Digital | User Guide - Page 94
to select [RESTORE DEFAULTS] and press the $ button. 4. Make sure that [YES] is selected, and then press the M/O button. The display indicates the camera is restoring the initial settings; once it is finished, the display returns to the Mode screen. Reference For a list of functions whose settings - Ricoh GR Digital | User Guide - Page 95
using the Shooting Setting menu, see "Using the Shooting Setting Menu" ( P.68). 2 1. Turn the Mode Dial to 4. 2. Press the $ button. The still image mode selection screen appears. 3. Press the !" buttons to select an text mode. 4. Press the M/O button. 5. Press the ADJ. dial. The Text Density menu - Ricoh GR Digital | User Guide - Page 96
Shift Function At macro shooting, the AF target shift function allows you to lock the focus (P.40) by using the !"#$ buttons on the camera without moving the camera. This is useful for macro shooting on a tripod with locked focus. The AF target shift function allows you to shift the cross at the - Ricoh GR Digital | User Guide - Page 97
mark appears. The "10" to the right of the symbol indicates the number of seconds. In this case, if you press the shutter button, the camera will shoot after 10 seconds. 3. Press the shutter release button. The focus is locked, the auxiliary light goes on, and the self-timer starts. Once the - Ricoh GR Digital | User Guide - Page 98
mode, the camera automatically sets the shutter speed according to the manually set aperture. You can select the aperture from Maximum, Medium, and Minimum. When Maximum is selected, the subject is emphasized with the background befogged. When Minimum is selected, the shot image is given depth - Ricoh GR Digital | User Guide - Page 99
Shooting with the Aperture and Shutter Speed Set (Manual Exposure Mode) Turning the Mode Dial to M (Manual Exposure mode) allows you to set the shutter speed manually. If you set the shutter speed, you can shoot at this shutter speed and the camera-set aperture. You can select a shutter speed from - Ricoh GR Digital | User Guide - Page 100
the shutter button all the way. Note • If you select a long exposure, the shutter speed becomes slow and blurring may result. Hold you camera steadily with your hands, a tripod or the like. • If you select a long exposure, the indication on the LCD monitor disappears during shooting. Caution - Ricoh GR Digital | User Guide - Page 101
to P. 2 2. Half-press the shutter button. The current combination of the F-value and shutter speed appears on the LCD monitor. 3. Release your finger from the shutter release button. 4. Turn the up-down dial to change the combination of the F-value and shutter speed. The combination of the F-value - Ricoh GR Digital | User Guide - Page 102
Note The program diagram is shown below. The above diagram is created with the flash mode set to FLASH OFF and the ISO sensitivity to AUTO (ISO 100). The gray portion shows the range where the programmed combination can be shifted. It varies with Ev. Ev8 Ev9 Ev10 Ev11 Ev12 Ev13 Ev14 Ev15 Ev16 Ev17 - Ricoh GR Digital | User Guide - Page 103
the scene while you hold the shutter release button down, and once you release it the previous 2 seconds of shots are recorded. The 16 still images are grouped together as a set and are recorded as one image file (3264 x 2448 pixels). 2. The camera records for about 2 seconds ahead 1. If you - Ricoh GR Digital | User Guide - Page 104
can be shot is exceeded, the image recording speed becomes slow. (This depends on the image size setting.) • When shooting with S Multi-Shot or M Multi-Shot, PIC QUALITY/SIZE can be set to either F3264 or N3264. 1. Make sure the camera power is on and turn the mode dial to 5, P, A or M. 2. Press - Ricoh GR Digital | User Guide - Page 105
memorizes the scene while you hold the shutter release button down. 8. Release your finger from the shutter release button. The camera stops memorizing and the previous 16 still images (in about 2 seconds) are recorded as one still image. Note • When you want to return to normal single-shot shooting - Ricoh GR Digital | User Guide - Page 106
The last shot taken is displayed. 2. Press the #$ buttons to display an S Multi-Shot or M Multi-Shot still image. 3. Press the 8 (Enlarged Display) button. The first frame of consecutive images is displayed in Enlarged Display Mode. The shot position bar appears at the lower part of the LCD monitor - Ricoh GR Digital | User Guide - Page 107
You can shoot movies with sound. You can select the image size, either 320 x 240 or 160 x 120 pixels. Each movie you shoot is recorded as one AVI file. 2 1. Turn the Mode Dial to 3. 2. Press the shutter release button. The camera starts recording. Recording continues until you press the shutter - Ricoh GR Digital | User Guide - Page 108
recording time may not change uniformly because it is recalculated from the remaining memory capacity during movie recording. Reference • For how to change the image size for movies, see P.69. • For the list of shooting setup menu items available in Movie mode, see P.190. Note The movie recording - Ricoh GR Digital | User Guide - Page 109
movies, follow the steps below. 1. Press the 6 (Playback) button. The last shot taken is displayed. For movies, the first frame is displayed as a still image. 2. Move to the movie you want to view using the #$ buttons. 2 Press the $ button to display the next file. Press the # button to - Ricoh GR Digital | User Guide - Page 110
stored as a WAV file. 1. Turn the mode dial to SCENE. 2. If the camera is in Text Mode, change it to Voice Memo Mode. 1. Press the $ button. M/O button. 3. Press the shutter release button. Sound recording starts. 4. Release your finger from the shutter release button to stop recording. Note The - Ricoh GR Digital | User Guide - Page 111
A Variety of Shooting Techniques/Playback Playing Back Sound To playback sounds, follow the steps below. 1. Press the 6 (Playback) button. The last shot taken is displayed. 2 2. Press the #$ buttons to select a sound file for playback (speaker icon). Press the $ button to display the next file. - Ricoh GR Digital | User Guide - Page 112
Other Functions Available in Playback Mode Playback Setting Menu The Playback menu provides the functions shown in the table below: Setting SLIDE SHOW PROTECT DPOF RESIZE COPY TO CARD Option Refer to P.111 Select/Deselect 1 FILE, Select/Deselect ALL FILES, Select Multi-files P.112 Select/ - Ricoh GR Digital | User Guide - Page 113
are played back in order. If you want to stop the slide show in progress, press any button on the camera. Until stopped, the slide show will repeat itself. Note • Still images are displayed for 3 seconds each. • For movies, not just one frame, but the entire movie you shot is displayed. • Sound - Ricoh GR Digital | User Guide - Page 114
Write-protecting Your Images (PROTECT) You can protect files from being accidentally deleted. Caution Protected files cannot be deleted normally. However, they will be deleted completely if you format - Ricoh GR Digital | User Guide - Page 115
A Variety of Shooting Techniques/Playback Protecting All Files To protect all your files, follow the steps below. 1. Press the 6 (Playback) button. 2. Press the M/O button. The Playback menu appears. 3. Press the " button to select 2 [PROTECT] and press the $ button. 4. Press the !" button - Ricoh GR Digital | User Guide - Page 116
the steps below. 1. Press the 6 (Playback) button. 2. Press the 9 (Thumbnail) button twice. The screen is divided into 12 frames and displays 12 still images at once. 3. Press the !"#$ buttons to select the first file of the selection. 4. Press the M/O button. The Playback menu appears. 5. Press the - Ricoh GR Digital | User Guide - Page 117
recorded on an SD Memory Card can be printed out if you take them to a shop that offers a digital camera print service. To use a print service, it is necessary to make settings required for printing. These settings are called DPOF (Dee-Pof) settings. The DPOF setting specifies one print per - Ricoh GR Digital | User Guide - Page 118
To apply DPOF settings to all your still images, follow the steps below. 1. Press the 6 (Playback) button. 2. Press the M/O button. The Playback menu appears. 3. screen. Note • To remove the DPOF setting from all your still images, select [CANCEL] in step 5. • You can remove all or multiple still - Ricoh GR Digital | User Guide - Page 119
of files. 2 3. Press the !"#$ buttons to select the first still image for which you wish to make the DPOF setting. 4. Press the M/O button " button to decrease it. 7. Press the #$ buttons to select the next still image for which you wish to make the DPOF setting. 8. Press the !" buttons to set - Ricoh GR Digital | User Guide - Page 120
. Note The following types of resizing are possible: Original Resized F3264/F3:2/N3264/N2592/N2048 N1280 N640 N1280 N640 To change the image size, follow the steps below. 1. Press the 6 (Playback) button. 2. Press the M/O button. The Playback Setting menu appears. 3. Press the " button to - Ricoh GR Digital | User Guide - Page 121
a Memory Card (COPY TO CARD) You can copy all movies, still images, and sound data stored in internal memory onto an SD Memory Card at once. 1. Turn the Camera Off. 2. Insert an SD Memory Card. 2 3. Turn the camera on. 4. Press the 6 (Playback) button. 5. Press the M/O button. The Playback - Ricoh GR Digital | User Guide - Page 122
120 - Ricoh GR Digital | User Guide - Page 123
Chapter 3 Changing Camera Settings Changing Camera Settings 122 - Ricoh GR Digital | User Guide - Page 124
Settings SETUP Menu You can change camera settings by displaying the SETUP menu from the OPE. ALERT VOL. LCD CONFIRM. SEQUENTIAL NO. DATE SETTINGS LANGUAGE VIDEO OUT MODE SHTG STGS WARNG. USB CONNECTION ENLGE PHOTO ICON COLOR SPACE SET AF AUX. LIGHT DIGITAL ZOOM ZOOM BTN. SET. REG. MY SETTINGS - Ricoh GR Digital | User Guide - Page 125
Press the $ button. 3 The setup menu appears. 3. Press the !" buttons to select the desired setting. The setting items are provided on 5 screens. Changing Camera Settings When the " button is pressed at the bottom item, the next screen appears. To select a screen by screen number: 1. Press the - Ricoh GR Digital | User Guide - Page 126
and repeat the formatting process again. Note Protecting your images from being deleted If you move the card's write-protection switch to LOCK, your still images cannot be accidentally erased and the card cannot be formatted. If you release the protection (by returning the switch to its original - Ricoh GR Digital | User Guide - Page 127
memory prior to use. Caution Formatting the internal memory erases all of the images recorded in the memory. If you have images that you do not want to erase stored on the internal memory, please contact the Ricoh Service offices prior to formatting it. 3 To format internal memory, follow the steps - Ricoh GR Digital | User Guide - Page 128
Adjusting the Brightness of the LCD Monitor (LCD BRIGHTNESS) To adjust the brightness of the LCD Monitor, follow the steps below. 1. Display the setup menu. For detailed operation, see P.123. 2. Press the " button to select [LCD BRIGHTNESS] and press the $ button. The LCD Brightness Adjustment bar - Ricoh GR Digital | User Guide - Page 129
Changing Camera Settings Setting a Function to the ADJ. dial (ADJ BTN.SET. 1/2) The ADJ. dial allows you to display the exposure correction screen and whitebalance setting screen - Ricoh GR Digital | User Guide - Page 130
on again. Keep pressing the Playback button for more than one second also turns on the camera, allowing you to use the camera in Playback Mode. • The Auto Power-off function does not work when the camera is connected to a computer. • When shooting with Interval Shooting, settings made here are not - Ricoh GR Digital | User Guide - Page 131
when the shutter button is pressed. : When the focus is set, the camera generates the focus sound. : If an impossible operation is attempted, the camera generates the beep sound. Possible Settings 3 SHUTTER (Shutter release sound, Beep Sound) ALL (all sounds on) *Setting upon purchase To change - Ricoh GR Digital | User Guide - Page 132
Changing the Beep Sound Volume (VOL. SETTINGS) The beep sound volume can be changed. Possible Settings (Mute) (Small) (Medium) *Setting upon purchase (Large) To change the beep sound volume, follow the steps below: 1. Display the setup menu. For detailed operation, see P.123. 2. Press the " - Ricoh GR Digital | User Guide - Page 133
Changing Camera Settings Changing Image Confirmation Time (LCD CONFIRM.) Immediately after pressing the shutter button, the still image taken is displayed for a moment so you can check it. At purchase, Confirmation Time is set to one second, but this can be changed. Possible - Ricoh GR Digital | User Guide - Page 134
you can set your camera to continue consecutive numbering from the previously loaded SD Memory Card. Possible Settings ON (Continue numbering) *Setting upon purchase File names will be automatically assigned to still images you take, in the format of "R" followed by 7 digits, from R0010001.jpg to - Ricoh GR Digital | User Guide - Page 135
RICOH Gate La (P.161), designating a file name same as the one that already exists in the destination folder, the file is renamed before saving to avoid overwrite problems. • When an image , no more files can be saved. In this case, move image data 3 from the SD memory card to the Camera Settings 133 - Ricoh GR Digital | User Guide - Page 136
Setting the Date and Time (DATE SETTINGS) You can take still images with the time or date stamped onto the picture. The date/time setting on the SETUP menu is explained here. 1. Display the setup menu. For detailed operation, see P.123. 2. Press the " button to select [DATE SETTINGS] and press the $ - Ricoh GR Digital | User Guide - Page 137
Changing Camera Settings Changing the Display Language (LANGUAGE/ ) You can change the language displayed on the LCD Monitor. Possible Settings ENGLISH Setting upon purchase DEUTSCH FRANÇAIS - Ricoh GR Digital | User Guide - Page 138
the Playback Method for Viewing on TV (VIDEO OUT MODE) You can view your still images and movies on a television screen by connecting your camera to a television with the AV cable that came with your camera. Your camera is set to NTSC video format (used in Japan and other countries) for use with - Ricoh GR Digital | User Guide - Page 139
ISO Setting • Exposure Comp. 3 If you operate a camera button while an icon is blinking, the icon stops blinking and lights steadily. If you operate a camera button during a warning message display, the message disappears. Possible Settings - Ricoh GR Digital | User Guide - Page 140
a USB driver or other Willing to automate downloading to a computer Using Windows 98/98 Second Edition Using Mac OS 8.6 Caution • At [MASS STR], RICOH Gate La cannot be used for image transfer. • At [MASS STR], files can only be read from the camera and cannot be written into or deleted from - Ricoh GR Digital | User Guide - Page 141
the M/O or # button. 3 5. If the # button was pressed in Step 4, press the M/O button. These settings are used until they are changed the next time. Changing Camera Settings Reference For how to transfer images using RICOH Gate La, see P.161. 139 - Ricoh GR Digital | User Guide - Page 142
images in Mass Storage Mode, follow the steps below: 1. Change [USB CONNECTION] to [MASS STR] on the Setup menu. 2. Make sure that the camera power is off. 3. Connect the accessory USB cable to a USB port of your computer. 4. Connect the USB cable to the USB terminal of the camera. The camera - Ricoh GR Digital | User Guide - Page 143
Settings Disconnecting the Camera from Your Computer (Windows) This display is an example for Windows ] is selected and click [OK]. 4. Click [OK]. 5. Unplug the USB cable. Disconnect the Camera from Your Computer (Macintosh) 1. Put the displayed drive in the Recycle Bin. 2. Unplug the USB cable. - Ricoh GR Digital | User Guide - Page 144
White Balance • Focus • Exposure Compensation • ISO Sensitivity If icons are enlarged, the following items are not displayed: • Zoom Bar/Focus Bar • Date/Time • Image Settings To enlarge icons on the shooting screen, follow the steps below: 1. Display the setup menu. For the operating procedure, see - Ricoh GR Digital | User Guide - Page 145
space between sRGB (a standard color space used in the digital world) and Adobe RGB (a color space wider than sRGB). Adobe RGB supported by this camera is compatible with the color space that Adobe Systems Inc. uses for image editing applications such as Photoshop by default. 1. Display the SETUP - Ricoh GR Digital | User Guide - Page 146
and home printers. Adobe RGB covers a color space wider than that of sRGB. In an environment not complying with Abobe RGB, however, images are displayed/printed in faint colors. • Without the application software that can reproduce the Adobe RGB color space correctly, correct color reproduction will - Ricoh GR Digital | User Guide - Page 147
Step 4, press the M/O button. Now you have completed AF auxiliary light setting. These settings are used until they are changed the next time. Changing Camera Settings Note The AF auxiliary lamp goes on when Auto-Focus does not function because of the dark surrounding area. When you fully press - Ricoh GR Digital | User Guide - Page 148
balance function can be assigned to the 8/9 button. 1. Display the setup menu. For the operating procedure, see P.123. 2. Press the " button to select [DIGITAL ZOOM] and press the $ button. 3. Press the !" buttons to select [ON] or [OFF]. 4. Press the M/O or # button. 5. If the # button was pressed - Ricoh GR Digital | User Guide - Page 149
Changing the Zoom Button Setting (ZOOM BTN. SET.) When you do not use digital zooming, you can assign the exposure compensation or white balancing function to the zoom button completed zoom button setting. These settings are used until they are changed the next time. Changing Camera Settings 147 - Ricoh GR Digital | User Guide - Page 150
to be used at power-on. For example, when a digital camera is used in common by multiple persons, each person can use the camera without regard to the settings made by the person who used the camera previously because the camera settings are restored to the administrator settings each time the - Ricoh GR Digital | User Guide - Page 151
[SETTING 2], the camera settings made with the My Setting function are used at power-on even if [RESTORE DEFAULTS] is selected. Settings Retained by My Setting Function PIC QUALITY FOCUS Focal distance used in Manual Focus mode PHOTOMETRY CONT. MODE IMG SET IMAGE WITH SOUND DATE IMPRINT EXPOSURE - Ricoh GR Digital | User Guide - Page 152
150 - Ricoh GR Digital | User Guide - Page 153
Chapter 4 Installing Software Installing the Provided Software (For Windows)..152 Installing the Provided Software (For Macintosh 171 Note The Caplio Software contained on the supplied CD-ROM is used for Ricoh digital camera series, GR DIGITAL and Caplio, in common. - Ricoh GR Digital | User Guide - Page 154
Software (For Windows) You need to install software for transferring images to your computer before you can download images from the camera. Note • If a file on the camera (P.138). Reference For how to download images from the camera into your computer, see the Software User Guide available from the - Ricoh GR Digital | User Guide - Page 155
DeskTopBinder Lite camera and images. P.159 4 Browse User's Manual (Software Version) Use this button to display the Software User Guide (PDF RICOH Gate La ImageMixer USB Driver WIA Driver Windows XP 98 OO OO OO O- Description Downloads images. Shot images can be displayed or edited and - Ricoh GR Digital | User Guide - Page 156
Reference The camera is provided with software ImageMixer that allows you to display and edit images from your computer. For how to use ImageMixer, click the [?] button on the ImageMixer window and see the displayed manual. For more information on the ImageMixer, contact the Customer Support Center - Ricoh GR Digital | User Guide - Page 157
When [Browse User's Manual (Software Version)] is clicked: The Software User Guide (PDF file) on the Caplio Software CD-ROM can be displayed on your computer screen. If you are a Windows user and have Acrobat Reader installed on your computer, simply double-click [View Software User Guide]. If not - Ricoh GR Digital | User Guide - Page 158
it cannot be supported. • Problems may arise due to changes made to the OS, such as through patches or a service package release. • The camera does not support connection to a . Reference For how to download images to your computer using an SD Memory Card, see the Software User Guide. 156 - Ricoh GR Digital | User Guide - Page 159
] screen appearing), simply click [Cancel], and after disconnecting your camera, install the software on your computer. • If a message new one again by following the message instructions. Even with the new Caplio software, however, the image downloading and other functions of the old model - Ricoh GR Digital | User Guide - Page 160
5. Confirm where you want to install and then click [Next]. The [Select Program Folder] screen appears. 6. Confirm where you want to install and then click [Next]. The ImageMixer installer starts. Install ImageMixer following the messages displayed on the screen. When installation of ImageMixer is - Ricoh GR Digital | User Guide - Page 161
For how to use DeskTopBinder Lite, refer to the Beginner's Guide, the Setup Guide, and the DeskTopBinder Lite - Auto Document Link Guide (all PDF files) that are installed with DeskTopBinder Lite. Caution • Do not connect your camera to the computer until indicated. If you happened to connect - Ricoh GR Digital | User Guide - Page 162
by selecting [Optional Settings] on the [RICOH Gate La Settings] menu. (Refer to the Software User Guide.) Before capturing images from the camera, set the date and time using the DATE SETTINGS option of the camera. (P.134) • If you turned off and on the camera connected to the computer with the - Ricoh GR Digital | User Guide - Page 163
Connecting the Camera to Your Computer Downloading Images Using RICOH Gate La After installing the software on your computer, connect your camera to the computer. The following explanation is provided assuming that [ORIGINAL] (default) is selected at [USB CONNECTION] of the camera's Setup menu - Ricoh GR Digital | User Guide - Page 164
For Windows XP The first time you connect your camera to the computer using a USB cable, the [Found New Hardware window is displayed, simply click [Next] to start installation. Reference For how to turn the camera on/off, see P.29. Note By default, the WIA driver is installed in the following location: - Ricoh GR Digital | User Guide - Page 165
GR DIGITAL] screen to be displayed each time you transfer images from the camera, thereby allowing you to choose whether to use RICOH Gate La or the Scanner and Camera Wizard for 4 image the camera, uninstall the software (P.169) and install it again. • When downloading images from the camera, - Ricoh GR Digital | User Guide - Page 166
CONNECTION] to [MASS STR] on the Setup menu. For more details, see P.138. At the time of purchase, [Original] is selected. 2. Make sure that the camera power is off. 3. Connect the accessory USB cable to a USB port of your computer. 4. Connect the USB cable to the USB terminal of your - Ricoh GR Digital | User Guide - Page 167
. 2. Select [USB Large-capacity Storage Device] and click [Stop]. 3. Check that [USB Large-capacity Storage Device] is selected and click [OK]. 4. Click [OK]. 4 Disconnecting the Camera from Your Computer (Macintosh) 1. Put the displayed drive in the Recycle Bin. Installing Software 165 - Ricoh GR Digital | User Guide - Page 168
Memory Card It is possible to download images from an SD memory card to the computer via a PC card slot or card reader. To load an SD memory Card into a PC card slot or card reader, use the PC card adapter. Images in an SD Memory Card Images are stored in an SD Memory - Ricoh GR Digital | User Guide - Page 169
is required to display the operation manual (PDF file). If the computer is running under Windows, Acrobat Reader can be installed. Acrobat Reader need not be installed if already installed on your computer. Caution • Do not install the software when the camera is connected to your computer with - Ricoh GR Digital | User Guide - Page 170
version available on the accompanying CD-ROM. For Windows XP, installation of DirectX is not needed because the updated version is already installed. Caution • Do not install the software when the camera is connected to your computer with a USB cable. • For Windows XP or Windows 2000, Administrator - Ricoh GR Digital | User Guide - Page 171
program before uninstalling. • If you install both the ImageMixer and the DeskTopBinder Lite and then uninstall either one, camera connection to the computer may fail. In this case, uninstall both [Caplio Software] and [Caplio Software S] and then install only the required one. 1. Click [Start] on - Ricoh GR Digital | User Guide - Page 172
Uninstalling the ImageMixer Caution • For Windows 2000/XP, Administrator privileges are required to uninstall the software. • If any other program is active or unsaved data remains, save the data and terminate the program before uninstalling. 1. Click [Start] on the Windows task bar. 2. Select [ - Ricoh GR Digital | User Guide - Page 173
the Provided Software (For Macintosh) You need to install software for transferring images to your computer before you can download images from the camera. Reference For how to download images from the camera into your computer, see the Software User Guide available from the Caplio Software CD-ROM - Ricoh GR Digital | User Guide - Page 174
on the right. Item Name Installing the Software Browse User's Manual (Software Version) Description Use this button to install software required for handling the camera and images. Use this button to display the Software User Guide (PDF). When [Install the Software] is clicked: The following - Ricoh GR Digital | User Guide - Page 175
, or the computer's user manual. Operating System Mac OS Installing Software Caution • Problems may arise due to extended function (PCI bus, etc.) cannot be supported. • If used in conjunction with a hub or download images to your computer using an SD Memory Card, see the Software User Guide. 173 - Ricoh GR Digital | User Guide - Page 176
) the software: To remove (uninstall) the software from your Macintosh, drag and drop the installed file into the Trash. File Name RICOH Gate La RICOH Gate La Prefs Caplio Mounter Caplio Mounter Prefs Caplio USB Driver Caplio Lib Folder Name System Folder: Control Panels System Folder: Preferences - Ricoh GR Digital | User Guide - Page 177
Installing the Software on Your Computer (Mac OS X 10.1.2 to 10.4) 1. Turn on your Macintosh and insert the Caplio CD-ROM in the CD-ROM drive. 2. Open the Mac OS X folder. The [Caplio Mounter.pkg] icon appears. 3. Double-click [Caplio Mounter.pkg]. The Installer starts. A screen appears prompting - Ricoh GR Digital | User Guide - Page 178
7. Click the destination volume you want, and then click [Continue]. 8. Click [Install]. When installation finishes, a message appears to inform you that it is necessary to restart your Macintosh. 9. Click [Continue Installation]. The software is installed, and after a while an Installation Complete - Ricoh GR Digital | User Guide - Page 179
supplied Adobe Photoshop Elements (Trial Version) is digital image editing software. With this software, you can read and follow the steps below. Operating system supported Windows 2000 Professional, Service Pack 4 and later Windows XP Home Edition/Professional, Service Pack 1 and later Mac OS - Ricoh GR Digital | User Guide - Page 180
Systems Inc. • The trial version is offered only for your evaluation. You can use all functions free of charge for 30 days starting from the date of first activation. • Note that no support is provided for the trial version user. 178 - Ricoh GR Digital | User Guide - Page 181
Chapter 5 Troubleshooting Troubleshooting 180 Appendices 187 Caution Never use any battery other than the specified one. Reference For the applicable battery, see P.19. - Ricoh GR Digital | User Guide - Page 182
Troubleshooting Troubleshooting the Camera Power Supply Symptom Cause Remedy Refer to The power Load the battery in correct orientation. P.28 The power cuts out during The camera was left unattended and Turn on the camera again. P.29 use. unused, so Auto Power-Off shut it off. Batteries - Ricoh GR Digital | User Guide - Page 183
to confirm the shot The image confirmation time is too Lengthen the image confirmation time. P.131 5 image. short. Images do not appear on The Manual Focus. P.40 P.74 A picture is blurred. You moved the camera when Hold the camera with your elbows tight P.34 pressing the shutter release - Ricoh GR Digital | User Guide - Page 184
monitor is Adjust the brightness of the LCD not appropriate. Monitor. P.126 The image is too dark. The shot was taken in a dark place Deselect the Flash a White Balance setting other to adjust to. than Auto. The date, or recording information does not appear. The screen display function is - Ricoh GR Digital | User Guide - Page 185
the protection. The SD Memory Card is "locked". Release the "Lock (write-protection)". The SD Memory Card is "locked". Release the "Lock (write-protection)". P.29 P.112 P.22 P.22 About the Software For details about the software, refer to the Software User Guide (PDF file). Troubleshooting 183 - Ricoh GR Digital | User Guide - Page 186
, the date setting will be lost. Make the settings again. P.134 Auto Power-Off does not Auto Power-Off is set to OFF. work. Set the time for Auto Power-Off. P.128 The beep does not sound. The camera is set to silent. Mute is set at [Volume Setting]. P.130 Images do not - Ricoh GR Digital | User Guide - Page 187
Troubleshooting Warning Messages Under Windows XP Service Pack 2 When software for Ricoh's digital camera is used on a PC with Windows XP Service Pack 2 installed, the following warning message may appear at software activation or USB connection. With this in mind, refer to the following: 1. Check - Ricoh GR Digital | User Guide - Page 188
, click [Switch to Classic Display] at the upper left of the window. 3. Click the [Exceptions] tab. 4. Check that the software is in [Programs and Services]. 5. Click the [Add Program] button to add software that uses the network. If you clicked the [Ask Me Later] button: Each time the program is - Ricoh GR Digital | User Guide - Page 189
°C to 60 °C Camera Parts Image Pickup Used Lens • Lens • Focal Length • Shooting distance • Macro shooting distance • Digital Zoom Monitor Display Parts AUTO/Fixed (Daylight, Overcast, Tungsten light, Fluorescent light, Manual Setting, Detail) Multi Light Metering (256 segments), Center-weighted - Ricoh GR Digital | User Guide - Page 190
Modes • Date Maintain Time AUTO, ISO64, ISO100, ISO200, ISO400, ISO800, ISO1600 5: F2.4, F3.5, F7.1, F10, F11 (F7.1 to F11 with ND filter) P, A, for "Design rule for Camera File system", a JEITA standard) Compression Format JPEG Baseline Format Compliant (Still, Movie) Image Size • 3264 X - Ricoh GR Digital | User Guide - Page 191
FLASH OFF as the flash mode of the built-in flash. (P.44) 2. Turn off the camera and flash. 3. Attach the external flash to the hot shoe on the camera. 4. Turn on the external flash. 5. Turn on the camera. 6. Make sure that the external flash icon is displayed on the LCD monitor. Caution If - Ricoh GR Digital | User Guide - Page 192
], 160 [MULTI AF], SPOT AF, MF, SNAP, ∞ [AUTO], (Daylight), (Overcast), (Tungsten light), (Fluorescent light), (Manual Setting), (Detail) Refer to P.69 P.74 P.88 Shooting Menu (Text Mode) Setting DENSITY SIZE IMAGE WITH SOUND DATE IMPRINT Option DEEP, [NORMAL], LIGHT 3264, [2048] ON, [OFF] [OFF - Ricoh GR Digital | User Guide - Page 193
O COLOR SPACE SET O DIGITAL ZOOM O AF AUX. LIGHT O PIC QUALITY/SIZE O MOVIE SIZE (Movie Mode) O SIZE (Text Mode) O DENSITY (Text Mode) O FOCUS O PHOTOMETRY O CONT. MODE X IMG SET O AUTO BRACKET X INTERVAL X IMAGE WITH SOUND X DATE IMPRINT O EXPOSURE COMP. O WHITE - Ricoh GR Digital | User Guide - Page 194
Card The following table shows the approximate number of images that can be recorded onto an SD memory card at various image size and picture quality settings. Mode Picture Quality Image Size IN 32MB 64MB 128MB 256MB 512MB 1GB Still Image TEXT MODE Movie Sound (Voice Memo) RAW 3264 X 2448 - Ricoh GR Digital | User Guide - Page 195
pushbutton allows you to perform various camera operations. Operations that can be performed ADJ. mode Aperture Priority mode Manual exposure mode Program Shift mode image. * When the image is switched to the previous/next image on the enlarged playback screen, the previous/next image - Ricoh GR Digital | User Guide - Page 196
are abroad, the manufacturer assumes no responsibility for servicing the product locally or bearing the expenditure incurred therefore video cable provided. This camera is compatible with both NTSC and PAL television formats. Switch the video format on the camera to match the television environment - Ricoh GR Digital | User Guide - Page 197
monitor or panel is exposed to sunlight, they may become washed out and images may become hard to view. • The LCD monitor and panel may contain some in the camera, resulting in troubles such as fogging of the glass surface or malfunctions of the camera. If this occurs, place the camera in a bag - Ricoh GR Digital | User Guide - Page 198
off particularly carefully. • In the unlikely event that your camera fails to work properly, please consult your Ricoh Repair Center. • There are high voltage circuits in this camera. As this is dangerous, do not dismantle this camera under any circumstances. • Do not get volatile substances, such - Ricoh GR Digital | User Guide - Page 199
date is not set. Set the date. MENU P.134 FILE NUMBER OVER The file number limit has been exceeded. Please use another card, or delete unwanted files. P.132 UNMATCHED FILE The camera P.56, P.124, P.125 The image print number limit has been exceeded. Select an image and set the number to 0. - Ricoh GR Digital | User Guide - Page 200
the instruction manual again to ensure proper operation. • Some repairs require a significant amount of time to be completed. • When sending the camera to a service center, please include a note which describes the defective part and the problem as precisely as possible. • Remove all accessories not - Ricoh GR Digital | User Guide - Page 201
to a host computer in order to comply with FCC emission limits. (FCC 15.27) An AC adapter with a ferrite core must be used for RF interference suppression. COMPLIANCE INFORMATION STATEMENT Product Name: DIGITAL CAMERA Model Number: GR DIGITAL This device complies with Part 15 of the FCC Rules - Ricoh GR Digital | User Guide - Page 202
-Shot 101 COPY TO CARD 119 D DATE IMPRINT 86 DENSITY 93 Direct Print 60 Grid Guide 32 H Half-press 37 Handstrap 10 How to Hold the Camera 34 I Image Size 69 IMAGE WITH Trouble 180 Troubleshooting 180 U Uninstalling 169 USB Cable 10 USB Driver 153, 154, 171 W Warranty and Servicing - Ricoh GR Digital | User Guide - Page 203
Telephone Support Numbers in Europe UK (from within the UK) 02073 656 580 (from outside of the UK) +44 2073 656 580 Deutschland (innerhalb fuera de España) +34 91 406 9148 Nederland (binnen Nederland) 0800 022 9494 (vanuit het buitenland) +49 6331 268 443 http://www.service.ricohpmmc.com/ - Ricoh GR Digital | User Guide - Page 204
environmental loads of digital cameras, Ricoh is also trying to solve the great subjects of "Saving energy by reducing power consumption" and "Reducing environment-effecting chemical substances contained in products". If a problem arises First of all, see "Troubleshooting" in this manual. If the
-
 1
1 -
 2
2 -
 3
3 -
 4
4 -
 5
5 -
 6
6 -
 7
7 -
8
-
9
-
10
-
11
-
12
-
13
-
14
-
15
-
16
-
17
-
18
-
19
-
20
-
21
-
22
-
23
-
24
-
25
-
26
-
27
-
28
-
29
-
30
-
31
-
32
-
33
-
34
-
35
-
36
-
37
-
38
-
39
-
40
-
41
-
42
-
43
-
44
-
45
-
46
-
47
-
48
-
49
-
50
-
51
-
52
-
53
-
54
-
55
-
56
-
57
-
58
-
59
-
60
-
61
-
62
-
63
-
64
-
65
-
66
-
67
-
68
-
69
-
70
-
71
-
72
-
73
-
74
-
75
-
76
-
77
-
78
-
79
-
80
-
81
-
82
-
83
-
84
-
85
-
86
-
87
-
88
-
89
-
90
-
91
-
92
-
93
-
94
-
95
-
96
-
97
-
98
-
99
-
100
-
101
-
102
-
103
-
104
-
105
-
106
-
107
-
108
-
109
-
110
-
111
-
112
-
113
-
114
-
115
-
116
-
117
-
118
-
119
-
120
-
121
-
122
-
123
-
124
-
125
-
126
-
127
-
128
-
129
-
130
-
131
-
132
-
133
-
134
-
135
-
136
-
137
-
138
-
139
-
140
-
141
-
142
-
143
-
144
-
145
-
146
-
147
-
148
-
149
-
150
-
151
-
152
-
153
-
154
-
155
-
156
-
157
-
158
-
159
-
160
-
161
-
162
-
163
-
164
-
165
-
166
-
167
-
168
-
169
-
170
-
171
-
172
-
173
-
174
-
175
-
176
-
177
-
178
-
179
-
180
-
181
-
182
-
183
-
184
-
185
-
186
-
187
-
188
-
189
-
190
-
191
-
192
-
193
-
194
-
195
-
196
-
197
-
198
-
199
-
200
-
201
-
202
-
203
-
204
 |
 |
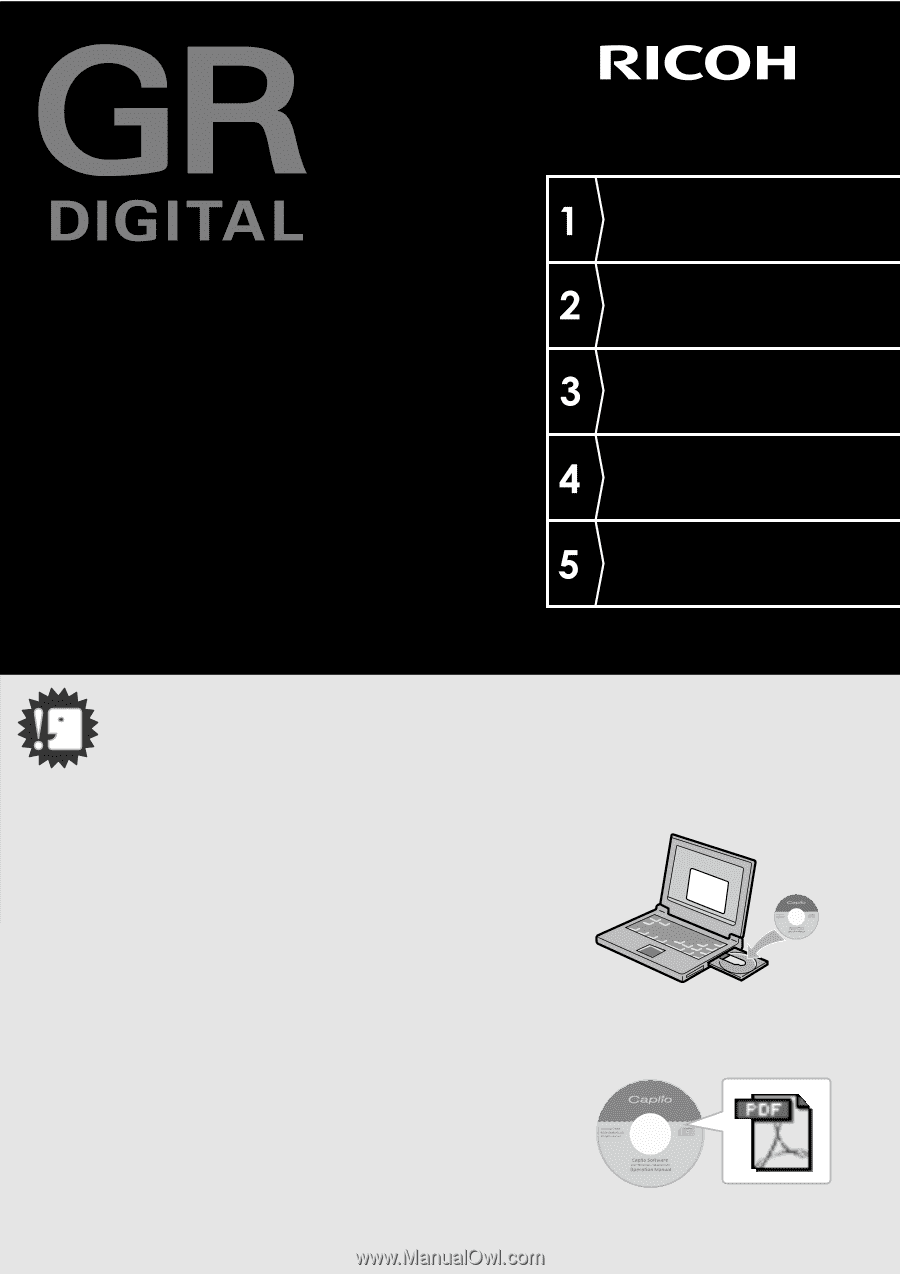
Do not connect the USB cable yet!
If you connect the camera to a computer through the
USB cable before installing the provided software on the
computer, the software required for connection between
camera and computer may not be installed
appropriately.
Be sure to connect the camera to your computer after
installing the provided software.
For how to install the software, see P.152.
About other documentation
Detailed explanations on how to use the provided
software can be found in "Software User Guide" (PDF
format file) included on the supplied CD-ROM.
For how to display the PDF file, see P.167.
The CD-ROM also contains English version of Camera
User Guide and Software User Guide in PDF format.
Camera User Guide
Caution!
Quick Guide
A Variety of Shooting
Techniques/Playback
Changing Camera
Settings
Installing Software
Troubleshooting
The serial number of this product is given
on the bottom face of the camera.