Ricoh GR Digital User Guide - Page 92
Setting the White Balance Detail
 |
UPC - 026649732430
View all Ricoh GR Digital manuals
Add to My Manuals
Save this manual to your list of manuals |
Page 92 highlights
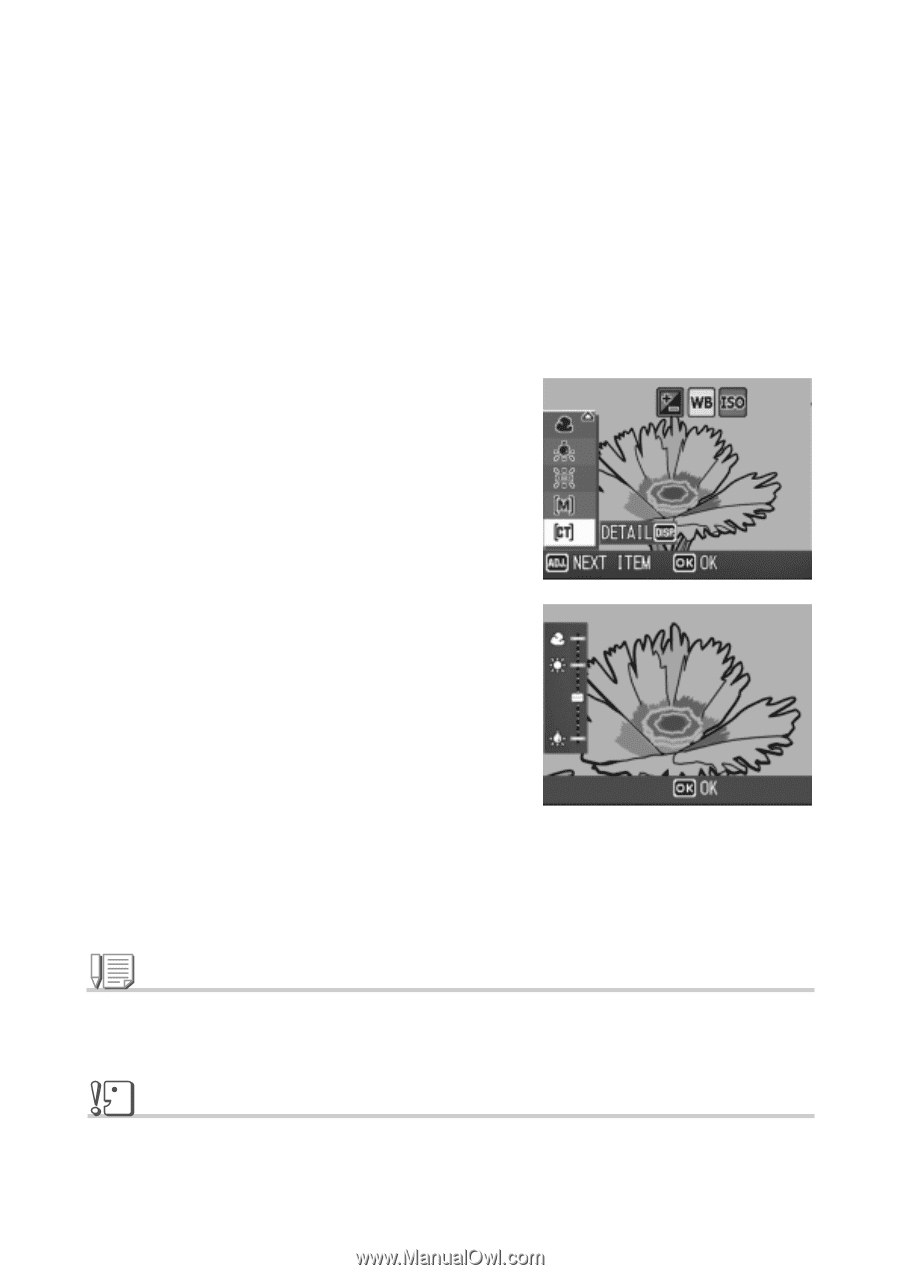
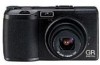
Setting the White Balance (Detail) 1. Make sure the camera power is on and turn the mode dial to 5, P, A or M. 2. Press the ADJ. dial. The camera enters the ADJ. mode. 3. Turn the ADJ. dial. 4. Press the #$ buttons until the White Balance menu appears. 5. Press the !" button to select [Detail] and press the DISP. button. The Detail Setting menu appears. 6. Press the !" buttons to select an White Balance. 7. Press the M/O button. 8. Press the M/O button. The setting of white balance is completed and the LCD monitor displays a marking. This setting will be used for shooting until you change it. Note In Auto Mode, white balance may not be adjusted correctly for a subject that is mostly dark. In this case, add something white as the subject. Caution When shooting with flash, white balance may not be adjusted correctly. In this case, switch to Auto Mode for shooting with flash. 90
-
 1
1 -
2
-
3
-
4
-
5
-
6
-
7
-
8
-
9
-
10
-
11
-
12
-
13
-
14
-
15
-
16
-
17
-
18
-
19
-
20
-
21
-
22
-
23
-
24
-
25
-
26
-
27
-
28
-
29
-
30
-
31
-
32
-
33
-
34
-
35
-
36
-
37
-
38
-
39
-
40
-
41
-
42
-
43
-
44
-
45
-
46
-
47
-
48
-
49
-
50
-
51
-
52
-
53
-
54
-
55
-
56
-
57
-
58
-
59
-
60
-
61
-
62
-
63
-
64
-
65
-
66
-
67
-
68
-
69
-
70
-
71
-
72
-
73
-
74
-
75
-
76
-
77
-
78
-
79
-
80
-
81
-
82
-
83
-
84
-
85
-
86
-
 87
87 -
 88
88 -
 89
89 -
 90
90 -
 91
91 -
 92
92 -
 93
93 -
 94
94 -
 95
95 -
 96
96 -
 97
97 -
98
-
99
-
100
-
101
-
102
-
103
-
104
-
105
-
106
-
107
-
108
-
109
-
110
-
111
-
112
-
113
-
114
-
115
-
116
-
117
-
118
-
119
-
120
-
121
-
122
-
123
-
124
-
125
-
126
-
127
-
128
-
129
-
130
-
131
-
132
-
133
-
134
-
135
-
136
-
137
-
138
-
139
-
140
-
141
-
142
-
143
-
144
-
145
-
146
-
147
-
148
-
149
-
150
-
151
-
152
-
153
-
154
-
155
-
156
-
157
-
158
-
159
-
160
-
161
-
162
-
163
-
164
-
165
-
166
-
167
-
168
-
169
-
170
-
171
-
172
-
173
-
174
-
175
-
176
-
177
-
178
-
179
-
180
-
181
-
182
-
183
-
184
-
185
-
186
-
187
-
188
-
189
-
190
-
191
-
192
-
193
-
194
-
195
-
196
-
197
-
198
-
199
-
200
-
201
-
202
-
203
-
204
 |
 |