Ricoh GR Digital User Guide - Page 83
Shooting Consecutively with Different White, Balance WHITE BALANCE BRACKET
 |
UPC - 026649732430
View all Ricoh GR Digital manuals
Add to My Manuals
Save this manual to your list of manuals |
Page 83 highlights
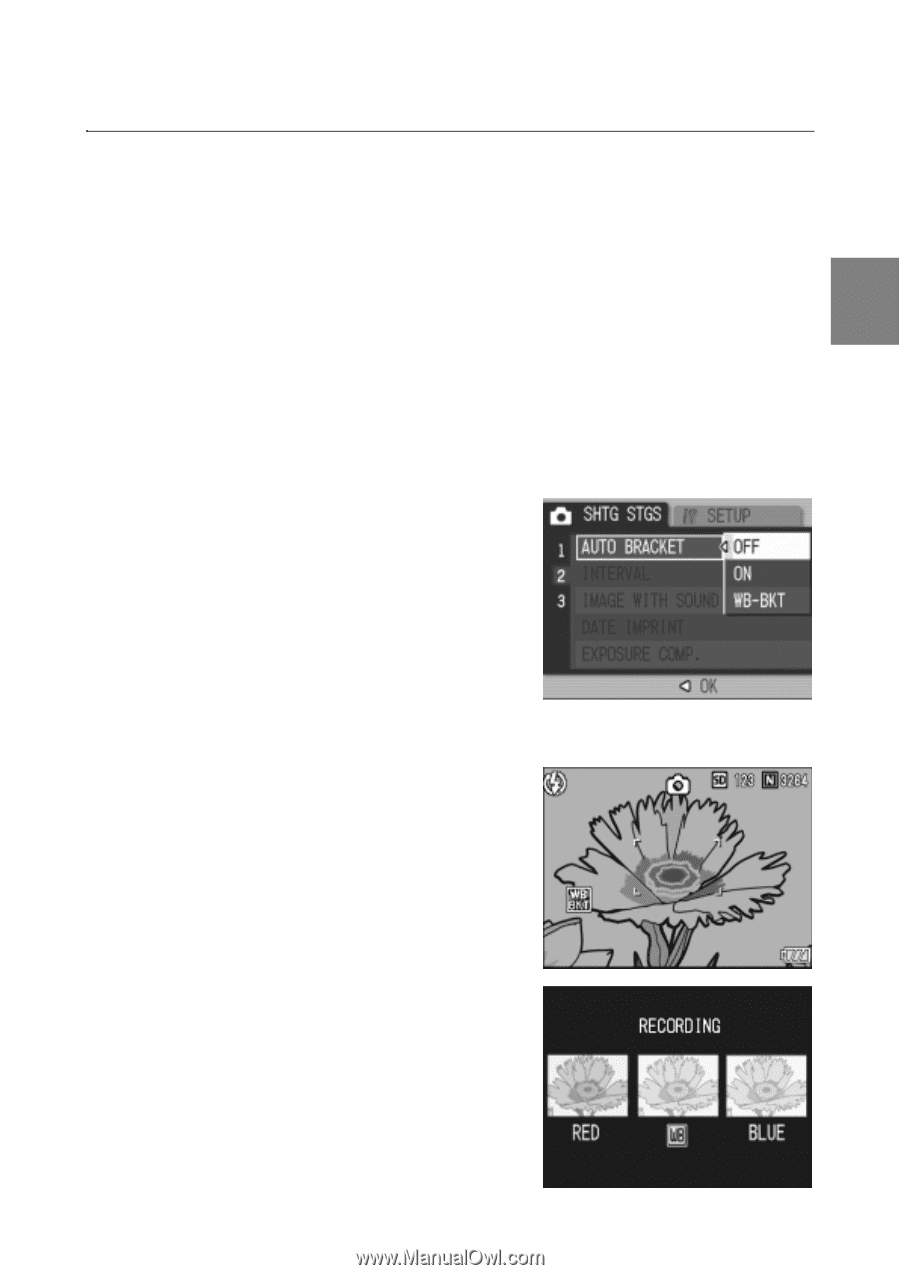
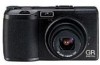
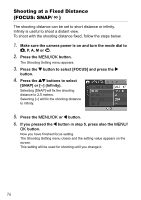
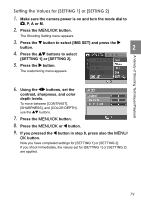
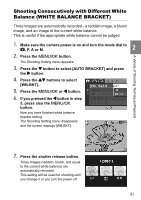
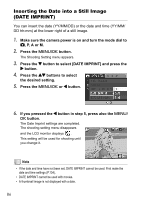
A Variety of Shooting Techniques/Playback Shooting Consecutively with Different White Balance (WHITE BALANCE BRACKET) Three images are automatically recorded - a reddish image, a bluish image, and an image of the current white balance. This is useful if the appropriate white balance cannot be judged. 2 1. Make sure the camera power is on and turn the mode dial to 5, P, A or M. 2. Press the M/O button. The Shooting Setting menu appears. 3. Press the " button to select [AUTO BRACKET] and press the $ button. 4. Press the !" buttons to select [WB-BKT]. 5. Press the M/O or # button. 6. If you pressed the # button in step 5, press also the M/O button. Now you have finished white balance bracket setting. The Shooting Setting menu disappears and the screen displays [WB-BKT]. 7. Press the shutter release button. Three images (reddish, bluish, and equal to the current white balance) are automatically recorded. This setting will be used for shooting until you change it or you turn the power off. 81
-
 1
1 -
2
-
3
-
4
-
5
-
6
-
7
-
8
-
9
-
10
-
11
-
12
-
13
-
14
-
15
-
16
-
17
-
18
-
19
-
20
-
21
-
22
-
23
-
24
-
25
-
26
-
27
-
28
-
29
-
30
-
31
-
32
-
33
-
34
-
35
-
36
-
37
-
38
-
39
-
40
-
41
-
42
-
43
-
44
-
45
-
46
-
47
-
48
-
49
-
50
-
51
-
52
-
53
-
54
-
55
-
56
-
57
-
58
-
59
-
60
-
61
-
62
-
63
-
64
-
65
-
66
-
67
-
68
-
69
-
70
-
71
-
72
-
73
-
74
-
75
-
76
-
77
-
 78
78 -
 79
79 -
 80
80 -
 81
81 -
 82
82 -
 83
83 -
 84
84 -
 85
85 -
 86
86 -
 87
87 -
 88
88 -
89
-
90
-
91
-
92
-
93
-
94
-
95
-
96
-
97
-
98
-
99
-
100
-
101
-
102
-
103
-
104
-
105
-
106
-
107
-
108
-
109
-
110
-
111
-
112
-
113
-
114
-
115
-
116
-
117
-
118
-
119
-
120
-
121
-
122
-
123
-
124
-
125
-
126
-
127
-
128
-
129
-
130
-
131
-
132
-
133
-
134
-
135
-
136
-
137
-
138
-
139
-
140
-
141
-
142
-
143
-
144
-
145
-
146
-
147
-
148
-
149
-
150
-
151
-
152
-
153
-
154
-
155
-
156
-
157
-
158
-
159
-
160
-
161
-
162
-
163
-
164
-
165
-
166
-
167
-
168
-
169
-
170
-
171
-
172
-
173
-
174
-
175
-
176
-
177
-
178
-
179
-
180
-
181
-
182
-
183
-
184
-
185
-
186
-
187
-
188
-
189
-
190
-
191
-
192
-
193
-
194
-
195
-
196
-
197
-
198
-
199
-
200
-
201
-
202
-
203
-
204
 |
 |