Ricoh GR Digital User Guide - Page 97
Using the Self-Timer
 |
UPC - 026649732430
View all Ricoh GR Digital manuals
Add to My Manuals
Save this manual to your list of manuals |
Page 97 highlights
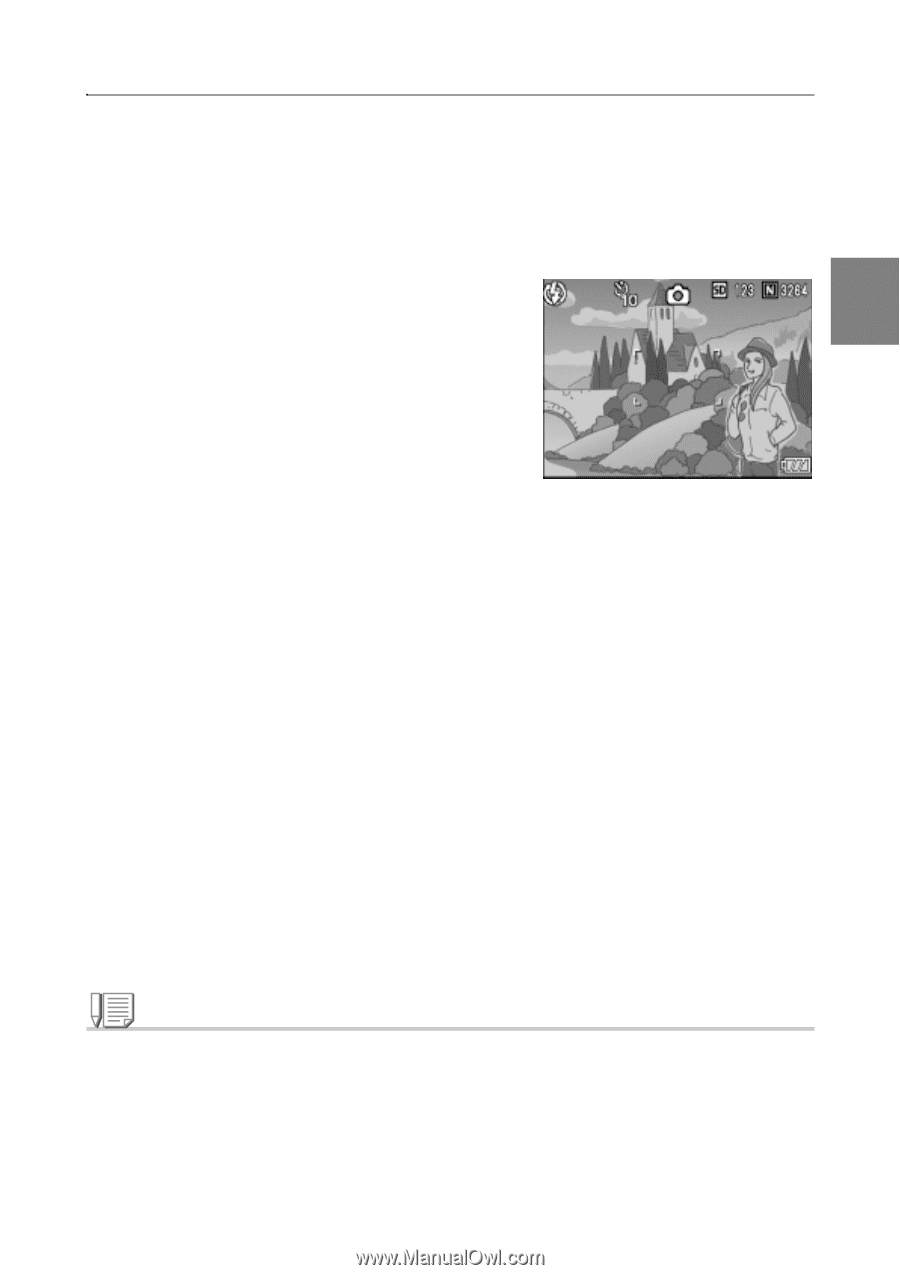
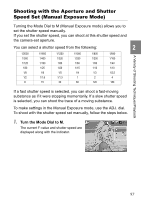
Using the Self-Timer You can set the Self-timer to shoot after either two or ten seconds. A setting of two seconds is useful for preventing camera shake. 1. Make sure the camera power is on and turn the mode dial to 5, P, A, M or 4. 2. Press the T (Self-timer) button. 2 The Self Timer mark appears. The "10" to the right of the symbol indicates the number of seconds. In this case, if you press the shutter button, the camera will shoot after 10 seconds. 3. Press the shutter release button. The focus is locked, the auxiliary light goes on, and the self-timer starts. Once the picture is taken, the self-timer mode is cleared. A Variety of Shooting Techniques/Playback Note • Each press of the T (Self-timer) button, it selects a function in the following sequence: 10 sec, 2 sec, Self-timer Off, 10 sec, 2 sec. • Self-timer settings are released when the power is turned off. • When the self-timer is set to 2 seconds, the AF auxiliary light for self-timer display does not go on. 95
-
 1
1 -
2
-
3
-
4
-
5
-
6
-
7
-
8
-
9
-
10
-
11
-
12
-
13
-
14
-
15
-
16
-
17
-
18
-
19
-
20
-
21
-
22
-
23
-
24
-
25
-
26
-
27
-
28
-
29
-
30
-
31
-
32
-
33
-
34
-
35
-
36
-
37
-
38
-
39
-
40
-
41
-
42
-
43
-
44
-
45
-
46
-
47
-
48
-
49
-
50
-
51
-
52
-
53
-
54
-
55
-
56
-
57
-
58
-
59
-
60
-
61
-
62
-
63
-
64
-
65
-
66
-
67
-
68
-
69
-
70
-
71
-
72
-
73
-
74
-
75
-
76
-
77
-
78
-
79
-
80
-
81
-
82
-
83
-
84
-
85
-
86
-
87
-
88
-
89
-
90
-
91
-
 92
92 -
 93
93 -
 94
94 -
 95
95 -
 96
96 -
 97
97 -
 98
98 -
 99
99 -
 100
100 -
 101
101 -
 102
102 -
103
-
104
-
105
-
106
-
107
-
108
-
109
-
110
-
111
-
112
-
113
-
114
-
115
-
116
-
117
-
118
-
119
-
120
-
121
-
122
-
123
-
124
-
125
-
126
-
127
-
128
-
129
-
130
-
131
-
132
-
133
-
134
-
135
-
136
-
137
-
138
-
139
-
140
-
141
-
142
-
143
-
144
-
145
-
146
-
147
-
148
-
149
-
150
-
151
-
152
-
153
-
154
-
155
-
156
-
157
-
158
-
159
-
160
-
161
-
162
-
163
-
164
-
165
-
166
-
167
-
168
-
169
-
170
-
171
-
172
-
173
-
174
-
175
-
176
-
177
-
178
-
179
-
180
-
181
-
182
-
183
-
184
-
185
-
186
-
187
-
188
-
189
-
190
-
191
-
192
-
193
-
194
-
195
-
196
-
197
-
198
-
199
-
200
-
201
-
202
-
203
-
204
 |
 |