Samsung HMX-S10BN User Manual (user Manual) (ver.1.0) (English, Spanish) - Page 134
Modo Storage Almacen., Utilizaci, n del dispositivo almacenador de datos, Storage Mode, Using as
 |
UPC - 036725303263
View all Samsung HMX-S10BN manuals
Add to My Manuals
Save this manual to your list of manuals |
Page 134 highlights
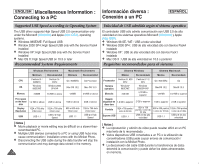
ENGLISH Storage Mode: Using as a Mass Storage Device Modo Storage (Almacen.) : ESPAÑOL Utilización del dispositivo almacenador de datos Using as a Mass Storage Device Utilización del dispositivo almacenador de datos You can use your Miniket Photo as a mass storage device. 1. Connect the Miniket Photo to the PC with the provided USB cable as shown in the figure. 2. Turn on your PC. 3. Turn the Mode Dial to Storage mode. 4. Press the [POWER] button to turn on the Miniket Photo. 5. Set the desired memory type on the PC. N Windows XP:Dialog windows may pop up overlapped. Locate the or recognised by the PC and then double-click it. . N Other than Windows XP: It appears to have two instances of "Removable Disk". If it displays D and E drives as removable disks, D is the mini SD Memory Card and E is the internal memory. 6. Copy files into the destination folder. N In Windows XP Internal Memory: - External Memory (mini SD Card): 7. When finished, disconnect the cable. [ Warning ] ✤ You cannot create a new folder on your Miniket Photo set. ✤ If you create a new folder on your mini SD card using a PC, it will not appear on the set. [ Notes ] ✤ Disconnecting the USB cable while the data transfer will stop the data transfer and might damage the data stored. ✤ Multiple USB devices connected to a PC or using USB hubs may cause communication / installation errors with the Miniket Photo. ✤ Pop up dialogs will appear differently whether the memory has files 134 or not. Puede utilizar la Miniket Photo como un dispositivo almacenador de datos USB. 1. Conecte la Miniket Photo al PC con el cable USB suministrado como se muestra en la figura. 2. Encienda el PC. 3. Gire el Dial de modo a Storage (Almacen.). 4. Pulse el botón [POWER] (ENC.) para encender la Miniket Photo. 5. Defina en el PC el tipo de memoria que desea. N Windows XP: es posible que aparezcan solapadas las ventanas de diálogo. Localice o (Dispositivo de almacenamiento extraíble) reconocido por el PC y haga doble clic en él. N Otros que no sean Windows XP: parece tener dos casos de "Disco extraíble". Si muestra las unidades D y E como discos extraíbles, D es la tarjeta de memoria mini SD y E es la memoria interna. 6. Copie los archivos en la carpeta de destino. N En Windows XP, Memoria interna: - Memoria interna (tarjeta mini SD): - 7. Al finalizar, desconecte el cable. [ Advertencia ] ✤ No es posible crear una nueva carpeta en el equipo de la Miniket Photo. ✤ Si crea una nueva carpeta en la tarjeta de memoria utilizando un PC, no aparecerá en el equipo. [ Notas ] ✤ Desconectar el cable USB mientras se transfieren datos detendrá la transferencia de datos y podría dañar los datos almacenados. ✤ Varios dispositivos USB conectados a un PC o la utilización de concentradores USB pueden causar errores de comunicación / instalación con la Miniket Photo. ✤ Los diálogos emergentes aparecerán de forma diferente si la memoria tiene o no archivos.
-
 1
1 -
2
-
3
-
4
-
5
-
6
-
7
-
8
-
9
-
10
-
11
-
12
-
13
-
14
-
15
-
16
-
17
-
18
-
19
-
20
-
21
-
22
-
23
-
24
-
25
-
26
-
27
-
28
-
29
-
30
-
31
-
32
-
33
-
34
-
35
-
36
-
37
-
38
-
39
-
40
-
41
-
42
-
43
-
44
-
45
-
46
-
47
-
48
-
49
-
50
-
51
-
52
-
53
-
54
-
55
-
56
-
57
-
58
-
59
-
60
-
61
-
62
-
63
-
64
-
65
-
66
-
67
-
68
-
69
-
70
-
71
-
72
-
73
-
74
-
75
-
76
-
77
-
78
-
79
-
80
-
81
-
82
-
83
-
84
-
85
-
86
-
87
-
88
-
89
-
90
-
91
-
92
-
93
-
94
-
95
-
96
-
97
-
98
-
99
-
100
-
101
-
102
-
103
-
104
-
105
-
106
-
107
-
108
-
109
-
110
-
111
-
112
-
113
-
114
-
115
-
116
-
117
-
118
-
119
-
120
-
121
-
122
-
123
-
124
-
125
-
126
-
127
-
128
-
 129
129 -
 130
130 -
 131
131 -
 132
132 -
 133
133 -
 134
134 -
 135
135 -
 136
136 -
 137
137 -
 138
138 -
 139
139 -
140
-
141
-
142
-
143
-
144
-
145
-
146
-
147
-
148
-
149
-
150
-
151
-
152
-
153
-
154
-
155
-
156
 |
 |
