Samsung SCH-R680 User Manual (user Manual) (ver.ei22) (English(north America)) - Page 75
Email, Gallery, Google Search, Latitude
 |
View all Samsung SCH-R680 manuals
Add to My Manuals
Save this manual to your list of manuals |
Page 75 highlights
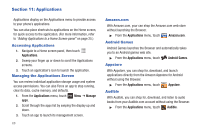
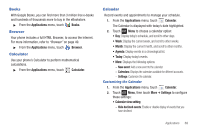
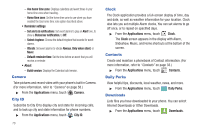
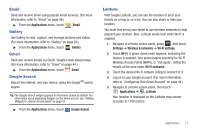
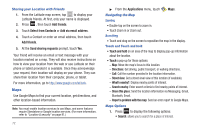
Email Send and receive email using popular email services. (For more information, refer to "Email" on page 46.) ᮣ From the Applications menu, touch Email. Gallery Use Gallery to view, capture, and manage pictures and videos. (For more information, refer to "Gallery" on page 60.) ᮣ From the Applications menu, touch Gallery. Gmail Send and receive emails via Gmail, Google's web-based email. (For more information, refer to "Gmail" on page 44.) ᮣ From the Applications menu, touch Gmail. Google Search Search the internet, and your device, using the GoogleTM search engine. Tip: The Google Search widget appears on the Home screen by default. For information about displaying widgets on the Home screen, see "Adding Widgets to a Home Screen panel" on page 23. ᮣ From the Applications menu, touch Google Search. Latitude With Google Latitude, you can see the location of all of your friends on a map or on a list. You can also share or hide your location. You must first set up your tablet to use wireless networks to help pinpoint your location. Also, Latitude works best when Wi-Fi is enabled. 1. Navigate to a Home screen panel, press , then touch Settings ➔ Wireless & networks ➔ Wi-Fi settings. 2. Touch Wi-Fi. A green check mark appears, indicating the feature is enabled. Your phone begins scanning for Wi-Fi Wireless Access Points (WAPs), or "hot spots", listing the results of the scan under Wi-Fi networks. 3. Touch the desired Wi-Fi network listing to connect to it. 4. Log on to your Google account. (For more information, refer to "Configuring Your Gmail Account" on page 44.) 5. Navigate to a Home screen panel, then touch Applications ➔ Latitude. Your location is displayed on the Latitude map screen, accurate to 1700 meters. Applications 71
-
 1
1 -
2
-
3
-
4
-
5
-
6
-
7
-
8
-
9
-
10
-
11
-
12
-
13
-
14
-
15
-
16
-
17
-
18
-
19
-
20
-
21
-
22
-
23
-
24
-
25
-
26
-
27
-
28
-
29
-
30
-
31
-
32
-
33
-
34
-
35
-
36
-
37
-
38
-
39
-
40
-
41
-
42
-
43
-
44
-
45
-
46
-
47
-
48
-
49
-
50
-
51
-
52
-
53
-
54
-
55
-
56
-
57
-
58
-
59
-
60
-
61
-
62
-
63
-
64
-
65
-
66
-
67
-
68
-
69
-
 70
70 -
 71
71 -
 72
72 -
 73
73 -
 74
74 -
 75
75 -
 76
76 -
 77
77 -
 78
78 -
 79
79 -
 80
80 -
81
-
82
-
83
-
84
-
85
-
86
-
87
-
88
-
89
-
90
-
91
-
92
-
93
-
94
-
95
-
96
-
97
-
98
-
99
-
100
-
101
-
102
-
103
-
104
-
105
-
106
-
107
-
108
-
109
-
110
-
111
-
112
-
113
-
114
-
115
-
116
-
117
-
118
-
119
-
120
-
121
-
122
-
123
-
124
-
125
-
126
-
127
-
128
-
129
-
130
-
131
-
132
-
133
-
134
-
135
-
136
-
137
-
138
-
139
-
140
-
141
 |
 |
