Xerox 6015/NI User Guide - Page 109
Scanning to a Folder on a USB Connected Computer
 |
View all Xerox 6015/NI manuals
Add to My Manuals
Save this manual to your list of manuals |
Page 109 highlights
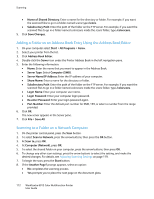
Scanning Scanning to a Folder on a USB Connected Computer 1. Start Express Scan Manager: Windows: Click Start > Programs > Xerox. Select your printer from the list. Double-click Express Scan Manager. Macintosh: Navigate to Applications > Xerox. Select your printer from the list. Double-click Express Scan Manager. 2. Click OK to accept the default Destination Path folder, or click Browse to navigate to another folder. 3. Press OK. 4. Load the original on the document glass or in the automatic document feeder. 5. On the printer control panel, press the Scan button. 6. To select Scan to Computer (USB), press the arrow buttons, then press OK. 7. To change any of the options, press the arrow buttons to select the option, then press OK. 8. To begin the scan, press the arrow buttons to select Scan to, then press Start. An Express Scan Manager dialog box opens on your computer to indicate the progress. The printer scans your documents to the output destination specified in Express Scan Manager. WorkCentre 6015 Color Multifunction Printer 109 User Guide
-
 1
1 -
2
-
3
-
4
-
5
-
6
-
7
-
8
-
9
-
10
-
11
-
12
-
13
-
14
-
15
-
16
-
17
-
18
-
19
-
20
-
21
-
22
-
23
-
24
-
25
-
26
-
27
-
28
-
29
-
30
-
31
-
32
-
33
-
34
-
35
-
36
-
37
-
38
-
39
-
40
-
41
-
42
-
43
-
44
-
45
-
46
-
47
-
48
-
49
-
50
-
51
-
52
-
53
-
54
-
55
-
56
-
57
-
58
-
59
-
60
-
61
-
62
-
63
-
64
-
65
-
66
-
67
-
68
-
69
-
70
-
71
-
72
-
73
-
74
-
75
-
76
-
77
-
78
-
79
-
80
-
81
-
82
-
83
-
84
-
85
-
86
-
87
-
88
-
89
-
90
-
91
-
92
-
93
-
94
-
95
-
96
-
97
-
98
-
99
-
100
-
101
-
102
-
103
-
 104
104 -
 105
105 -
 106
106 -
 107
107 -
 108
108 -
 109
109 -
 110
110 -
 111
111 -
 112
112 -
 113
113 -
 114
114 -
115
-
116
-
117
-
118
-
119
-
120
-
121
-
122
-
123
-
124
-
125
-
126
-
127
-
128
-
129
-
130
-
131
-
132
-
133
-
134
-
135
-
136
-
137
-
138
-
139
-
140
-
141
-
142
-
143
-
144
-
145
-
146
-
147
-
148
-
149
-
150
-
151
-
152
-
153
-
154
-
155
-
156
-
157
-
158
-
159
-
160
-
161
-
162
-
163
-
164
-
165
-
166
-
167
-
168
-
169
-
170
-
171
-
172
-
173
-
174
-
175
-
176
-
177
-
178
-
179
-
180
-
181
-
182
-
183
-
184
-
185
-
186
-
187
-
188
-
189
-
190
-
191
-
192
-
193
-
194
-
195
-
196
-
197
-
198
-
199
-
200
-
201
-
202
-
203
-
204
-
205
-
206
-
207
-
208
-
209
-
210
-
211
-
212
-
213
-
214
 |
 |
