Xerox 6015/NI User Guide - Page 133
Faxing to an Individual in the Address Book, Specify an Address Number, Group Membership, Save All
 |
View all Xerox 6015/NI manuals
Add to My Manuals
Save this manual to your list of manuals |
Page 133 highlights
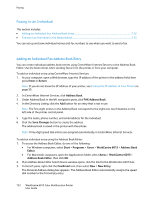
Faxing 4. To assign the speed dial number manually, select the Specify an Address Number check box, then enter a value from 1-200. Note: The first eight entries in the Address Book correspond to the eight one-touch buttons on the left side of the printer control panel. 5. Type the name, phone number, and email address for the individual. To insert a pause, type a hyphen. 6. To add this entry to an existing group: a. Click Group Membership. b. Select the groups to add this entry to, then click Add. c. Confirm the group members, then click OK. 7. Click OK. 8. Click the File menu, then select Save All. The address book is saved in the printer with the entries. Faxing to an Individual in the Address Book 1. On the printer control panel, press the Fax button. 2. At Fax to, press the Address Book button. 3. At All Entries, press the OK button. 4. To scroll through the address book list, press the arrow buttons, then press OK to select the recipient. You can select more than one recipient. 5. After selecting the recipients, press OK. 6. Press the green Start button. To stop a fax from sending, click the Stop Sending button. WorkCentre 6015 Color Multifunction Printer 133 User Guide
-
 1
1 -
2
-
3
-
4
-
5
-
6
-
7
-
8
-
9
-
10
-
11
-
12
-
13
-
14
-
15
-
16
-
17
-
18
-
19
-
20
-
21
-
22
-
23
-
24
-
25
-
26
-
27
-
28
-
29
-
30
-
31
-
32
-
33
-
34
-
35
-
36
-
37
-
38
-
39
-
40
-
41
-
42
-
43
-
44
-
45
-
46
-
47
-
48
-
49
-
50
-
51
-
52
-
53
-
54
-
55
-
56
-
57
-
58
-
59
-
60
-
61
-
62
-
63
-
64
-
65
-
66
-
67
-
68
-
69
-
70
-
71
-
72
-
73
-
74
-
75
-
76
-
77
-
78
-
79
-
80
-
81
-
82
-
83
-
84
-
85
-
86
-
87
-
88
-
89
-
90
-
91
-
92
-
93
-
94
-
95
-
96
-
97
-
98
-
99
-
100
-
101
-
102
-
103
-
104
-
105
-
106
-
107
-
108
-
109
-
110
-
111
-
112
-
113
-
114
-
115
-
116
-
117
-
118
-
119
-
120
-
121
-
122
-
123
-
124
-
125
-
126
-
127
-
 128
128 -
 129
129 -
 130
130 -
 131
131 -
 132
132 -
 133
133 -
 134
134 -
 135
135 -
 136
136 -
 137
137 -
 138
138 -
139
-
140
-
141
-
142
-
143
-
144
-
145
-
146
-
147
-
148
-
149
-
150
-
151
-
152
-
153
-
154
-
155
-
156
-
157
-
158
-
159
-
160
-
161
-
162
-
163
-
164
-
165
-
166
-
167
-
168
-
169
-
170
-
171
-
172
-
173
-
174
-
175
-
176
-
177
-
178
-
179
-
180
-
181
-
182
-
183
-
184
-
185
-
186
-
187
-
188
-
189
-
190
-
191
-
192
-
193
-
194
-
195
-
196
-
197
-
198
-
199
-
200
-
201
-
202
-
203
-
204
-
205
-
206
-
207
-
208
-
209
-
210
-
211
-
212
-
213
-
214
 |
 |
