Xerox 6015/NI User Guide - Page 149

Cleaning the Exterior, CAUTION, WARNING - cartridge
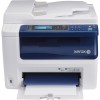
Page 149 highlights

9. Close the document cover. Maintenance Cleaning the Exterior Clean the exterior of the printer once a month.  Wipe the paper tray, output tray, control panel, and other parts with a damp, soft cloth.  After cleaning, wipe with a dry, soft cloth.  For stubborn stains, apply a small amount of mild detergent to the cloth and gently wipe the stain off. CAUTION: Do not spray detergent directly on the printer. Liquid detergent could enter the printer through a gap and cause problems. Never use cleaning agents other than water or mild detergent. Cleaning the Interior After clearing paper jams or replacing a toner cartridge, inspect the inside of the printer before closing the printer covers.  Remove any remaining pieces of paper or debris. For details, see Clearing Paper Jams on page 173.  Remove any dust or stains with a dry, clean cloth. WARNING: Never touch a labeled area on or near the heat roller in the fuser. You can get burned. If a sheet of paper is wrapped around the heat roller, do not try to remove it immediately. Switch off the printer immediately and wait 20 minutes for the fuser to cool. Try to remove the jam after the printer has cooled. WorkCentre 6015 Color Multifunction Printer 149 User Guide

  • 1
  • 2
  • 3
  • 4
  • 5
  • 6
  • 7
  • 8
  • 9
  • 10
  • 11
  • 12
  • 13
  • 14
  • 15
  • 16
  • 17
  • 18
  • 19
  • 20
  • 21
  • 22
  • 23
  • 24
  • 25
  • 26
  • 27
  • 28
  • 29
  • 30
  • 31
  • 32
  • 33
  • 34
  • 35
  • 36
  • 37
  • 38
  • 39
  • 40
  • 41
  • 42
  • 43
  • 44
  • 45
  • 46
  • 47
  • 48
  • 49
  • 50
  • 51
  • 52
  • 53
  • 54
  • 55
  • 56
  • 57
  • 58
  • 59
  • 60
  • 61
  • 62
  • 63
  • 64
  • 65
  • 66
  • 67
  • 68
  • 69
  • 70
  • 71
  • 72
  • 73
  • 74
  • 75
  • 76
  • 77
  • 78
  • 79
  • 80
  • 81
  • 82
  • 83
  • 84
  • 85
  • 86
  • 87
  • 88
  • 89
  • 90
  • 91
  • 92
  • 93
  • 94
  • 95
  • 96
  • 97
  • 98
  • 99
  • 100
  • 101
  • 102
  • 103
  • 104
  • 105
  • 106
  • 107
  • 108
  • 109
  • 110
  • 111
  • 112
  • 113
  • 114
  • 115
  • 116
  • 117
  • 118
  • 119
  • 120
  • 121
  • 122
  • 123
  • 124
  • 125
  • 126
  • 127
  • 128
  • 129
  • 130
  • 131
  • 132
  • 133
  • 134
  • 135
  • 136
  • 137
  • 138
  • 139
  • 140
  • 141
  • 142
  • 143
  • 144
  • 145
  • 146
  • 147
  • 148
  • 149
  • 150
  • 151
  • 152
  • 153
  • 154
  • 155
  • 156
  • 157
  • 158
  • 159
  • 160
  • 161
  • 162
  • 163
  • 164
  • 165
  • 166
  • 167
  • 168
  • 169
  • 170
  • 171
  • 172
  • 173
  • 174
  • 175
  • 176
  • 177
  • 178
  • 179
  • 180
  • 181
  • 182
  • 183
  • 184
  • 185
  • 186
  • 187
  • 188
  • 189
  • 190
  • 191
  • 192
  • 193
  • 194
  • 195
  • 196
  • 197
  • 198
  • 199
  • 200
  • 201
  • 202
  • 203
  • 204
  • 205
  • 206
  • 207
  • 208
  • 209
  • 210
  • 211
  • 212
  • 213
  • 214

Maintenance
WorkCentre 6015 Color Multifunction Printer
149
User Guide
9.
Close the document cover.
Cleaning the Exterior
Clean the exterior of the printer once a month.
Wipe the paper tray, output tray, control panel, and other parts with a damp, soft cloth.
After cleaning, wipe with a dry, soft cloth.
For stubborn stains, apply a small amount of mild detergent to the cloth and gently wipe the stain
off.
CAUTION:
Do not spray detergent directly on the printer. Liquid detergent could enter the printer
through a gap and cause problems. Never use cleaning agents other than water or mild detergent.
Cleaning the Interior
After clearing paper jams or replacing a toner cartridge, inspect the inside of the printer before closing
the printer covers.
Remove any remaining pieces of paper or debris. For details, see
Clearing Paper Jams
on page 173.
Remove any dust or stains with a dry, clean cloth.
WARNING:
Never touch a labeled area on or near the heat roller in the fuser. You can get burned. If a
sheet of paper is wrapped around the heat roller, do not try to remove it immediately. Switch off the
printer immediately and wait 20 minutes for the fuser to cool. Try to remove the jam after the printer
has cooled.