Yamaha Tyros4 Owner's Manual - Page 81
Yamaha Tyros4 Manual
 |
UPC - 086792947280
View all Yamaha Tyros4 manuals
Add to My Manuals
Save this manual to your list of manuals |
Page 81 highlights
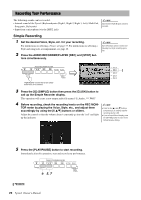
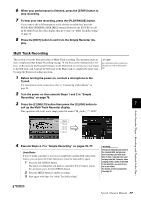
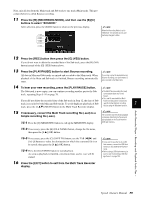
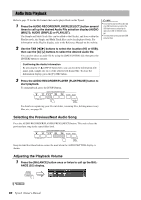
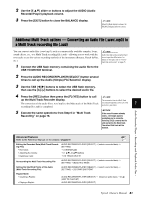
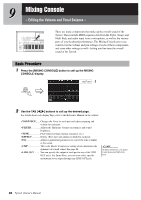
2 Use the [5 ] slider or buttons to adjust the AUDIO (Audio Recorder/Player) playback volume. 3 Press the [EXIT] button to close the BALANCE display. NOTE When the Main display is shown, the BALANCE display cannot be closed. Audio Recorder/Player - Recording and Playback Audio Files - Additional Multi Track options - Converting an Audio File (.wav/.mp3) to a Multi Track recording file (.aud) You can convert audio files (.wav/.mp3), such as commercially available samples, loops, sound effects, etc., to a Multi Track recording file (.aud) - allowing you to work with the two tracks or use the various recording methods of the instrument (Bounce, Punch In/Out, etc.). 1 Connect the USB flash memory containing the audio file to the USB TO DEVICE terminal. NOTE Audio files that can be converted must be no longer than 80 minutes. For details on file types, refer to "File formats that can be used:" on page 75. 2 Press the AUDIO RECORDER/PLAYER [SELECT] button several times to call up the Audio (Simple) File Selection display. 3 Use the TAB [][] buttons to select the USB flash memory, then use the [A]-[J] buttons to select the desired audio file. 4 Press the [REC] button then press the [F] (YES) button to call NOTE up the Multi Track Recorder display. The conversion time to a Multi Track The conversion of the audio files (.wav/.mp3) to the Main track of the Multi Track recording file depends on the size of the audio file (.wav/.mp3). 7 recording file (.aud) is completed. 5 Execute the same operations from Step 6 in "Multi Track Recording" on page 78. NOTICE If the same file name already exists, a message appears prompting you to overwrite. Selecting [YES] converts the file and overwrites the Main track. The data of Sub track will be deleted. Advanced Features Refer to the Reference Manual on the website, Chapter 7. Editing the Recorded Data (Multi Track Recording File): • Normalize: • Adjusting the volume: • Deleting a track: AUDIO RECORDER/PLAYER [SELECT] (select a recorded data) [SETTING] [I] NORMALIZE [1 ]-[4 ] buttons [H] TRACK DELETE Re-recording the Multi Track Recording File: AUDIO RECORDER/PLAYER [SELECT] (select a recorded data) [SETTING] [B]/[C] REC MODE Setting the Start/End Points of the Audio (Multi Track Recording File): AUDIO RECORDER/PLAYER [SELECT] (select a recorded data) [SETTING] [C] START/END POINT Playlist Mode: • Creating a Playlist: • Playing a Playlist: AUDIO RECORDER/PLAYER [SELECT] (Select an audio data) [6 ] (ADD TO PLAYLIST) AUDIO RECORDER/PLAYER [SELECT] Tyros4 Owner's Manual 81
-
 1
1 -
2
-
3
-
4
-
5
-
6
-
7
-
8
-
9
-
10
-
11
-
12
-
13
-
14
-
15
-
16
-
17
-
18
-
19
-
20
-
21
-
22
-
23
-
24
-
25
-
26
-
27
-
28
-
29
-
30
-
31
-
32
-
33
-
34
-
35
-
36
-
37
-
38
-
39
-
40
-
41
-
42
-
43
-
44
-
45
-
46
-
47
-
48
-
49
-
50
-
51
-
52
-
53
-
54
-
55
-
56
-
57
-
58
-
59
-
60
-
61
-
62
-
63
-
64
-
65
-
66
-
67
-
68
-
69
-
70
-
71
-
72
-
73
-
74
-
75
-
 76
76 -
 77
77 -
 78
78 -
 79
79 -
 80
80 -
 81
81 -
 82
82 -
 83
83 -
 84
84 -
 85
85 -
 86
86 -
87
-
88
-
89
-
90
-
91
-
92
-
93
-
94
-
95
-
96
-
97
-
98
-
99
-
100
-
101
-
102
-
103
-
104
-
105
-
106
-
107
-
108
-
109
-
110
-
111
-
112
-
113
-
114
-
115
-
116
-
117
-
118
-
119
-
120
-
121
-
122
-
123
-
124
-
125
-
126
 |
 |
