Brother International PE-DESIGN 10 Startup : Reference Guide - Page 50
Editing the text, Outputting the design data
 |
View all Brother International PE-DESIGN 10 manuals
Add to My Manuals
Save this manual to your list of manuals |
Page 50 highlights
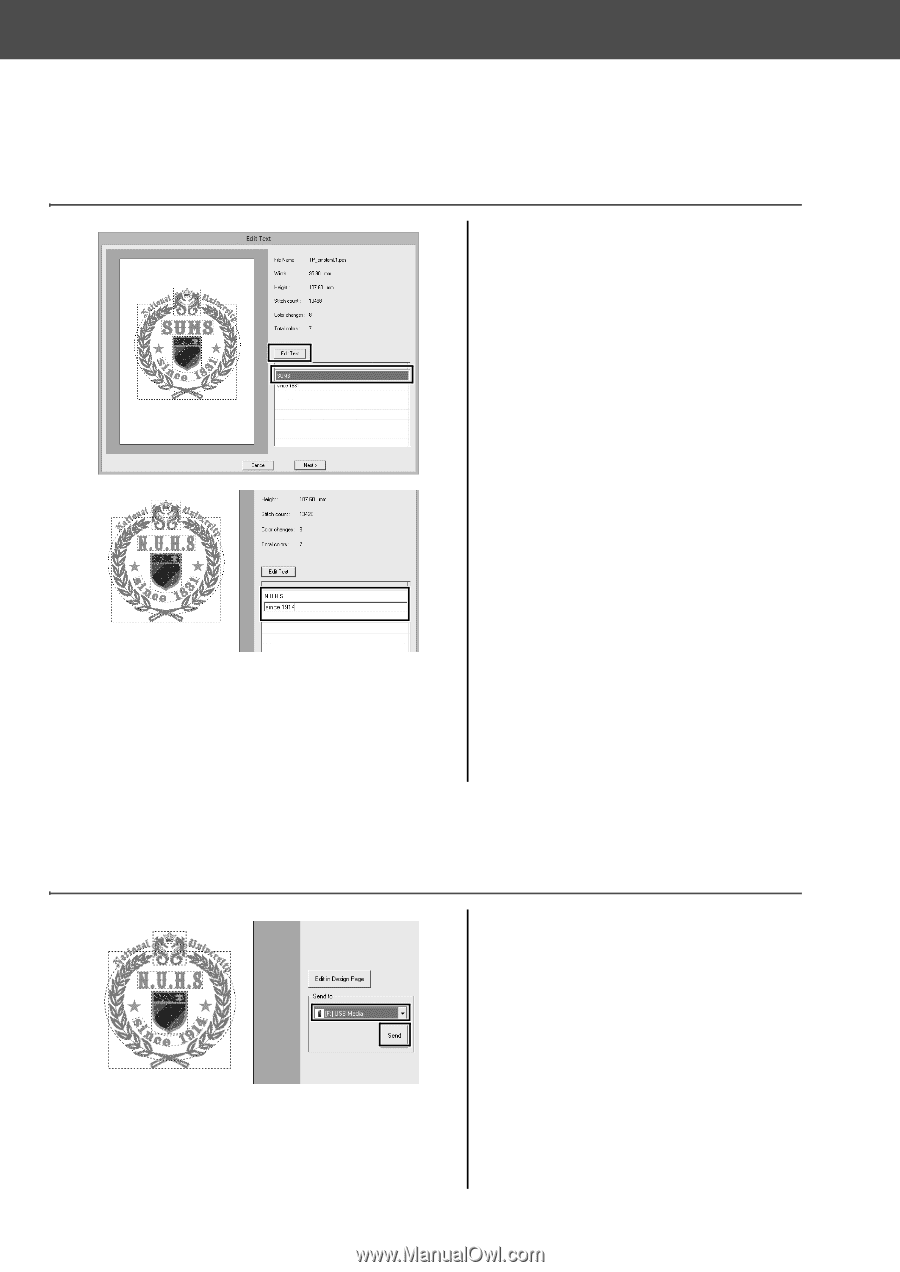
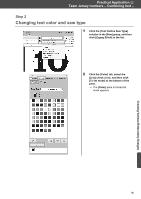
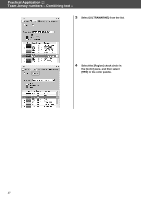
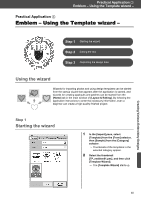
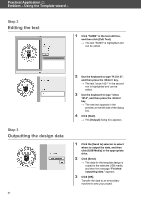
Practical Application c Emblem - Using the Template wizard - Step 2 Editing the text 1 Click "SUMS" in the text edit box, and then click [Edit Text]. → The text "SUMS" is highlighted and can be edited. Step 3 Outputting the design data 41 2 Use the keyboard to type "N.U.H.S", and then press the key. → The text "since 1831" in the second row is highlighted and can be edited. 3 Use the keyboard to type "since 1914", and then press the key. → The new text appears in the preview on the left side of the dialog box. 4 Click [Next]. → The [Output] dialog box appears. 1 Click the [Send to] selector to select where to output the data, and then click [USB Media] in the appropriate drive. 2 Click [Send]. → The data for the template design is copied to the selected USB media, and then the message "Finished outputting data." appears. 3 Click [OK]. Transfer the data to an embroidery machine to sew your project.
-
 1
1 -
2
-
3
-
4
-
5
-
6
-
7
-
8
-
9
-
10
-
11
-
12
-
13
-
14
-
15
-
16
-
17
-
18
-
19
-
20
-
21
-
22
-
23
-
24
-
25
-
26
-
27
-
28
-
29
-
30
-
31
-
32
-
33
-
34
-
35
-
36
-
37
-
38
-
39
-
40
-
41
-
42
-
43
-
44
-
 45
45 -
 46
46 -
 47
47 -
 48
48 -
 49
49 -
 50
50 -
 51
51 -
 52
52 -
 53
53 -
 54
54 -
 55
55 -
56
-
57
-
58
-
59
-
60
-
61
-
62
-
63
-
64
-
65
-
66
-
67
-
68
-
69
-
70
-
71
-
72
-
73
-
74
-
75
-
76
-
77
-
78
-
79
-
80
 |
 |