Brother International PE-DESIGN 10 Startup : Reference Guide - Page 60
Applying patterned stitches to a shape
 |
View all Brother International PE-DESIGN 10 manuals
Add to My Manuals
Save this manual to your list of manuals |
Page 60 highlights
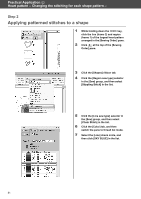
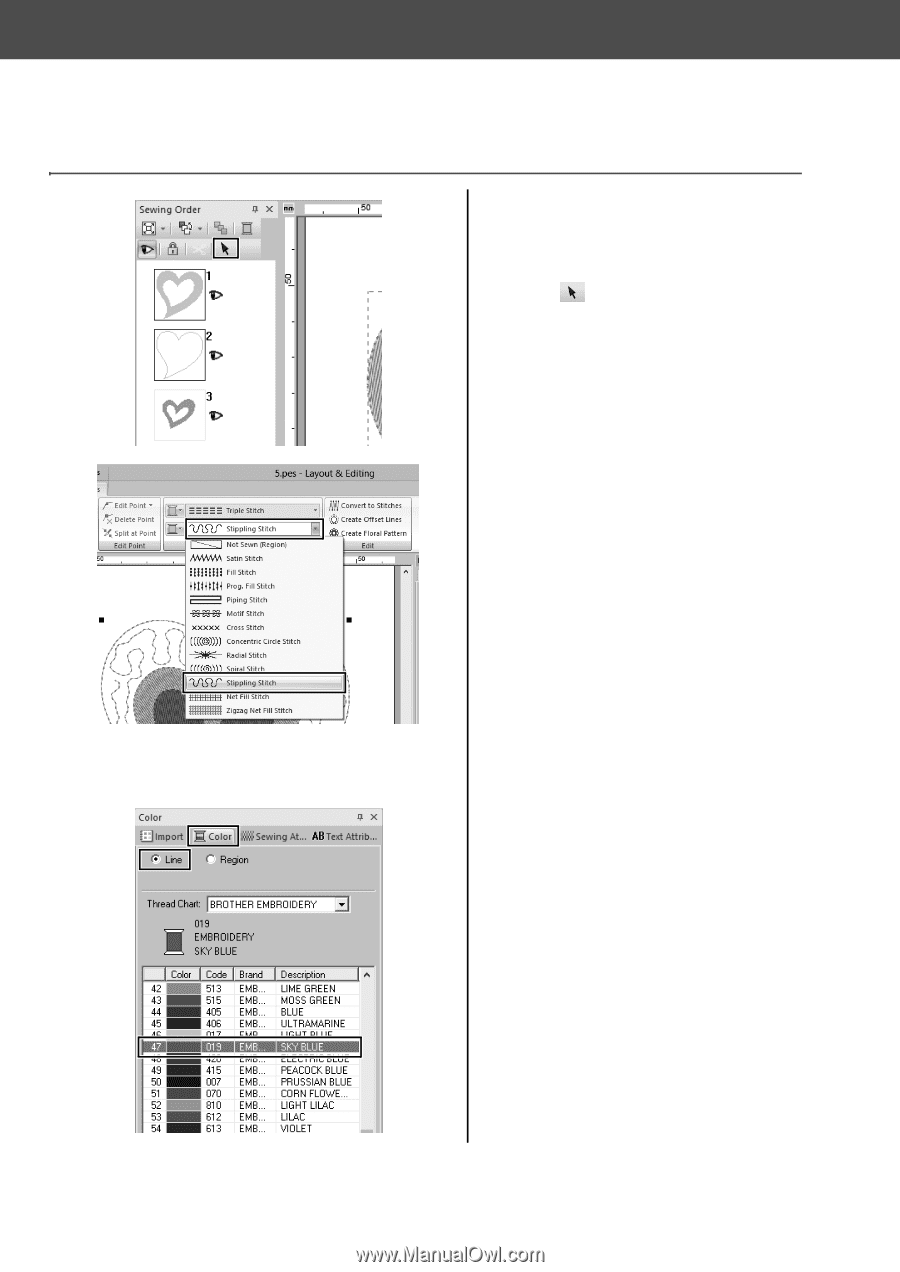
Practical Application e Heart pattern - Changing the stitching for each shape pattern - Step 2 Applying patterned stitches to a shape 1 While holding down the key, click the line (frame 2) and region (frame 1) of the largest heart pattern arranged in the [Sewing Order] pane. 2 Click at the top of the [Sewing Order] pane. 3 Click the [Shapes] ribbon tab. 4 Click the [Region sew type] selector in the [Sew] group, and then select [Stippling Stitch] in the list. 5 Click the [Line sew type] selector in the [Sew] group, and then select [Chain Stitch] in the list. 6 Click the [Color] tab, and then switch the pane to thread list mode. 7 Select the [Line] check circle, and then click [SKY BLUE] in the list. 51
-
 1
1 -
2
-
3
-
4
-
5
-
6
-
7
-
8
-
9
-
10
-
11
-
12
-
13
-
14
-
15
-
16
-
17
-
18
-
19
-
20
-
21
-
22
-
23
-
24
-
25
-
26
-
27
-
28
-
29
-
30
-
31
-
32
-
33
-
34
-
35
-
36
-
37
-
38
-
39
-
40
-
41
-
42
-
43
-
44
-
45
-
46
-
47
-
48
-
49
-
50
-
51
-
52
-
53
-
54
-
 55
55 -
 56
56 -
 57
57 -
 58
58 -
 59
59 -
 60
60 -
 61
61 -
 62
62 -
 63
63 -
 64
64 -
 65
65 -
66
-
67
-
68
-
69
-
70
-
71
-
72
-
73
-
74
-
75
-
76
-
77
-
78
-
79
-
80
 |
 |
51
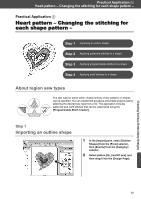
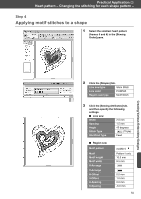
Practical Application
e
Heart pattern – Changing the stitching for each shape pattern –
Step 2
Applying patterned stitches to a shape
1
While holding down the <Ctrl> key,
click the line (frame 2) and region
(frame 1) of the largest heart pattern
arranged in the [Sewing Order] pane.
2
Click
at the top of the [Sewing
Order] pane.
3
Click the [Shapes] ribbon tab.
4
Click the [Region sew type] selector
in the [Sew] group, and then select
[Stippling Stitch] in the list.
5
Click the [Line sew type] selector in
the [Sew] group, and then select
[Chain Stitch] in the list.
6
Click the [Color] tab, and then
switch the pane to thread list mode.
7
Select the [Line] check circle, and
then click [SKY BLUE] in the list.