Canon PIXMA MP510 Quick Start Guide - Page 23
Memory Card Mode
 |
View all Canon PIXMA MP510 manuals
Add to My Manuals
Save this manual to your list of manuals |
Page 23 highlights
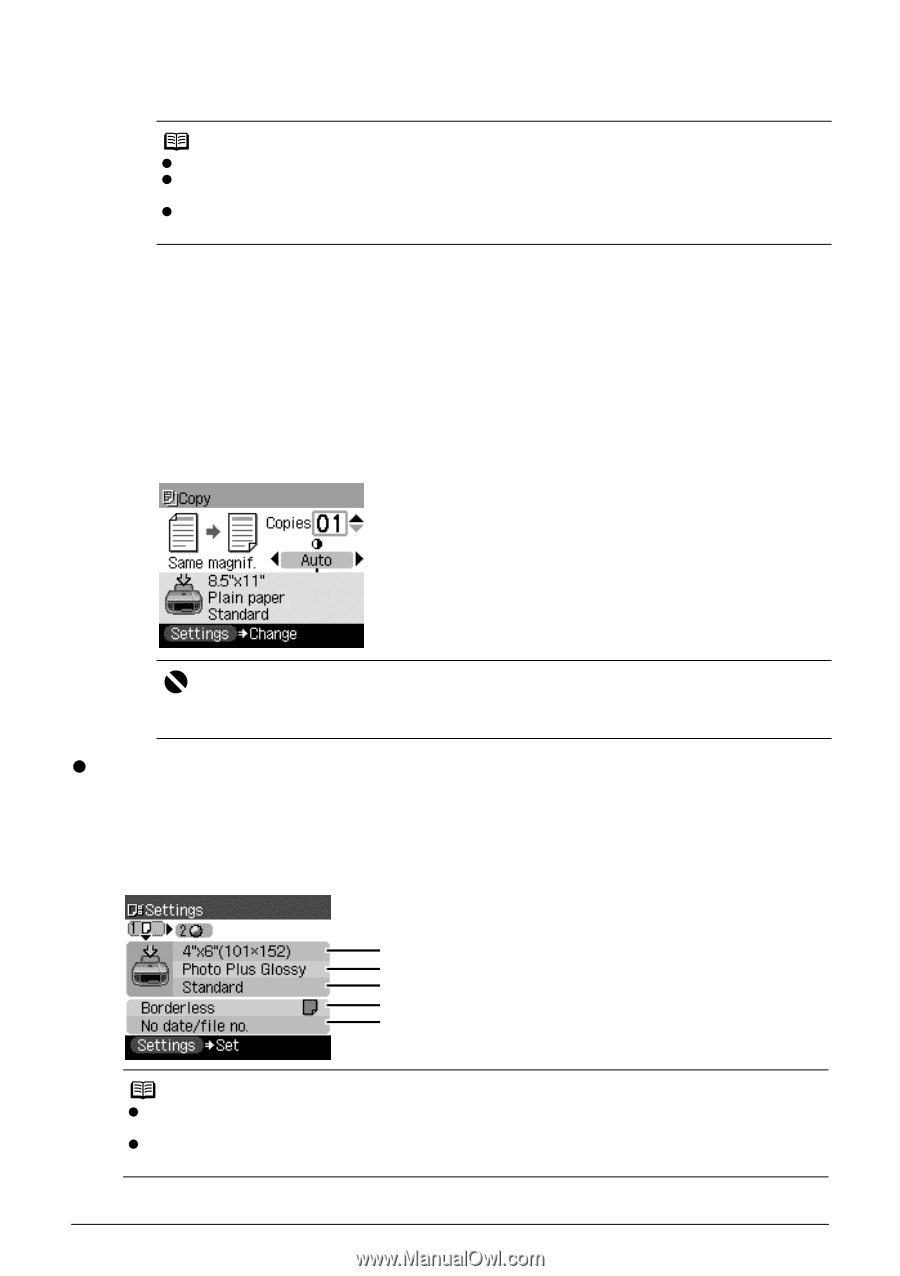
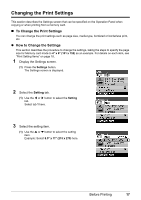
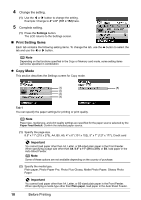
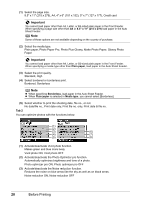
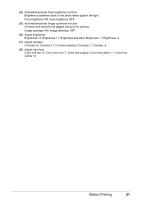
(3) Adjust image quality according to the original. Fast, Standard, High Note z Fast can be selected when Plain paper is selected as the media type. z If you used Fast with media type set to Plain paper and the quality is not as good as expected, select Standard or High and try copying again. z Select High to copy in grayscale. Grayscale renders tones in a range of grays instead of black or white. (4) You can specify the reduction or enlargement method. Same magnification, Preset ratio, Zoom (25-400%), Fit-to-page Tab 2 You can specify auto intensity. (5) Specify if auto intensity is performed. Auto intensity ON, Auto intensity OFF This function automatically adjusts the intensity of the original on the Platen Glass. Specifying Auto intensity ON automatically changes the icon above the intensity slide bar on the LCD to AUTO. Important Even while Auto intensity ON is selected, you can change the intensity by pressing the [ or ] button. Move the cursor to the center of the slide bar to enable auto intensity again. z Memory Card Mode This section describes the Settings screen for Memory card mode. Tab 1 You can specify the settings such as the size and type of paper, bordered/borderless, and Date/ file no. (1) (2) (3) (4) (5) Note z Paper size, media type, and print quality settings are specified for the paper source selected by the Paper Feed Switch. Confirm the selected paper source. z You can change the print settings on this screen when a PictBridge compliant device is connected to this machine. Before Printing 19
-
 1
1 -
2
-
3
-
4
-
5
-
6
-
7
-
8
-
9
-
10
-
11
-
12
-
13
-
14
-
15
-
16
-
17
-
 18
18 -
 19
19 -
 20
20 -
 21
21 -
 22
22 -
 23
23 -
 24
24 -
 25
25 -
 26
26 -
 27
27 -
 28
28 -
29
-
30
-
31
-
32
-
33
-
34
-
35
-
36
-
37
-
38
-
39
-
40
-
41
-
42
-
43
-
44
-
45
-
46
-
47
-
48
-
49
-
50
-
51
-
52
-
53
-
54
-
55
-
56
-
57
-
58
-
59
-
60
-
61
-
62
-
63
-
64
-
65
-
66
-
67
-
68
-
69
-
70
-
71
-
72
-
73
-
74
-
75
-
76
-
77
-
78
-
79
-
80
-
81
-
82
-
83
-
84
-
85
-
86
-
87
-
88
-
89
-
90
-
91
-
92
-
93
-
94
-
95
-
96
-
97
-
98
 |
 |