Canon PIXMA MP510 Quick Start Guide - Page 45
Printing the Nozzle Check Pattern
 |
View all Canon PIXMA MP510 manuals
Add to My Manuals
Save this manual to your list of manuals |
Page 45 highlights
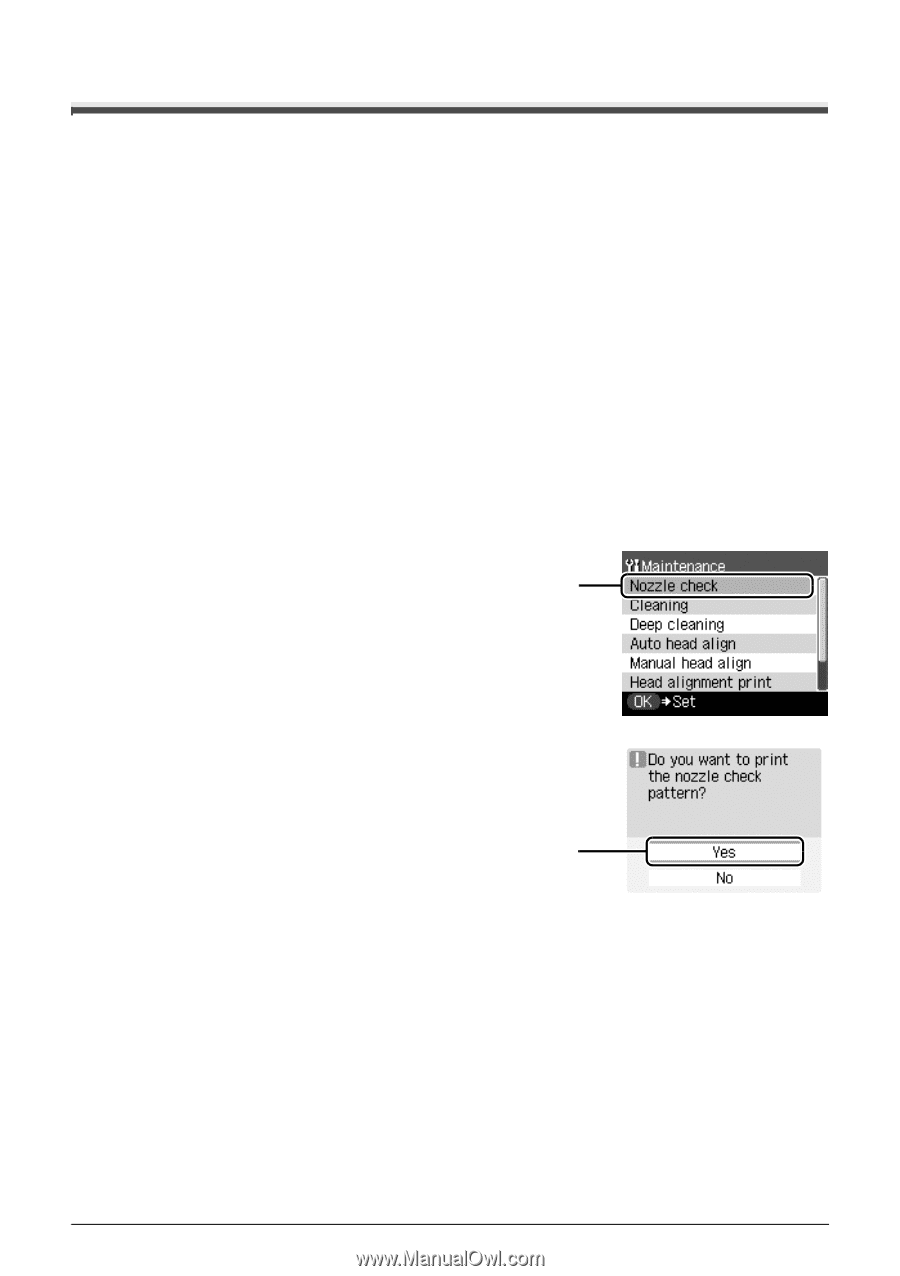
Printing the Nozzle Check Pattern Print the nozzle check pattern to determine whether the ink ejects properly from the Print Head. 1 Make sure that the machine is turned on, open the Front Feeder, and extend the Output Paper Support. 2 Load a sheet of A4 or Letter-sized plain paper in the Auto Sheet Feeder or the Front Feeder. Set the Paper Thickness Lever to the left. 3 Press the Paper Feed Switch to select the paper source where you have loaded paper. 4 Print the nozzle check pattern. (1) Press the Menu button. (2) Use the [ or ] button to select Maintenance/settings, then press the OK button. The Maintenance/settings screen is displayed. (3) Use the [ or ] button to select Maintenance, then press the OK button. The Maintenance screen is displayed. (4) Use the { or } button to select Nozzle check and then press the OK button. (4) The pattern print confirmation screen is displayed. (5) Use the { or } button to select Yes and then press the OK button. The nozzle check pattern is printed, and the pattern confirmation screens are displayed alternately. (5) 5 Examine the pattern and take the appropriate action. See "Examining the Nozzle Check Pattern" on page 42. Routine Maintenance 41
-
 1
1 -
2
-
3
-
4
-
5
-
6
-
7
-
8
-
9
-
10
-
11
-
12
-
13
-
14
-
15
-
16
-
17
-
18
-
19
-
20
-
21
-
22
-
23
-
24
-
25
-
26
-
27
-
28
-
29
-
30
-
31
-
32
-
33
-
34
-
35
-
36
-
37
-
38
-
39
-
 40
40 -
 41
41 -
 42
42 -
 43
43 -
 44
44 -
 45
45 -
 46
46 -
 47
47 -
 48
48 -
 49
49 -
 50
50 -
51
-
52
-
53
-
54
-
55
-
56
-
57
-
58
-
59
-
60
-
61
-
62
-
63
-
64
-
65
-
66
-
67
-
68
-
69
-
70
-
71
-
72
-
73
-
74
-
75
-
76
-
77
-
78
-
79
-
80
-
81
-
82
-
83
-
84
-
85
-
86
-
87
-
88
-
89
-
90
-
91
-
92
-
93
-
94
-
95
-
96
-
97
-
98
 |
 |