Canon PIXMA MP510 Quick Start Guide - Page 58
Cleaning the Inside of the Machine Bottom Plate Cleaning
 |
View all Canon PIXMA MP510 manuals
Add to My Manuals
Save this manual to your list of manuals |
Page 58 highlights
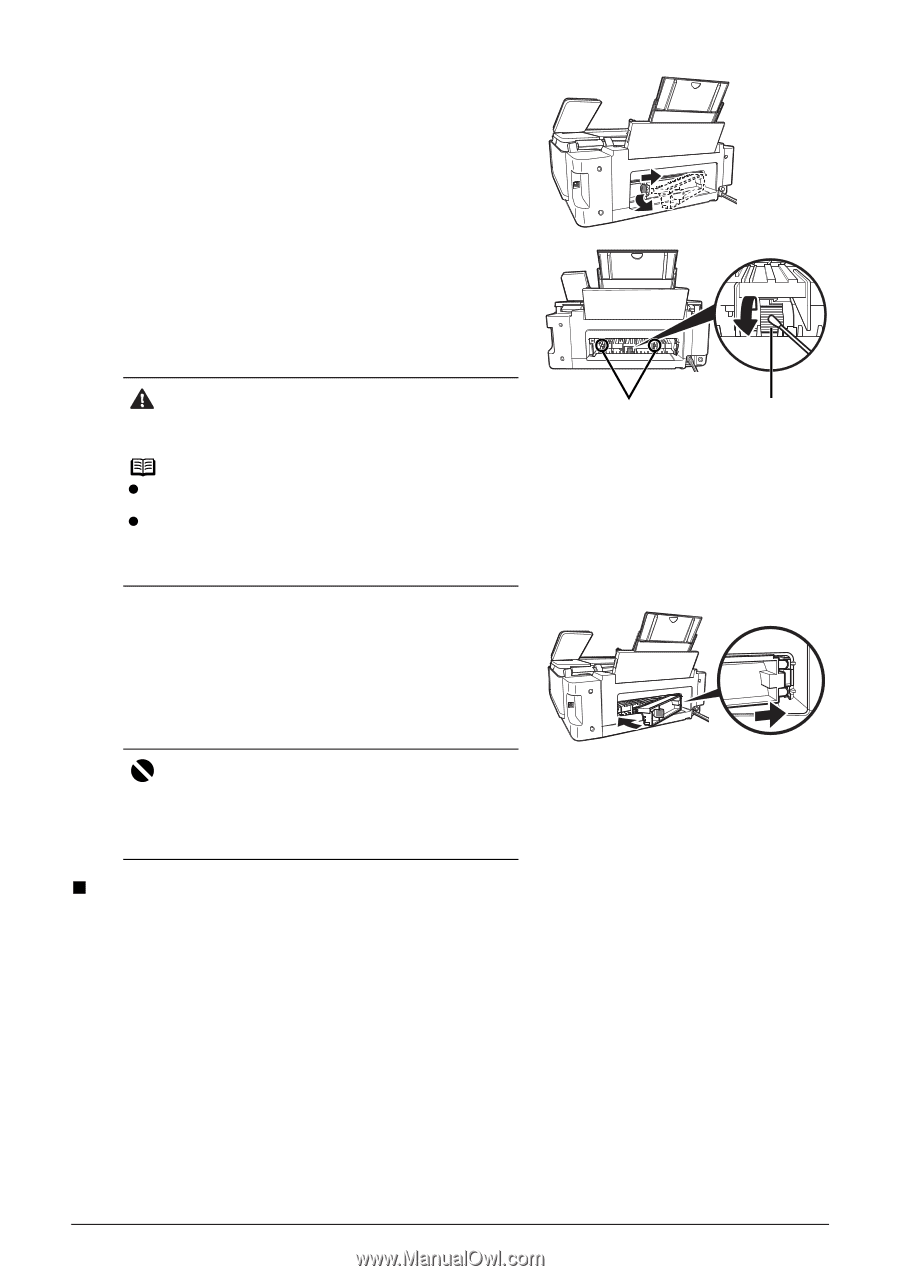
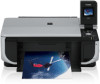
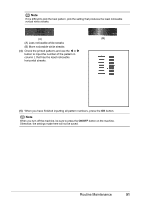
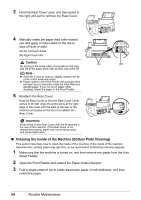
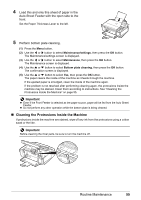
3 Hold the Rear Cover Lever and then press to the right and pull to remove the Rear Cover. 4 Manually rotate the paper feed roller toward you and apply a cotton swab or the like to wipe off dust or stain. (A) Do not touch these. (B) Paper feed roller Caution (A) (B) Do not touch the small rollers (A) located on the right and left of the paper feed roller as they may come off. Note z If the dirt is hard to remove, slightly moisten the tip of the cotton swab with water. z Paper loaded in the Front Feeder will gradually feed and eject as you manually rotate the roller. Remove ejected paper. If you run out of paper while cleaning, reload the paper in the Front Feeder. 5 Reattach the Rear Cover. Hold the Rear Cover so that the Rear Cover Lever comes to the left. Align the protrusions at the right edge of the cover with the slots at the rear of the machine and press on the lever to reattach the Rear Cover. Important Press firmly on the Rear Cover until it is fit squarely in the rear of the machine. If the Rear Cover is not reattached properly, paper may not be fed properly and cause paper jams. „ Cleaning the Inside of the Machine (Bottom Plate Cleaning) This section describes how to clean the inside of the machine. If the inside of the machine becomes dirty, printed paper may get dirty, so we recommend performing cleaning regularly. 1 Make sure that the machine is turned on, and then remove any paper from the Auto Sheet Feeder. 2 Open the Front Feeder and extend the Paper Output Support. 3 Fold a single sheet of A4 or Letter-sized plain paper in half widthwise, and then unfold the paper. 54 Routine Maintenance
-
 1
1 -
2
-
3
-
4
-
5
-
6
-
7
-
8
-
9
-
10
-
11
-
12
-
13
-
14
-
15
-
16
-
17
-
18
-
19
-
20
-
21
-
22
-
23
-
24
-
25
-
26
-
27
-
28
-
29
-
30
-
31
-
32
-
33
-
34
-
35
-
36
-
37
-
38
-
39
-
40
-
41
-
42
-
43
-
44
-
45
-
46
-
47
-
48
-
49
-
50
-
51
-
52
-
 53
53 -
 54
54 -
 55
55 -
 56
56 -
 57
57 -
 58
58 -
 59
59 -
 60
60 -
 61
61 -
 62
62 -
 63
63 -
64
-
65
-
66
-
67
-
68
-
69
-
70
-
71
-
72
-
73
-
74
-
75
-
76
-
77
-
78
-
79
-
80
-
81
-
82
-
83
-
84
-
85
-
86
-
87
-
88
-
89
-
90
-
91
-
92
-
93
-
94
-
95
-
96
-
97
-
98
 |
 |