Canon PIXMA Pro9000 Quick Start Guide - Page 31
Connecting to a PictBridge Compliant Device, Advanced Printing, Set up the printer. - printer head
 |
View all Canon PIXMA Pro9000 manuals
Add to My Manuals
Save this manual to your list of manuals |
Page 31 highlights
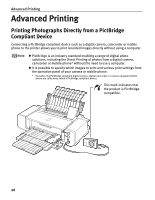
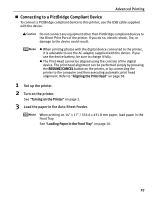
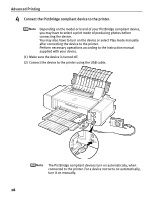
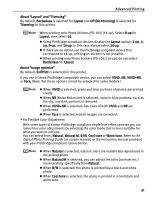
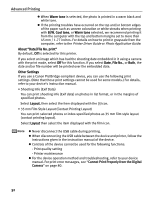
Advanced Printing „ Connecting to a PictBridge Compliant Device To connect a PictBridge compliant device to this printer, use the USB cable supplied with the device. Do not connect any equipment other than PictBridge compliant devices to the Direct Print Port of the printer. If you do so, electric shock, fire, or damage to the device could result. z When printing photos with the digital device connected to the printer, it is advisable to use the AC adapter supplied with the device. If you use the device battery, be sure to charge it fully. z The Print Head cannot be aligned using the controls of the digital device. The print head alignment can be performed simply by pressing the RESUME/CANCEL button on the printer, or by connecting the printer to the computer and then executing automatic print head alignment. Refer to "Aligning the Print Head" on page 58. 1 Set up the printer. 2 Turn on the printer. See "Turning on the Printer" on page 2. 3 Load the paper in the Auto Sheet Feeder. When printing on 14" x 17" / 355.6 x 431.8 mm paper, load paper in the Front Tray. See "Loading Paper in the Front Tray" on page 10. 27
-
 1
1 -
2
-
3
-
4
-
5
-
6
-
7
-
8
-
9
-
10
-
11
-
12
-
13
-
14
-
15
-
16
-
17
-
18
-
19
-
20
-
21
-
22
-
23
-
24
-
25
-
 26
26 -
 27
27 -
 28
28 -
 29
29 -
 30
30 -
 31
31 -
 32
32 -
 33
33 -
 34
34 -
 35
35 -
 36
36 -
37
-
38
-
39
-
40
-
41
-
42
-
43
-
44
-
45
-
46
-
47
-
48
-
49
-
50
-
51
-
52
-
53
-
54
-
55
-
56
-
57
-
58
-
59
-
60
-
61
-
62
-
63
-
64
-
65
-
66
-
67
-
68
-
69
-
70
-
71
-
72
-
73
-
74
-
75
-
76
-
77
-
78
-
79
-
80
-
81
-
82
-
83
-
84
-
85
-
86
-
87
-
88
-
89
-
90
-
91
-
92
-
93
-
94
-
95
-
96
-
97
-
98
-
99
-
100
 |
 |