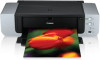
Canon PIXMA Pro9000 Quick Start Guide - Page 37
Accessing the Printer Driver (Windows)
 |
View all Canon PIXMA Pro9000 manuals
Add to My Manuals
Save this manual to your list of manuals |
Page 37 highlights
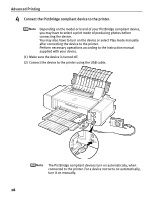
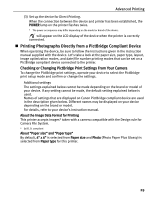
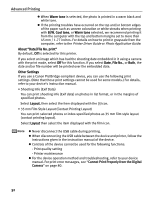
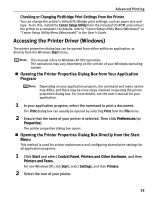
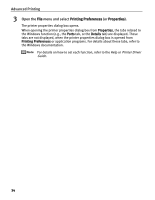
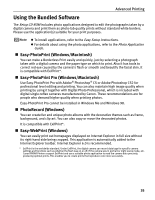
Advanced Printing Checking or Changing PictBridge Print Settings From the Printer You can change the printer's default PictBridge print settings, such as paper size and type. To do this, install the Canon Setup Utility from the included CD-ROM and connect the printer to a computer. For details, refer to "Canon Setup Utility Menu (Windows)" or "Canon Setup Utility Menu (Macintosh)" in the User's Guide. Accessing the Printer Driver (Windows) The printer properties dialog box can be opened from either within an application, or directly from the Windows Start menu. This manual refers to Windows XP SP2 operation. The operations may vary depending on the version of your Windows operating system. „ Opening the Printer Properties Dialog Box from Your Application Program Depending on your application program, the command and menu names may differ, and there may be more steps involved in opening the printer properties dialog box. For more details, see the user's manual for your application. 1 In your application program, select the command to print a document. The Print dialog box can usually be opened by selecting Print from the File menu. 2 Ensure that the name of your printer is selected. Then click Preferences (or Properties). The printer properties dialog box opens. „ Opening the Printer Properties Dialog Box Directly from the Start Menu This method is used for printer maintenance and configuring shared print settings for all application programs. 1 Click Start and select Control Panel, Printers and Other Hardware, and then Printers and Faxes. For non-Windows XP, click Start, select Settings, and then Printers. 2 Select the icon of your printer. 33
-
 1
1 -
2
-
3
-
4
-
5
-
6
-
7
-
8
-
9
-
10
-
11
-
12
-
13
-
14
-
15
-
16
-
17
-
18
-
19
-
20
-
21
-
22
-
23
-
24
-
25
-
26
-
27
-
28
-
29
-
30
-
31
-
 32
32 -
 33
33 -
 34
34 -
 35
35 -
 36
36 -
 37
37 -
 38
38 -
 39
39 -
 40
40 -
 41
41 -
 42
42 -
43
-
44
-
45
-
46
-
47
-
48
-
49
-
50
-
51
-
52
-
53
-
54
-
55
-
56
-
57
-
58
-
59
-
60
-
61
-
62
-
63
-
64
-
65
-
66
-
67
-
68
-
69
-
70
-
71
-
72
-
73
-
74
-
75
-
76
-
77
-
78
-
79
-
80
-
81
-
82
-
83
-
84
-
85
-
86
-
87
-
88
-
89
-
90
-
91
-
92
-
93
-
94
-
95
-
96
-
97
-
98
-
99
-
100
 |
 |
