Canon PIXMA Pro9000 Quick Start Guide - Page 78
Number of, Flashes, Possible Cause, Try This, The Front Tray is - service manual
 |
View all Canon PIXMA Pro9000 manuals
Add to My Manuals
Save this manual to your list of manuals |
Page 78 highlights
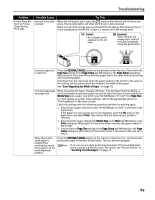
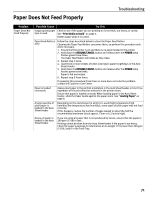
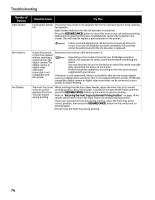
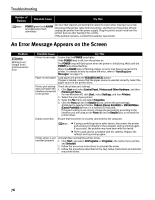
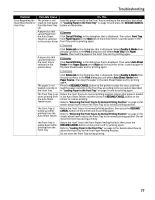
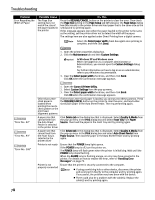
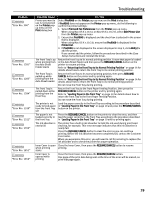
Troubleshooting Number of Flashes Eight flashes Nine flashes Ten flashes Possible Cause Try This Ink absorber almost The printer has a built-in ink absorber for the ink used during print head cleaning, full for example. Eight flashes indicates that the ink absorber is nearly full. Press the RESUME/CANCEL button to cancel the error so you can continue printing. Before the ink absorber becomes completely full, contact the Customer Care Center. (You will need to replace a particular part of the printer.) Canon recommends that you call for service as soon as this error occurs. Once the ink absorber becomes completely full, printing cannot be performed until the ink absorber is replaced. A specified period of time has elapsed without receiving a response from the digital camera/The digital camera or digital video camcorder connected is not compatible with this printer Disconnect the camera cable and reconnect it. Depending on the model or brand of your PictBridge compliant device, you may have to select a print mode before connecting the device. You may also have to turn on the device or select Play mode manually after connecting the device to the printer. Perform necessary operations according to the instruction manual supplied with your device. If the error is still unresolved, there is a possibility that you are using a digital camera or digital video camcorder that is not supported by this printer. PictBridgecompatible digital camera or digital video camcorder can be connected to your printer for Direct Printing. The Front Tray is not set to its correct position/The Front Tray was moved during printing When printing from the Auto Sheet Feeder, return the Front Tray to its normal printing position. Ensure that paper is loaded in the Auto Sheet Feeder and then press the RESUME/CANCEL button on the printer to resume printing. Refer to "Returning the Front Tray to Its Normal Printing Position" on page 14 for details about how to return the Front Tray to its normal printing position. If you have moved the Front Tray during printing, return the Front Tray to the correct position, then press the RESUME/CANCEL button on the printer and try printing again. Do not move the Front Tray during printing. 74
-
 1
1 -
2
-
3
-
4
-
5
-
6
-
7
-
8
-
9
-
10
-
11
-
12
-
13
-
14
-
15
-
16
-
17
-
18
-
19
-
20
-
21
-
22
-
23
-
24
-
25
-
26
-
27
-
28
-
29
-
30
-
31
-
32
-
33
-
34
-
35
-
36
-
37
-
38
-
39
-
40
-
41
-
42
-
43
-
44
-
45
-
46
-
47
-
48
-
49
-
50
-
51
-
52
-
53
-
54
-
55
-
56
-
57
-
58
-
59
-
60
-
61
-
62
-
63
-
64
-
65
-
66
-
67
-
68
-
69
-
70
-
71
-
72
-
 73
73 -
 74
74 -
 75
75 -
 76
76 -
 77
77 -
 78
78 -
 79
79 -
 80
80 -
 81
81 -
 82
82 -
 83
83 -
84
-
85
-
86
-
87
-
88
-
89
-
90
-
91
-
92
-
93
-
94
-
95
-
96
-
97
-
98
-
99
-
100
 |
 |