Canon PowerShot 350 Service Manual - Page 62
Changing, writing, reading, Right, Change, Address, every, bytes., Command, Control, used., Shift,
 |
View all Canon PowerShot 350 manuals
Add to My Manuals
Save this manual to your list of manuals |
Page 62 highlights
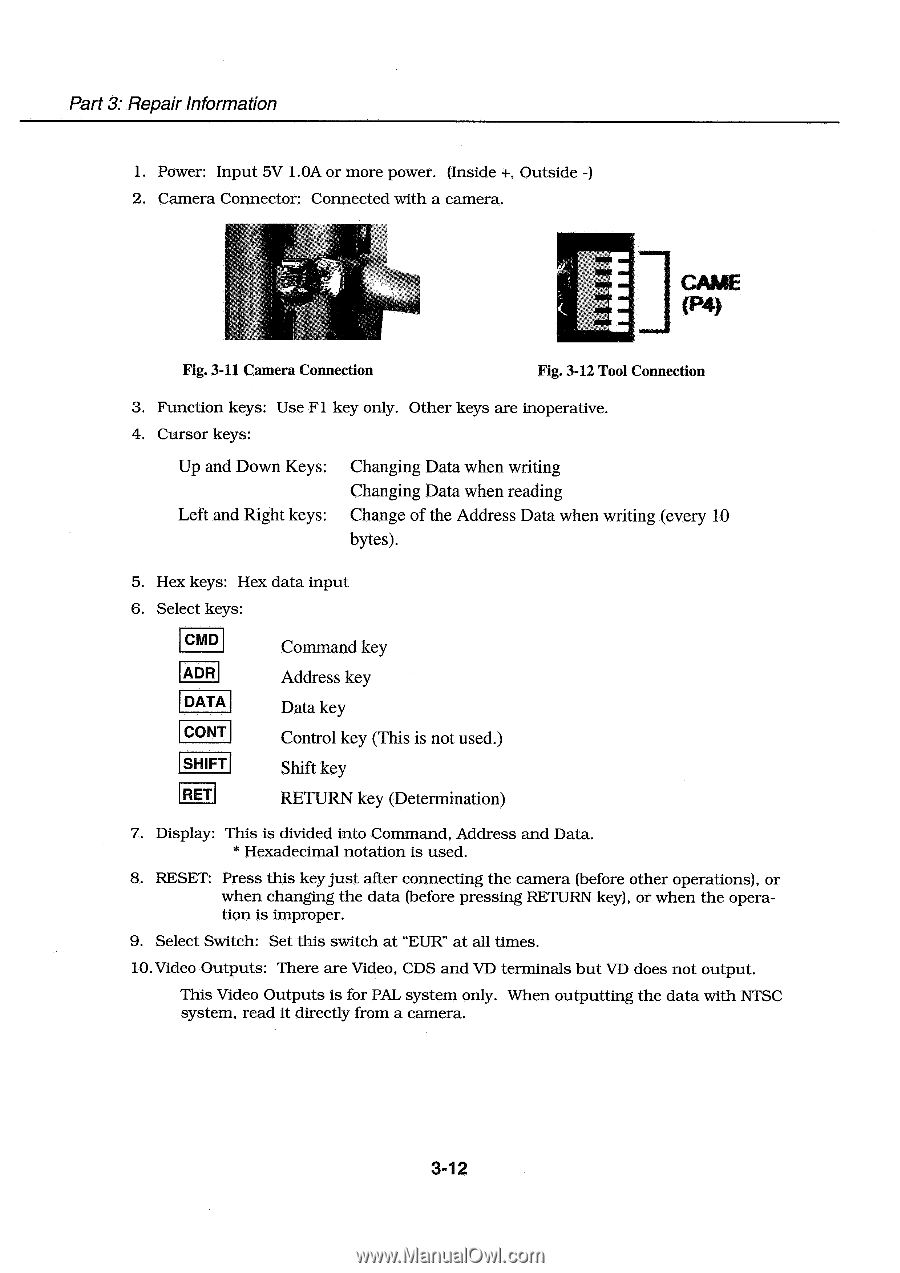
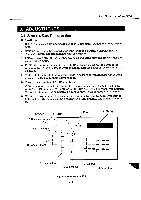
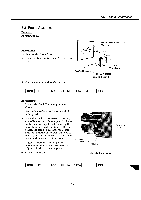
Part 3: Repair Information 1. Power: Input 5V 1.0A or more power. (Inside +, Outside -) 2. Camera Connector: Connected with a camera. CAME (P4) Fig. 3-11 Camera Connection Fig. 3-12 Tool Connection 3. Function keys: Use Fl key only. Other keys are inoperative. 4. Cursor keys: Up and Down Keys: Left and Right keys: Changing Data when writing Changing Data when reading Change of the Address Data when writing (every 10 bytes). 5. Hex keys: Hex data input 6. Select keys: CMD ADR DATA CONT SHIFT RET Command key Address key Data key Control key (This is not used.) Shift key RETURN key (Determination) 7. Display: This is divided into Command, Address and Data. * Hexadecimal notation is used. 8. RESET: Press this key just after connecting the camera (before other operations), or when changing the data (before pressing RETURN key), or when the operation is improper. 9. Select Switch: Set this switch at "EUR" at all times. 10. Video Outputs: There are Video, CDS and VD terminals but VD does not output. This Video Outputs is for PAL system only. When outputting the data with NTSC system, read it directly from a camera. 3-12
-
 1
1 -
2
-
3
-
4
-
5
-
6
-
7
-
8
-
9
-
10
-
11
-
12
-
13
-
14
-
15
-
16
-
17
-
18
-
19
-
20
-
21
-
22
-
23
-
24
-
25
-
26
-
27
-
28
-
29
-
30
-
31
-
32
-
33
-
34
-
35
-
36
-
37
-
38
-
39
-
40
-
41
-
42
-
43
-
44
-
45
-
46
-
47
-
48
-
49
-
50
-
51
-
52
-
53
-
54
-
55
-
56
-
 57
57 -
 58
58 -
 59
59 -
 60
60 -
 61
61 -
 62
62 -
 63
63 -
 64
64 -
 65
65 -
 66
66 -
 67
67 -
68
-
69
-
70
-
71
-
72
-
73
-
74
-
75
-
76
-
77
-
78
-
79
-
80
-
81
-
82
-
83
-
84
-
85
-
86
-
87
-
88
-
89
-
90
-
91
-
92
-
93
-
94
-
95
-
96
-
97
-
98
-
99
-
100
-
101
-
102
-
103
-
104
-
105
-
106
-
107
-
108
-
109
-
110
-
111
-
112
-
113
-
114
-
115
-
116
-
117
-
118
-
119
-
120
-
121
-
122
-
123
-
124
-
125
-
126
-
127
-
128
-
129
-
130
-
131
-
132
-
133
-
134
-
135
-
136
-
137
-
138
-
139
 |
 |