Canon PowerShot SX420 IS User Manual - Page 117
Using the Software
 |
View all Canon PowerShot SX420 IS manuals
Add to My Manuals
Save this manual to your list of manuals |
Page 117 highlights
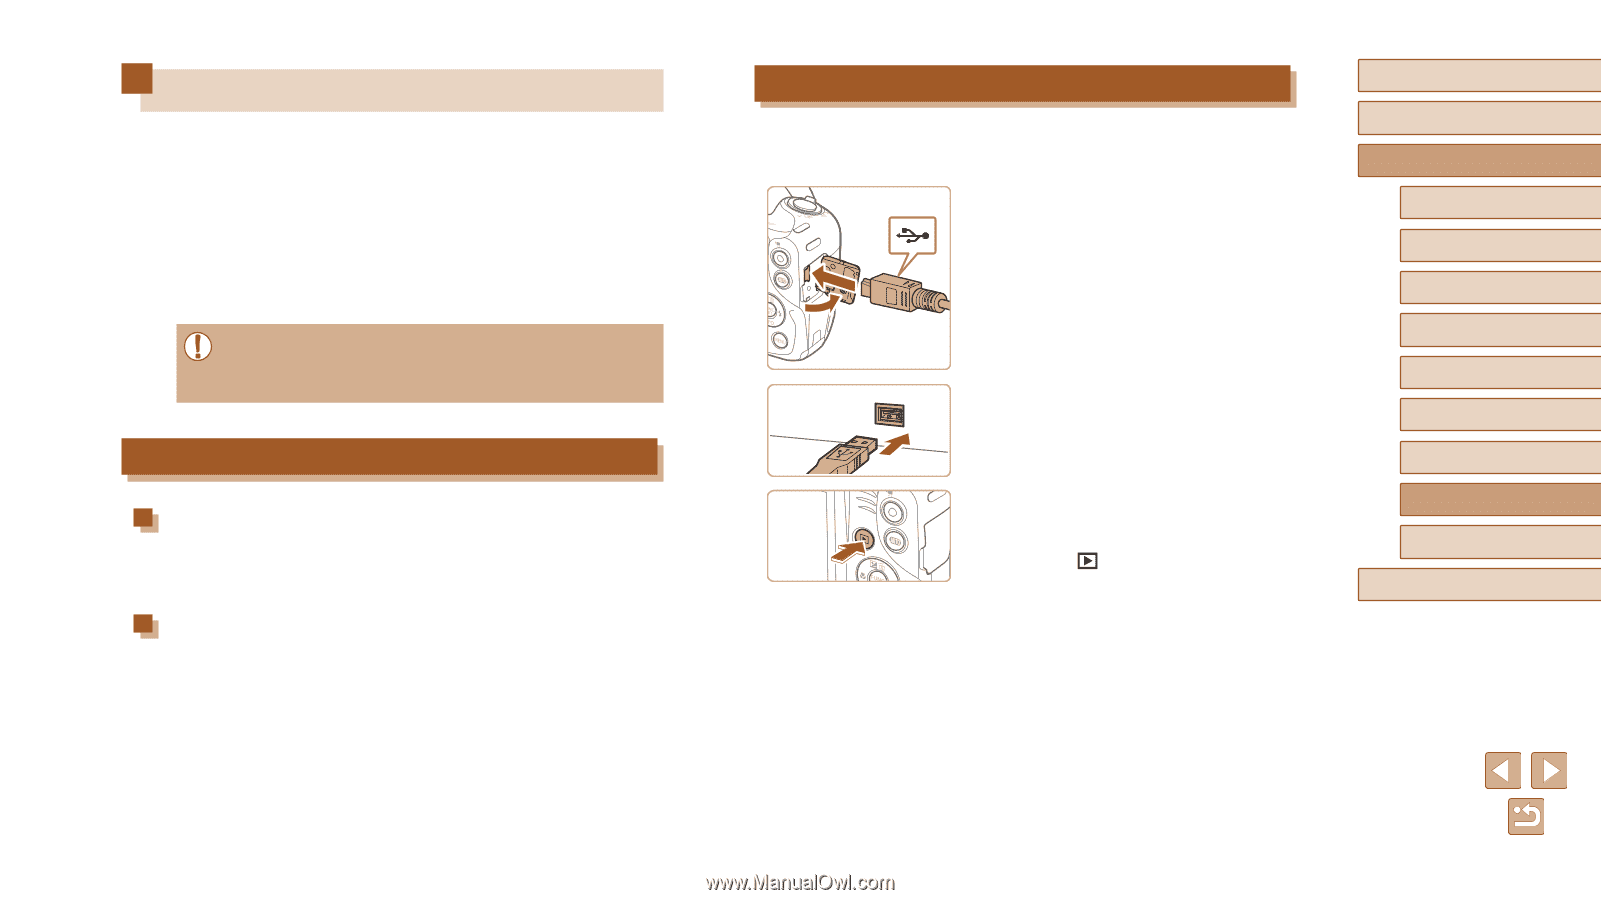
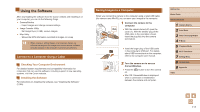
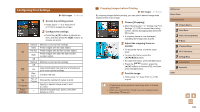
Using the Software After downloading the software from the Canon website and installing it on your computer, you can do the following things. ●● CameraWindow -- Import images and change camera settings ●● Image Transfer Utility -- Set Image Sync (=99), receive images ●● Map Utility -- Shows the GPS information recorded in images on a map ●● When viewing or editing images on a computer, always use software that supports the images shot on the camera (software normally installed on the computer or general-use software). Connect to a Computer Using a Cable Checking Your Computer Environment For detailed system requirements and compatibility information for computers that can use this software, including support in new operating systems, visit the Canon website. Installing the Software For instructions on installing the software, see "Installing the Software" (= 85). Saving Images to a Computer When you connect the camera to the computer using a retail USB cable (the camera uses Mini-B), you can save your images to the computer. 1 Connect the camera to the computer. (2) (1) ●●With the camera turned off, open the cover (1). With the smaller plug of the USB cable in the orientation shown, insert the plug fully into the camera terminal (2). ●●Insert the larger plug of the USB cable in the computer's USB port. For details about USB connections on the computer, refer to the computer user manual. 2 Turn the camera on to access CameraWindow. ●●Press the [ ] button to turn the camera on. ●●Mac OS: CameraWindow is displayed when a connection is established between the camera and computer. Before Use Basic Guide Advanced Guide 1 Camera Basics 2 Auto Mode 3 Other Shooting Modes 4 P Mode 5 Playback Mode 6 Wi-Fi Functions 7 Setting Menu 8 Accessories 9 Appendix Index 117
-
 1
1 -
2
-
3
-
4
-
5
-
6
-
7
-
8
-
9
-
10
-
11
-
12
-
13
-
14
-
15
-
16
-
17
-
18
-
19
-
20
-
21
-
22
-
23
-
24
-
25
-
26
-
27
-
28
-
29
-
30
-
31
-
32
-
33
-
34
-
35
-
36
-
37
-
38
-
39
-
40
-
41
-
42
-
43
-
44
-
45
-
46
-
47
-
48
-
49
-
50
-
51
-
52
-
53
-
54
-
55
-
56
-
57
-
58
-
59
-
60
-
61
-
62
-
63
-
64
-
65
-
66
-
67
-
68
-
69
-
70
-
71
-
72
-
73
-
74
-
75
-
76
-
77
-
78
-
79
-
80
-
81
-
82
-
83
-
84
-
85
-
86
-
87
-
88
-
89
-
90
-
91
-
92
-
93
-
94
-
95
-
96
-
97
-
98
-
99
-
100
-
101
-
102
-
103
-
104
-
105
-
106
-
107
-
108
-
109
-
110
-
111
-
 112
112 -
 113
113 -
 114
114 -
 115
115 -
 116
116 -
 117
117 -
 118
118 -
 119
119 -
 120
120 -
 121
121 -
 122
122 -
123
-
124
-
125
-
126
-
127
-
128
-
129
-
130
-
131
-
132
-
133
-
134
-
135
-
136
-
137
-
138
-
139
-
140
-
141
-
142
-
143
-
144
-
145
-
146
-
147
-
148
-
149
 |
 |