Canon imageRUNNER ADVANCE 8295 imageRUNNER ADVANCE 8200 Srs Basic Operation Gu
Canon imageRUNNER ADVANCE 8295 Manual
 |
View all Canon imageRUNNER ADVANCE 8295 manuals
Add to My Manuals
Save this manual to your list of manuals |
Canon imageRUNNER ADVANCE 8295 manual content summary:
- Canon imageRUNNER ADVANCE 8295 | imageRUNNER ADVANCE 8200 Srs Basic Operation Gu - Page 1
Basic Operation Guide After you finish reading this guide, store it in a safe place for future reference. ENG - Canon imageRUNNER ADVANCE 8295 | imageRUNNER ADVANCE 8200 Srs Basic Operation Gu - Page 2
next to the machine so it can be used when the user encounters trouble operating the machine. * Some functions explained in this manual may require optional equipment. * Screen shots used in this manual may differ from the ones you actually see. Contents ˙ Before You Start Using This Machine What - Canon imageRUNNER ADVANCE 8295 | imageRUNNER ADVANCE 8200 Srs Basic Operation Gu - Page 3
How to Use This Manual ˙ Troubleshooting Clearing Paper Jams 140 Reducing the Frequency of Paper Jams 204 Clearing Staple Jams ( Error Message Is Displayed 220 When an Error Code Is Displayed 221 Printer/Fax Driver Troubleshooting 222 Service Call Message 223 Frequently Asked Questions 230 3 - Canon imageRUNNER ADVANCE 8295 | imageRUNNER ADVANCE 8200 Srs Basic Operation Gu - Page 4
After you finish reading this guide, store it in a safe place for future reference. ENG Setup Guide ˔ Basic Operation Guide (This Manual) ˙ Provides an overview of the functions and describes the basic operations. ˙ Describes the maintenance and troubleshooting procedures for the machine. After - Canon imageRUNNER ADVANCE 8295 | imageRUNNER ADVANCE 8200 Srs Basic Operation Gu - Page 5
Guide ˙ Provides instructions on installing the printer, fax, and other drivers. • Printer Driver Installation Guide • Mac Printer Driver Installation Guide • Fax Driver Installation Guide • Network ScanGear Installation Guide ˙ Included on the same CD-ROM as each driver. Symbols Used in This Manual - Canon imageRUNNER ADVANCE 8295 | imageRUNNER ADVANCE 8200 Srs Basic Operation Gu - Page 6
the [Documents]* folder on your computer. If the shortcut icon is created on the Desktop or if the [index. html] file is double-clicked, the e-Manual is displayed. * The folder name differs, depending on your operating system. The folder name is [Documents] if you are using Windows Vista/7 and [My - Canon imageRUNNER ADVANCE 8295 | imageRUNNER ADVANCE 8200 Srs Basic Operation Gu - Page 7
is displayed. 2 Select from functions The instructions of each function and operation method are described. 3 [Top] The top page of the e-Manual is displayed. 4 [Site map] The site map of the e-Manual is displayed. 5 [Help] The usage of the e-Manual is displayed. 6 [Glossary] The glossary is - Canon imageRUNNER ADVANCE 8295 | imageRUNNER ADVANCE 8200 Srs Basic Operation Gu - Page 8
MEMO 8 - Canon imageRUNNER ADVANCE 8295 | imageRUNNER ADVANCE 8200 Srs Basic Operation Gu - Page 9
What This Machine Can Do Before You Start Using This Machine 1 What This Machine Can Do 10 Main Power and Energy Saver Key 12 Parts and Their Functions 14 External View 14 Internal View 16 Control Panel and Touch Panel Display 17 Control Panel (Flat 17 Upright Control Panel 19 Main Menu - Canon imageRUNNER ADVANCE 8295 | imageRUNNER ADVANCE 8200 Srs Basic Operation Gu - Page 10
features that can greatly enhance your efficiency. Equipped with features that meet the needs of document work in a digitized office, the imageRUNNER ADVANCE 8205/8295/8285 represents the ultimate in a digital multitasking machines. ˔ Copy You can make two-sided copies from one-sided originals or - Canon imageRUNNER ADVANCE 8295 | imageRUNNER ADVANCE 8200 Srs Basic Operation Gu - Page 11
other imageRUNNER ADVANCE machines for operations, such as printing stored data. (p. 44, p. 48) ˔ Use Remote Scanner You can use this machine as a remote scanner by TWAIN compatible computer software. You can scan up to 11" x 17" in size at a resolution of 600 x 600 dpi. (See e-Manual > Scanner - Canon imageRUNNER ADVANCE 8295 | imageRUNNER ADVANCE 8200 Srs Basic Operation Gu - Page 12
power of the optional products (the Staple Finisher-Q1 PRO, Booklet Finisher-Q1 PRO, Professional Puncher-C1, Professional Puncher Integration Unit-B1, switch cover. • If you are using a login service, log in using the procedure for the login service you are using. • If the main power indicator - Canon imageRUNNER ADVANCE 8295 | imageRUNNER ADVANCE 8200 Srs Basic Operation Gu - Page 13
may cause the machine to fail to back up the stored data. • Data stored in the machine may be damaged if the Advanced Box is accessed by another imageRUNNER ADVANCE machine or a computer immediately before the machine shuts down. • The machine may take some time to completely shutdown. Do not unplug - Canon imageRUNNER ADVANCE 8295 | imageRUNNER ADVANCE 8200 Srs Basic Operation Gu - Page 14
Parts and Their Functions This section provides you with the names and functions of all the parts on the outside and inside of the main unit. External View The Booklet Finisher-Q1 PRO and Duplex Color Image Reader Unit-G1 are attached: 1 11 10 2 3 4 5 6 7 8 9 13 12 14 15 16 17 14 - Canon imageRUNNER ADVANCE 8295 | imageRUNNER ADVANCE 8200 Srs Basic Operation Gu - Page 15
the USB port to connect external hard disks and other devices to the machine. 6 Multi-Purpose Tray Use the multi-purpose tray to feed paper manually and for loading nonstandard paper stock. 7 Main Unit's Upper Right Cover Open this cover when clearing a paper jam inside the main unit. 8 Main Unit - Canon imageRUNNER ADVANCE 8295 | imageRUNNER ADVANCE 8200 Srs Basic Operation Gu - Page 16
Parts and Their Functions Internal View The Booklet Finisher-Q1 PRO and Duplex Color Image Reader Unit-G1 are attached: 1 2 3 1 Toner Replacement Cover Open this cover to replace the toner cartridge. 2 Front Cover Open this cover - Canon imageRUNNER ADVANCE 8295 | imageRUNNER ADVANCE 8200 Srs Basic Operation Gu - Page 17
as to enter characters. If you lose the edit pen, contact your local authorized Canon dealer. Do not use an object with a sharp end on the control panel, machine. When the Error indicator flashes, follow the instructions that appear on the touch panel display. When the Error indicator maintains - Canon imageRUNNER ADVANCE 8295 | imageRUNNER ADVANCE 8200 Srs Basic Operation Gu - Page 18
. 12 Reset key Press to restore the standard settings of the machine. 13 ID (Log In/Out) key Press to log in/out when a login service such as Department ID Management or SSO-H has been set. 14 Numeric keys Press to enter numerical values. 15 Touch Panel Display The settings screen - Canon imageRUNNER ADVANCE 8295 | imageRUNNER ADVANCE 8200 Srs Basic Operation Gu - Page 19
the machine. When the Error indicator flashes, follow the instructions that appear on the touch panel display. When the Error indicator maintains as to enter characters. If you lose the edit pen, contact your local authorized Canon dealer. Do not use an object with a sharp end on the control panel, - Canon imageRUNNER ADVANCE 8295 | imageRUNNER ADVANCE 8200 Srs Basic Operation Gu - Page 20
12 Reset key Press to restore the standard settings of the machine. 13 ID (Log In/Out) key Press to log in/out when a login service such as Department ID Management or SSO-H has been set. 14 Touch Panel Display The settings screen for each function is shown on this display - Canon imageRUNNER ADVANCE 8295 | imageRUNNER ADVANCE 8200 Srs Basic Operation Gu - Page 21
that are frequently used are set in the Quick Menu beforehand, you can recall the function by pressing (Quick Menu). If you are using a login service, Quick Menu screen set for each user appears. To register a function in the Quick Menu, set the function and press [Register to Quick Menu] from - Canon imageRUNNER ADVANCE 8295 | imageRUNNER ADVANCE 8200 Srs Basic Operation Gu - Page 22
Main Menu Screen Settings You can specify settings for the displayed screen by pressing an administrator. on the top right of the screen. To perform this procedure, log in to the machine as • The items displayed when is pressed may differ, depending on the function. • If authentication function - Canon imageRUNNER ADVANCE 8295 | imageRUNNER ADVANCE 8200 Srs Basic Operation Gu - Page 23
Main Menu screen. Example of Customized Screen For more information on [Language/Keyboard Switch], [Auto Adjust Gradation], [Paper Settings], and [Paper Type Management Settings], see e-Manual > Settings/Registration. 23 - Canon imageRUNNER ADVANCE 8295 | imageRUNNER ADVANCE 8200 Srs Basic Operation Gu - Page 24
you to use it more conveniently and easily. You can register or change the settings according to your needs. For more information, see e-Manual > Settings/Registration. ˔ Preferences You can specify basic settings for using the machine, such as changing the paper size to load, changing the default - Canon imageRUNNER ADVANCE 8295 | imageRUNNER ADVANCE 8200 Srs Basic Operation Gu - Page 25
Flow of Basic Operations Flow of Basic Operations 2 How to Make a Copy 26 Things You Can Do with the Copy Functions 28 Sending a Fax 32 Things You Can Do with the Fax Functions 34 Sending Scanned Data (E-Mail/I-Fax/File Servers 38 Things You Can Do with the Scan and Send Functions 40 Storing - Canon imageRUNNER ADVANCE 8295 | imageRUNNER ADVANCE 8200 Srs Basic Operation Gu - Page 26
Menu screen. Placing originals in the feeder Adjust the slide guides to fit the size of your originals. Neatly place , see from p. 28 to p. 31 in this manual. Gently close the feeder/platen cover. • If a a control card. • If a login service, such as Department ID Management or SSO-H has been set, - Canon imageRUNNER ADVANCE 8295 | imageRUNNER ADVANCE 8200 Srs Basic Operation Gu - Page 27
Flow of Basic Operations 3 Setting the Number of Copies Enter the number of copies. Press the numeric keys to enter the desired copy quantity (1 to 999). 4 Start Copying After specifying the settings, press (Start). Press (Start). If you make a mistake when entering values, press (Clear) enter - Canon imageRUNNER ADVANCE 8295 | imageRUNNER ADVANCE 8200 Srs Basic Operation Gu - Page 28
Settings and Copy You can set the settings on the Regular Copy Basic Features screen quickly by using the Express Copy Basic Features screen. For instructions on displaying the Express Copy Basic Features Screen, see e-Manual > Settings/Registration. 28 - Canon imageRUNNER ADVANCE 8295 | imageRUNNER ADVANCE 8200 Srs Basic Operation Gu - Page 29
Flow of Basic Operations 2 3 1 4 12 11 5 6 10 9 8 7 [Options] 1/3 1 [Book 2 Pages] You can copy facing pages in a book onto separate sheets of paper. 2 [2-Sided] You can make one-sided copies from two-sided originals, or make two-sided copies of your originals. 3 [Finishing] You can - Canon imageRUNNER ADVANCE 8295 | imageRUNNER ADVANCE 8200 Srs Basic Operation Gu - Page 30
Things You Can Do with the Copy Functions This section describes the functions you can use on the [Options] (2/3 and 3/3) screen of the Copy function. The [Options] screen is divided into three screens. Pressing or on the bottom right of the screen displays the next or previous screen. An optional - Canon imageRUNNER ADVANCE 8295 | imageRUNNER ADVANCE 8200 Srs Basic Operation Gu - Page 31
Flow of Basic Operations How to Make a Copy 2 3 1 4 10 5 6 9 8 7 [Options] 3/3 1 [Print & Check] This mode enables you to confirm scanned images page by page before copying when you scan originals on the platen glass. 2 [Nega/Posi] This mode enables you to copy the original image with the - Canon imageRUNNER ADVANCE 8295 | imageRUNNER ADVANCE 8200 Srs Basic Operation Gu - Page 32
. Placing originals in the feeder Adjust the slide guides to fit the size of your originals. Neatly from p. 34 to p. 37 in this manual. Gently close the feeder/platen cover. • is attached, first insert a control card. • If a login service, such as Department ID Management or SSO-H has been set, - Canon imageRUNNER ADVANCE 8295 | imageRUNNER ADVANCE 8200 Srs Basic Operation Gu - Page 33
Sending]. You can specify the destination using the one-touch buttons or [Address Book]. For more information on storing the destination, see e-Manual > Fax. When sending is complete, remove your originals. After a job is sent, the send settings may be retained except the specified destinations - Canon imageRUNNER ADVANCE 8295 | imageRUNNER ADVANCE 8200 Srs Basic Operation Gu - Page 34
then start scanning the originals. You can directly send without storing the original in the memory. 11 [On-Hook] When using the fax information service, you can perform operation, such as entering number while listening to the automated audio response from the speaker of the machine. 12 [Address - Canon imageRUNNER ADVANCE 8295 | imageRUNNER ADVANCE 8200 Srs Basic Operation Gu - Page 35
Flow of Basic Operations 2 1 4 3 Screen for Specifying the Fax Destination 1 [Pause] Press to insert a pause of several seconds in the fax number that you are dialing. If you insert a pause, the letter appears between the numbers, and the letter appears at the end of the number. When - Canon imageRUNNER ADVANCE 8295 | imageRUNNER ADVANCE 8200 Srs Basic Operation Gu - Page 36
] You can select the telephone line to use for sending a facsimile. 8 [Sender Name (TTI)] You can register a department name or personal name in advance, and show this on the destination fax machine. * Set the Sender Name after specifying the destination. 9 [Job Build] You can scan originals that - Canon imageRUNNER ADVANCE 8295 | imageRUNNER ADVANCE 8200 Srs Basic Operation Gu - Page 37
Flow of Basic Operations 2 3 1 4 [Options] 2/2 1 [Delayed Send] This mode enables you to store a send job in memory, and have it sent at a later time. 2 [Preview] This mode enables you to preview the scanned data of your originals and to check the page count before sending a fax. You can also - Canon imageRUNNER ADVANCE 8295 | imageRUNNER ADVANCE 8200 Srs Basic Operation Gu - Page 38
. Placing originals in the feeder Adjust the slide guides to fit the size of your originals. Neatly see from p. 40 to p. 43 in this manual. Gently close the feeder/platen cover. • If attached, first insert a control card. • If a login service, such as Department ID Management or SSO-H has been set, - Canon imageRUNNER ADVANCE 8295 | imageRUNNER ADVANCE 8200 Srs Basic Operation Gu - Page 39
next original. After all of the originals are scanned, press [Start Sending]. For more information on storing the destination in the address book, see e-Manual > Scan and Send. You can specify the destination using the onetouch buttons or frequently used settings. Also, if you want to send to a new - Canon imageRUNNER ADVANCE 8295 | imageRUNNER ADVANCE 8200 Srs Basic Operation Gu - Page 40
Things You Can Do with the Scan and Send Functions To use the Send functions, press [Scan and Send] on the Main Menu screen. This section describes the main functions on the Scan and Send Basic Features screen. Depending on the file format, optional products are required to use the Scan function. - Canon imageRUNNER ADVANCE 8295 | imageRUNNER ADVANCE 8200 Srs Basic Operation Gu - Page 41
Flow of Basic Operations 1 2 3 4 5 6 9 87 Scan and Send Basic Features Screen (Destination Set) 1 [Previous Settings] You can recall the three most recent destinations or send settings. You can send using the recalled destination or settings. 2 [Favorite Settings] You can register frequently - Canon imageRUNNER ADVANCE 8295 | imageRUNNER ADVANCE 8200 Srs Basic Operation Gu - Page 42
Things You Can Do with the Scan and Send Functions This section describes the functions you can use on the [Options] (1/2 and 2/2) screen of the Scan and Send function. The [Options] screen is divided into two screens. Pressing or on the bottom right of the screen displays the next or previous - Canon imageRUNNER ADVANCE 8295 | imageRUNNER ADVANCE 8200 Srs Basic Operation Gu - Page 43
Flow of Basic Operations Useful Send Functions (Last Page) 2 3 1 4 5 8 7 67 [Options] 2/2 1 [Delayed Send] This mode enables you to store a send job in memory, and have it sent at a later time. 2 [Preview] This mode enables you to preview the scanned data of your originals and to check - Canon imageRUNNER ADVANCE 8295 | imageRUNNER ADVANCE 8200 Srs Basic Operation Gu - Page 44
] from the Main Menu screen. Placing originals in the feeder Adjust the slide guides to fit the size of your originals. Neatly place your originals with the side is attached, first insert a control card. • If a login service, such as Department ID Management or SSO-H has been set, press (Log In/Out - Canon imageRUNNER ADVANCE 8295 | imageRUNNER ADVANCE 8200 Srs Basic Operation Gu - Page 45
scanned, press [Start Storing]. The Scan screen is displayed. You can set various scan functions. For more information, see from p. 46 to p. 47 in this manual. When scanning is complete, remove your originals. 45 - Canon imageRUNNER ADVANCE 8295 | imageRUNNER ADVANCE 8200 Srs Basic Operation Gu - Page 46
Things You Can Do with the Scan and Store Functions To scan the original and store it, press [Scan and Store] on the Main Menu screen. This section describes the functions you can use on the Scan and Store Basic Features screen and the [Options] screen. If you press [Scan] after selecting the - Canon imageRUNNER ADVANCE 8295 | imageRUNNER ADVANCE 8200 Srs Basic Operation Gu - Page 47
Flow of Basic Operations 2 3 1 4 8 5 7 6 [Options] 1 [Book 2 Pages] You can scan facing pages, such as in a book one sheet at a time. 2 [Booklet Scan] You can scan with booklet settings. 3 [N on 1] You can scan multiple pages of the original and reduce the size of the images to fit onto a - Canon imageRUNNER ADVANCE 8295 | imageRUNNER ADVANCE 8200 Srs Basic Operation Gu - Page 48
-H appears, you must enter the applicable authentication information (ID, password/ PIN). If the Copy Card Reader-F1 is attached, first insert a control card. • If a login service, such as Department ID Management or SSO-H has been set, press (Log In/Out)to log out. 48 - Canon imageRUNNER ADVANCE 8295 | imageRUNNER ADVANCE 8200 Srs Basic Operation Gu - Page 49
can set various print settings on the screen displayed when [Change Print Settings] is pressed. For more information, see from p. 53 to p. 55 in this manual. When printing is complete, the display returns to the Mail Box Selection screen. 49 - Canon imageRUNNER ADVANCE 8295 | imageRUNNER ADVANCE 8200 Srs Basic Operation Gu - Page 50
-H appears, you must enter the applicable authentication information (ID, password/ PIN). If the Copy Card Reader-F1 is attached, first insert a control card. • If a login service, such as Department ID Management or SSO-H has been set, press (Log In/Out) to log out. 50 - Canon imageRUNNER ADVANCE 8295 | imageRUNNER ADVANCE 8200 Srs Basic Operation Gu - Page 51
]. Press [Send]. Select the destinations press [OK]. Press [Start Sending]. You can set various send functions. For more information, see p. 56 to p. 57 in this manual. 51 - Canon imageRUNNER ADVANCE 8295 | imageRUNNER ADVANCE 8200 Srs Basic Operation Gu - Page 52
Things You Can Do with the Access Stored Files Functions (File Operation) To perform various operations on stored files, press [Access Stored Files] on the Main Menu screen. This section describes the functions you can use to edit files stored in a mail box. Select the file that you want to edit - Canon imageRUNNER ADVANCE 8295 | imageRUNNER ADVANCE 8200 Srs Basic Operation Gu - Page 53
Flow of Basic Operations Things You Can Do with the Access Stored Files Functions (Print) This section describes the functions on the Print Settings screen that you can use when printing stored files. If you select the file that you want to print from the list of stored files and press [Print], the - Canon imageRUNNER ADVANCE 8295 | imageRUNNER ADVANCE 8200 Srs Basic Operation Gu - Page 54
Things You Can Do with the Access Stored Files Functions (Print) This section describes the functions you can use on the [Options] (1/2 and 2/2) screen of the Access Stored Files function. The [Options] screen is divided into two screens. Pressing or on the bottom right of the screen displays the - Canon imageRUNNER ADVANCE 8295 | imageRUNNER ADVANCE 8200 Srs Basic Operation Gu - Page 55
Operations 2 3 9 1 4 8 7 6 5 11 10 [Options] (Advanced Box, the Advanced Box of Another Machine on the Same Network, Memory Media) 1 [Resolution] If can specify the orientation of the image manually for printing. The available functions may differ, depending on the file format. 55 - Canon imageRUNNER ADVANCE 8295 | imageRUNNER ADVANCE 8200 Srs Basic Operation Gu - Page 56
Things You Can Do with the Access Stored Files Functions (Send) This section describes things you can do when sending a file stored in a mail box, and the modes available on the [Options] screen. Select the file that you want to send from the list of stored files, press [Send], and the following - Canon imageRUNNER ADVANCE 8295 | imageRUNNER ADVANCE 8200 Srs Basic Operation Gu - Page 57
the first text block in the document for use as its file name. 4 [Sender Name (TTI)] You can register a department name or personal name in advance, and show this on the destination fax machine. * Set the Sender Name after specifying the destination. 5 [E-Mail Priority] You can set a priority level - Canon imageRUNNER ADVANCE 8295 | imageRUNNER ADVANCE 8200 Srs Basic Operation Gu - Page 58
turn ON the main power again. • The [Remote UI] setting is made effective only after turning the machine's main power OFF, and then ON. For instructions on turning ON/OFF the machine, see p.12, 13 in this - Canon imageRUNNER ADVANCE 8295 | imageRUNNER ADVANCE 8200 Srs Basic Operation Gu - Page 59
]. To specify the settings: Click [Settings/Registration]. If the Log In screen is displayed, enter the user name and password click [Log In]. If a login service, such as Department ID Management or SSO-H has been set, enter the appropriate login information. 59 - Canon imageRUNNER ADVANCE 8295 | imageRUNNER ADVANCE 8200 Srs Basic Operation Gu - Page 60
[1-sided printing] is the default setting. • Printing methods may differ, depending on the applications you are using. For details, see the instruction manuals provided with the application software. • The screens may differ, depending on the operating system, and the type and version of the printer - Canon imageRUNNER ADVANCE 8295 | imageRUNNER ADVANCE 8200 Srs Basic Operation Gu - Page 61
. When printing is complete, collect the output. The print job status can be checked from the Remote UI. For more information, see p. 59 in this manual. 61 - Canon imageRUNNER ADVANCE 8295 | imageRUNNER ADVANCE 8200 Srs Basic Operation Gu - Page 62
MEMO 62 - Canon imageRUNNER ADVANCE 8295 | imageRUNNER ADVANCE 8200 Srs Basic Operation Gu - Page 63
Staple Finisher-Q1 PRO/Booklet Finisher-Q1 PRO 93 Replacing the Staple Cartridge in the Saddle Stitcher Unit (Booklet Finisher-Q1 PRO 96 Replacing the Cleaning 126 Platen Glass and Underside of the Feeder 127 Manual Feeder Cleaning 128 Automatic Feeder Cleaning 132 Wire Cleaning 133 Drum - Canon imageRUNNER ADVANCE 8295 | imageRUNNER ADVANCE 8200 Srs Basic Operation Gu - Page 64
You can use custom paper sizes. For more information, see e-Manual > Settings/Registration > Registering/Editing/Deleting Custom Paper Sizes. fixed to LTR. For instructions on changing the paper size that can be loaded in the Paper Deck Unit-C1, contact your local authorized Canon dealer. • For more - Canon imageRUNNER ADVANCE 8295 | imageRUNNER ADVANCE 8200 Srs Basic Operation Gu - Page 65
3 and 4 2 Prepare the paper to load. Open the packaging for the paper, and remove the paper stack. • For high-quality printouts, use paper recommended by Canon. • Before loading paper, always fan the sheets several times, and align the edges to facilitate feeding. 65 - Canon imageRUNNER ADVANCE 8295 | imageRUNNER ADVANCE 8200 Srs Basic Operation Gu - Page 66
3 Load the paper stack into the paper drawer. Paper Drawer (Right/Left) 1. Make sure that the paper size plate of the paper drawer matches the size of the paper loaded in the paper drawer. 2. Load the paper stack against the right wall of the paper drawer. 3. Gently push the paper drawer back into - Canon imageRUNNER ADVANCE 8295 | imageRUNNER ADVANCE 8200 Srs Basic Operation Gu - Page 67
on the paper package about which side of the paper to load, follow those instructions. • When the paper is loaded into the paper drawer, the side facing down is the one printed on. • If problems, such as poor print quality or paper jams occur, try turning the paper stack over and reloading - Canon imageRUNNER ADVANCE 8295 | imageRUNNER ADVANCE 8200 Srs Basic Operation Gu - Page 68
a Different Paper Size If you want to load a different size paper into a paper drawer, follow the procedure described below to adjust the paper drawer guides. When handling paper, take care not to cut your hands on the edges of the paper. 1 Remove the paper loaded in the paper drawer. 1. Press - Canon imageRUNNER ADVANCE 8295 | imageRUNNER ADVANCE 8200 Srs Basic Operation Gu - Page 69
Routine Maintenance 3 Load the appropriate size paper into the paper drawer. 1. Make sure that the paper size setting of the paper drawer matches the size of the paper to load in the paper drawer. 2. Load the paper stack against the right wall of the paper drawer. 4 Change the paper drawer's paper - Canon imageRUNNER ADVANCE 8295 | imageRUNNER ADVANCE 8200 Srs Basic Operation Gu - Page 70
, select [Face Up (Reverse Order)] in [Face Up/Face Down]. (See e-Manual > Copy.) • If you want to output prints with the printed face down, select paper with horizontal (landscape) orientation in [Select Paper]. (See e-Manual > Copy.) Loading Transparencies You can load the transparencies to the - Canon imageRUNNER ADVANCE 8295 | imageRUNNER ADVANCE 8200 Srs Basic Operation Gu - Page 71
-K1 Only LTR tab paper can be used. When you load tab paper into the paper drawer, make sure to register the paper type. (See e-Manual > Settings/Registration.) How to Load Tab Paper There are two kinds of tab paper: right order tab paper and reverse order tab paper. 1 2 3 1 2 3 4 4 Right - Canon imageRUNNER ADVANCE 8295 | imageRUNNER ADVANCE 8200 Srs Basic Operation Gu - Page 72
properly for the paper size loaded in the paper drawer, the correct paper size may not appear on the touch panel display. Adjust the front guide correctly to avoid causing a paper jam, dirty prints, or make the inside of the machine dirty. 3 Remove the Tab Feeding Attachment Kit-B1. 1 Slide the - Canon imageRUNNER ADVANCE 8295 | imageRUNNER ADVANCE 8200 Srs Basic Operation Gu - Page 73
Routine Maintenance 4 Place the Tab Feeding Attachment Kit-B1 aligning the mark for tab paper. 1 Place the Tab Feeding Attachment Kit-B1 aligning the mark for tab paper. 2 Slide the Tab Feeding Attachment Kit-B1 to the back of the paper drawer. 5 Place the Tab Feeding Attachment Kit-B1 aligning the - Canon imageRUNNER ADVANCE 8295 | imageRUNNER ADVANCE 8200 Srs Basic Operation Gu - Page 74
LTRR • The paper size of the Paper Deck Unit-C1 is fixed to LTR. For instructions on changing the paper size that can be loaded in the Paper Deck Unit-C1, contact your local authorized Canon dealer. Loading Paper into the Paper Deck Unit-C1/POD Deck Lite-A1 If you select - Canon imageRUNNER ADVANCE 8295 | imageRUNNER ADVANCE 8200 Srs Basic Operation Gu - Page 75
, and remove the paper stack. • For high-quality printouts, use paper recommended by Canon. • Before loading paper, always fan the sheets several times, and align the edges to facilitate feeding. 3 Lift the feeding support roller. If the Paper Deck Unit-C1 is attached, proceed to step 4. • When - Canon imageRUNNER ADVANCE 8295 | imageRUNNER ADVANCE 8200 Srs Basic Operation Gu - Page 76
4 Load the paper stack into the paper deck unit. Paper Deck Unit-C1 POD Deck Lite-A1 5 Lower the feeding support roller and close the paper deck unit. 1. Lower the feeding support roller. If the Paper Deck Unit-C1 is attached, proceed to next step. 2. Close the paper deck unit. The inside lifter - Canon imageRUNNER ADVANCE 8295 | imageRUNNER ADVANCE 8200 Srs Basic Operation Gu - Page 77
the paper package about which side of the paper to load, follow those instructions. • When paper is loaded in the Paper Deck Unit-C1 or POD Deck Lite-A1, the side facing up is the one printed on. • If problems, such as poor print quality or paper jams occur, try turning the - Canon imageRUNNER ADVANCE 8295 | imageRUNNER ADVANCE 8200 Srs Basic Operation Gu - Page 78
the desired paper size for the POD Deck Lite-A1 in [Paper Settings] in [Preferences] (Settings/Registration). For instructions on registering the paper size for the POD Deck Lite-A1, see e-Manual > Settings/ Registration. 2 Remove all of the loaded paper, the paper size sheet, and deck base plate in - Canon imageRUNNER ADVANCE 8295 | imageRUNNER ADVANCE 8200 Srs Basic Operation Gu - Page 79
Routine Maintenance 4 Remove the rear edge retainer. 5 Remove the two blue screws on the outer size change plate using a coin or something similar. Do not loosen or remove any screw other than the two blue screws on the outer size change plate. 6 Remove the outer size change plate. 79 - Canon imageRUNNER ADVANCE 8295 | imageRUNNER ADVANCE 8200 Srs Basic Operation Gu - Page 80
7 Align the outer size change plate with the marks for the desired paper size that you want to load. 330mm 483mm 13 19 305mm 457mm 12 18 11 17/LTR LGL/LTR R (SRA3) 320mm 450mm 12 5/8 17 11/16 A4/A3 B5/B4 A4 R • Make sure to align the outer size change plate properly with the marks for the desired - Canon imageRUNNER ADVANCE 8295 | imageRUNNER ADVANCE 8200 Srs Basic Operation Gu - Page 81
Routine Maintenance 9 Align the rear edge retainer with the marks for the desired paper size. B5 LTR A4 If the rear edge retainer is not aligned properly, paper may become jammed, the quality of the image may be degraded, or the inside of the machine may become dirty. Make sure to load paper with - Canon imageRUNNER ADVANCE 8295 | imageRUNNER ADVANCE 8200 Srs Basic Operation Gu - Page 82
12Remove the inner size change plate. Hot air that is blown by the fan may warm the inner size change plate. 13Align the inner size change plate with the marks for the desired paper size. B4 B5 11 17/LTR 12 18 305mm 457mm 13 19 330mm 483mm A3 A4 125/8 1711/16 320mm 450mm (SRA3) • Make sure to - Canon imageRUNNER ADVANCE 8295 | imageRUNNER ADVANCE 8200 Srs Basic Operation Gu - Page 83
Routine Maintenance 14Fix the inner size change plate with the two blue screws using a coin or something similar, while slightly holding its center front portion, and pressing it away from you. Fasten the right blue screw before fastening the left blue screw. If you fasten the blue screws without - Canon imageRUNNER ADVANCE 8295 | imageRUNNER ADVANCE 8200 Srs Basic Operation Gu - Page 84
15Insert the correct deck base plate that matches the new paper size into the paper deck. If you are not using the deck base plate, move the POD Deck Lite-A1 away from the main unit, and hang it on the hook that is on the inner left side of the POD Deck Lite-A1. • Always use the deck base plate when - Canon imageRUNNER ADVANCE 8295 | imageRUNNER ADVANCE 8200 Srs Basic Operation Gu - Page 85
Routine Maintenance 17Load the paper stack into the paper deck, and then lower the feeding support roller. 1. Load the paper stack. 2. Lower the feeding support roller. When loading paper, take care not to cut your hands on the edges of the paper. • To load paper larger than LGL, first close - Canon imageRUNNER ADVANCE 8295 | imageRUNNER ADVANCE 8200 Srs Basic Operation Gu - Page 86
Loading Paper into the Document Insertion Unit-K1 (Optional) Follow the procedure below to load the paper into the Document Insertion Unit-K1. When loading paper, take care not to cut your hands on the edges of the paper. • The Document Insertion Unit-K1 is an optional product. • The following paper - Canon imageRUNNER ADVANCE 8295 | imageRUNNER ADVANCE 8200 Srs Basic Operation Gu - Page 87
Routine Maintenance 1 Adjust the slide guides to fit the paper size. ˔ To use the upper tray: Adjust the slide guide. ˔ To use the lower tray: Open the tray cover. Adjust the slide guide. 87 - Canon imageRUNNER ADVANCE 8295 | imageRUNNER ADVANCE 8200 Srs Basic Operation Gu - Page 88
Prepare the paper to load. Open the packaging for the paper, and remove the paper stack. • For high-quality printouts, use paper recommended by Canon. • Before loading paper, always fan the sheets several times, and align the edges to facilitate feeding. Also, you should always fan paper that has - Canon imageRUNNER ADVANCE 8295 | imageRUNNER ADVANCE 8200 Srs Basic Operation Gu - Page 89
Lite-A1. • A maximum of 200 sheets of paper (20 lb bond (80 g/m2)) can be loaded in the tray of Document Insertion Unit-K1. • For instructions on loading tab paper into the Document Insertion Unit-K1, see "Loading Tab Paper Using the Tab Feeding Attachment Kit-B1 (Optional)," on p. 71. • Rewrap - Canon imageRUNNER ADVANCE 8295 | imageRUNNER ADVANCE 8200 Srs Basic Operation Gu - Page 90
Replacing the Stamp Cartridge (Duplex Color Image Reader Unit-G1) Originals sent via the Duplex Color Image Reader Unit-G1 can be stamped to indicate that they have been sent. Replace the stamp cartridge when the stamp mark is faint or no longer visible. When replacing the stamp cartridge, take - Canon imageRUNNER ADVANCE 8295 | imageRUNNER ADVANCE 8200 Srs Basic Operation Gu - Page 91
Routine Maintenance 3 Insert the stamp cartridge. 1. Remove the old stamp cartridge, using tweezers. 2. Push in the new stamp cartridge until it clicks. • Insert the stamp cartridge so that it is not slanted. • Insert the stamp cartridge properly, or paper jams may occur. 4 Close the stamp cover. - Canon imageRUNNER ADVANCE 8295 | imageRUNNER ADVANCE 8200 Srs Basic Operation Gu - Page 92
5 Close the document scan cover, and the feeder. 1. Close the document scan cover. 2. Close the feeder. • When closing the document scan cover and the feeder, be careful not to get your fingers caught, as this may result in personal injury. • Be aware that the light emitted from the platen glass - Canon imageRUNNER ADVANCE 8295 | imageRUNNER ADVANCE 8200 Srs Basic Operation Gu - Page 93
after you place the staple cartridge into the staple case. • The Staple Finisher-Q1 PRO and Booklet Finisher-Q1 PRO are optional products. • We recommend that you order staple cartridges from your local authorized Canon dealer before your stock runs out. • Use only staple cartridges intended for use - Canon imageRUNNER ADVANCE 8295 | imageRUNNER ADVANCE 8200 Srs Basic Operation Gu - Page 94
2 Pull out the staple case from the stapler unit, holding it by its green tab. When the stapler unit is at the back and it is difficult to pull out the staple case, turn the dial on the bottom left hand side to the left to move the stapler unit. 3 Pull out the staple cartridge. 1. Pull out the - Canon imageRUNNER ADVANCE 8295 | imageRUNNER ADVANCE 8200 Srs Basic Operation Gu - Page 95
Routine Maintenance 5 Close the front cover of the finisher. When closing the front cover of the finisher, be careful not to get your fingers caught, as this may result in personal injury. 95 - Canon imageRUNNER ADVANCE 8295 | imageRUNNER ADVANCE 8200 Srs Basic Operation Gu - Page 96
attached (the Booklet Finisher-Q1 PRO is an optional product). • When replacing the staple cartridges, replace both the front and back staple cartridges. • We recommend that you order staple cartridges from your local authorized Canon dealer before your stock runs out. • Use only staple cartridges - Canon imageRUNNER ADVANCE 8295 | imageRUNNER ADVANCE 8200 Srs Basic Operation Gu - Page 97
Routine Maintenance 2 Pull out the staple case in the saddle stitcher unit (F-C4). 1. Pull out the saddle stitcher unit (F-C4). 2. Pull out the staple case, holding it by its tab. 3 Open the staple case cover by pressing the its left and right sides. 1. Press the left and right sides of the staple - Canon imageRUNNER ADVANCE 8295 | imageRUNNER ADVANCE 8200 Srs Basic Operation Gu - Page 98
5 Insert the new staple cartridge until it clicks into place. 6 Close the staple case cover. 7 Return the staple case to its original position in the saddle stitcher unit. When returning the staple case, always make sure to the staple case is inserted until the arrows are aligned as shown in the - Canon imageRUNNER ADVANCE 8295 | imageRUNNER ADVANCE 8200 Srs Basic Operation Gu - Page 99
Routine Maintenance 8 Gently push the saddle stitcher unit (F-C4) back into the machine, and close the front cover. 1. Gently push the saddle stitcher unit (F-C4) back into the machine. Always make sure to push the saddle stitcher unit in as far as it can go. 2. Close the front cover of the - Canon imageRUNNER ADVANCE 8295 | imageRUNNER ADVANCE 8200 Srs Basic Operation Gu - Page 100
case. • The Staple Finisher-N1 and Booklet Finisher-N1 are optional products. • We recommend that you order staple cartridges from your local authorized Canon dealer before your stock runs out. • Use only staple cartridges intended for use with this machine. 1 Open the front cover of the finisher - Canon imageRUNNER ADVANCE 8295 | imageRUNNER ADVANCE 8200 Srs Basic Operation Gu - Page 101
Routine Maintenance 2 Pull out the staple case from the stapler unit, holding it by its green tab. 3 Pull out the staple cartridge. 1. Pull out the staple cartridge. 2. Insert the new staple cartridge. • Remove the seal that holds the staples together after you place the staple cartridge into - Canon imageRUNNER ADVANCE 8295 | imageRUNNER ADVANCE 8200 Srs Basic Operation Gu - Page 102
5 Close the front cover of the finisher. When closing the front cover of the finisher, be careful not to get your fingers caught, as this may result in personal injury. 102 - Canon imageRUNNER ADVANCE 8295 | imageRUNNER ADVANCE 8200 Srs Basic Operation Gu - Page 103
When replacing the staple cartridges, replace both the front and back staple cartridges. • We recommend that you order staple cartridges from your local authorized Canon dealer before your stock runs out. • Use only staple cartridges intended for use with this machine. 1 Open the front cover of the - Canon imageRUNNER ADVANCE 8295 | imageRUNNER ADVANCE 8200 Srs Basic Operation Gu - Page 104
2 Pull out the staple case in the saddle stitcher unit (F-C5). 1. Pull out the saddle stitcher unit (F-C5). 2. Pull out the staple case, holding it by its tab. 3 Open the staple case cover by pressing the light blue area. 1. Press the light blue area on both sides of the staple cartridge. 2. Open - Canon imageRUNNER ADVANCE 8295 | imageRUNNER ADVANCE 8200 Srs Basic Operation Gu - Page 105
Routine Maintenance 5 Insert the new staple cartridge until it clicks into place. 6 Close the staple case cover. 7 Return the staple case to its original position in the saddle stitcher unit. When returning the staple case, always make sure to the staple case is inserted until the arrows are - Canon imageRUNNER ADVANCE 8295 | imageRUNNER ADVANCE 8200 Srs Basic Operation Gu - Page 106
8 Gently push the saddle stitcher unit (F-C5) back into the machine, and close the front cover. 1. Gently push the saddle stitcher unit (F-C5) back into the machine. Always make sure to push the saddle stitcher unit in as far as it can go. 2. Close the front cover of the finisher. • When pushing the - Canon imageRUNNER ADVANCE 8295 | imageRUNNER ADVANCE 8200 Srs Basic Operation Gu - Page 107
This section describes how to remove the staple waste from the staple waste tray. When the staple waste tray of the Staple Finisher-Q1 PRO/Booklet Finisher-Q1 PRO/Staple Finisher-N1/Booklet Finisher-N1 becomes full, a screen prompting you to remove the staple waste appears on the touch panel display - Canon imageRUNNER ADVANCE 8295 | imageRUNNER ADVANCE 8200 Srs Basic Operation Gu - Page 108
3 Discard the staple waste. When discarding the staple waste, be careful not to touch the staple waste, as this may result in personal injury. 4 Return the staple waste tray to its original position. Make sure to insert the staple waste tray as far as it can go. 5 Close the front cover of the - Canon imageRUNNER ADVANCE 8295 | imageRUNNER ADVANCE 8200 Srs Basic Operation Gu - Page 109
Routine Maintenance Staple Finisher-N1/Booklet Finisher-N1 1 Open the front cover of the finisher. 2 Below the stapler unit is the staple waste tray. Pull out the staple waste tray. 109 - Canon imageRUNNER ADVANCE 8295 | imageRUNNER ADVANCE 8200 Srs Basic Operation Gu - Page 110
3 Discard the staple waste. When discarding the staple waste, be careful not to touch the staple waste, as this may result in personal injury. 4 Return the staple waste tray to its original position. Make sure to insert the staple waste tray as far as it can go. 5 Close the front cover of the - Canon imageRUNNER ADVANCE 8295 | imageRUNNER ADVANCE 8200 Srs Basic Operation Gu - Page 111
The Puncher Unit-BS1 and Puncher Unit-BF1 are optional products. • The Puncher Unit-BS1 is available only when the Staple Finisher-Q1 PRO or Booklet Finisher-Q1 PRO is attached. • The Puncher Unit-BF1 is available only when the Staple Finisher-N1 or Booklet Finisher-N1 is attached. Puncher Unit-BS1 - Canon imageRUNNER ADVANCE 8295 | imageRUNNER ADVANCE 8200 Srs Basic Operation Gu - Page 112
2 Pull out the punch waste tray. Check that the guide (F-A2) is closed before pulling out the punch waste tray. If the guide is open, the punch waste tray cannot be pulled out. Close the guide as shown in the illustration below. 3 Discard the punch waste into a receptacle. Make sure that the punch - Canon imageRUNNER ADVANCE 8295 | imageRUNNER ADVANCE 8200 Srs Basic Operation Gu - Page 113
, you cannot make copies or prints in the Hole Punch mode. • Check that the guide (F-A2) is closed before inserting the punch waste tray. If the guide is open, the punch waste tray cannot be inserted. Close the guide as shown in the illustration below. 5 Close the front cover of the finisher. When - Canon imageRUNNER ADVANCE 8295 | imageRUNNER ADVANCE 8200 Srs Basic Operation Gu - Page 114
Puncher Unit-BF1 1 Open the front cover of the finisher. 2 Pull out the punch waste tray. 3 Discard the punch waste into a receptacle. Make sure that the punch waste tray is completely emptied. 114 - Canon imageRUNNER ADVANCE 8295 | imageRUNNER ADVANCE 8200 Srs Basic Operation Gu - Page 115
Routine Maintenance 4 Return the punch waste tray to its original position. Always make sure to insert the punch waste tray as far as it can go, until it clicks into place. If the punch waste tray is not securely in place, you cannot make copies or prints in the Hole Punch mode. 5 Close the front - Canon imageRUNNER ADVANCE 8295 | imageRUNNER ADVANCE 8200 Srs Basic Operation Gu - Page 116
using the Trim mode. • For more information on the procedure for removing trim waste when the Booklet Finisher-Q1 PRO and Booklet Trimmer-D1 are attached, consult the instruction manuals that come with the optional products. 1 Open the front cover of the finisher. 2 Pull out the trim waste tray - Canon imageRUNNER ADVANCE 8295 | imageRUNNER ADVANCE 8200 Srs Basic Operation Gu - Page 117
Routine Maintenance 3 Discard the trim waste into a receptacle. Make sure that the trim waste tray is completely emptied. 4 Return the trim waste tray to its original position and close the front cover of the finisher. 1 Return the trim waste tray. Always make sure to insert the trim waste tray as - Canon imageRUNNER ADVANCE 8295 | imageRUNNER ADVANCE 8200 Srs Basic Operation Gu - Page 118
other functions may be able to perform normally. Call your service representative before you operate the module separation switch. E590 Cause: E57b, E57c, E583, E584 Cause: Remedy: The Staple Finisher-Q1 PRO or Booklet Finisher-Q1 PRO is out of order. You can only output copies/prints by - Canon imageRUNNER ADVANCE 8295 | imageRUNNER ADVANCE 8200 Srs Basic Operation Gu - Page 119
2 Press [Management Settings] [Device Management] [Limited Functions Mode]. For instructions on setting the Limited Functions Mode from the Service Call Message screen, see "Setting the Limited Functions Mode from the Service Call Message Screen," on p. 226. 3 Select the finishing mode you want - Canon imageRUNNER ADVANCE 8295 | imageRUNNER ADVANCE 8200 Srs Basic Operation Gu - Page 120
]. 5 Press [Close]. The Limited Functions Mode is enabled only after you restart the machine (the main power is turned OFF, and then back ON). For instructions on restarting (turning the main power OFF, and then back ON) the machine, see "Main Power and Energy Saver Key," on p. 12. 120 - Canon imageRUNNER ADVANCE 8295 | imageRUNNER ADVANCE 8200 Srs Basic Operation Gu - Page 121
replace the toner cartridge. on the bottom right and When the toners run out completely and prints can no longer be made, a screen with instructions on how to replace the toner cartridge appears on the touch panel display. Follow the procedure described below to replace the toner cartridge. If you - Canon imageRUNNER ADVANCE 8295 | imageRUNNER ADVANCE 8200 Srs Basic Operation Gu - Page 122
machine. • For information on the supported Canon genuine toner, see "Consumables," on p. 136. • Do not replace toner cartridges until the message prompting you to do so appears. • You can replace a toner cartridge while the machine is printing. • Complete instructions on how to replace the toner - Canon imageRUNNER ADVANCE 8295 | imageRUNNER ADVANCE 8200 Srs Basic Operation Gu - Page 123
turn the locking lever to the right until it stops. (Otherwise, you may not be able to remove the toner cartridge.) 4 Remove the toner cartridge, supporting it with both hands. Do not burn or throw used toner cartridges into open flames, as this may cause the toner remaining inside the cartridges - Canon imageRUNNER ADVANCE 8295 | imageRUNNER ADVANCE 8200 Srs Basic Operation Gu - Page 124
5 Prepare the new toner cartridge. 6 Twist the red protective cap of the new toner cartridge in the direction of the arrow to remove it. 7 Insert the new toner cartridge. Align the end of the toner cartridge with the toner supply port as shown by the arrow in the illustration below, and insert the - Canon imageRUNNER ADVANCE 8295 | imageRUNNER ADVANCE 8200 Srs Basic Operation Gu - Page 125
Routine Maintenance 8 Turn the locking lever to the left until it stops, and close the toner replacement cover. 1 Turn the locking lever to the left until it stops. 2 Close the toner replacement cover. The toner confirmation screen is displayed. When closing the toner replacement cover, be careful - Canon imageRUNNER ADVANCE 8295 | imageRUNNER ADVANCE 8200 Srs Basic Operation Gu - Page 126
Routine Cleaning If the original is not copied clearly or streaks appear on printed output, clean the following parts of the machine. For highquality printouts, we recommend cleaning these parts once or twice a month. ˔ Platen glass ˔ Underside of the feeder ˔ Wires ˔ Drums If the touch panel - Canon imageRUNNER ADVANCE 8295 | imageRUNNER ADVANCE 8200 Srs Basic Operation Gu - Page 127
Routine Maintenance Platen Glass and Underside of the Feeder If the platen glass or the underside of the feeder is dirty, the original may not be scanned clearly, or the size of the original may be detected incorrectly. Clean the platen glass and the underside of the feeder by following the - Canon imageRUNNER ADVANCE 8295 | imageRUNNER ADVANCE 8200 Srs Basic Operation Gu - Page 128
Manual Feeder Cleaning If originals that have been fed through the feeder have streaks or appear dirty, clean the feeder's scanning area and the rollers. Clean - Canon imageRUNNER ADVANCE 8295 | imageRUNNER ADVANCE 8200 Srs Basic Operation Gu - Page 129
Routine Maintenance 3 Clean the feed scanning area with a cloth dampened in water or a mild detergent, and then wipe the area with a soft dry cloth. 4 Close the covers and the feeder. 1 Close the inside cover. 2 Close the document scan cover. 3 Close the feeder. • When closing the covers and the - Canon imageRUNNER ADVANCE 8295 | imageRUNNER ADVANCE 8200 Srs Basic Operation Gu - Page 130
Cleaning the Feeder's Rollers Spin the rollers while cleaning them. 1 Pull the lever, and open the feeder cover. 2 Clean the rollers (a total of five places) inside the feeder cover with a cloth dampened with water. Then, wipe the area with a soft, dry cloth. 3 Clean the rollers inside the inner - Canon imageRUNNER ADVANCE 8295 | imageRUNNER ADVANCE 8200 Srs Basic Operation Gu - Page 131
Routine Maintenance 4 Close the covers. 1 Close the inner cover. 2 Close the feeder cover. 5 Clean the resin roller. 1 Open the feeder. 2 Clean the left side of the rubber roller with a cloth dampened with water. Then, wipe the area with a soft dry cloth. 3 Close the feeder. • When closing the - Canon imageRUNNER ADVANCE 8295 | imageRUNNER ADVANCE 8200 Srs Basic Operation Gu - Page 132
Automatic Feeder Cleaning If your originals have black streaks or appear dirty after scanning them through the feeder, perform an automatic feeder cleaning for the rollers of the feeder. This procedure is necessary only if the Duplex Color Image Reader Unit-G1 is attached. 1 Press (Settings/ - Canon imageRUNNER ADVANCE 8295 | imageRUNNER ADVANCE 8200 Srs Basic Operation Gu - Page 133
Routine Maintenance Wire Cleaning If streaks appear on printed output or random parts of the printed image are missing, clean the corona assembly wires inside the main unit. 1 Press (Settings/Registration). 2 Press [Adjustment/Maintenance] [Maintenance] [Clean Wire]. 3 Press [Start]. It - Canon imageRUNNER ADVANCE 8295 | imageRUNNER ADVANCE 8200 Srs Basic Operation Gu - Page 134
Drum Cleaning Printed images may be light or distorted when the machine is used immediately after installation or after a long period time of not using the machine. If printed images are light or distorted, clean the drum inside the machine as necessary. 1 Press (Settings/Registration). 2 Press [ - Canon imageRUNNER ADVANCE 8295 | imageRUNNER ADVANCE 8200 Srs Basic Operation Gu - Page 135
Routine Maintenance Cleaning the Touch Panel Display If the touch panel display becomes dirty and the screen may not be seen clearly, clean the touch panel display. 1 Wipe the touch panel display with a cloth dampened in water or a mild cleaning agent, and then wipe the area clean with a soft, dry - Canon imageRUNNER ADVANCE 8295 | imageRUNNER ADVANCE 8200 Srs Basic Operation Gu - Page 136
panel display, replace the used toner cartridge with a new one. Only use toner cartridges intended for use with this machine. For optimum print quality, using Canon genuine toner is recommended. Product Name Supported Canon Genuine Toner imageRUNNER ADVANCE 8205/8295/8285 GPR-37 Black Toner 136 - Canon imageRUNNER ADVANCE 8295 | imageRUNNER ADVANCE 8200 Srs Basic Operation Gu - Page 137
is not responsible for any malfunction, accident or damage caused by the use of counterfeit toner. For more information, see http://www.canon.com/counterfeit. ˔ Stamp Cartridge The stamp cartridge is used to stamp originals. Use the tweezers provided to remove and replace the stamp cartridge. Stamp - Canon imageRUNNER ADVANCE 8295 | imageRUNNER ADVANCE 8200 Srs Basic Operation Gu - Page 138
Unit Finisher Name Shape Booklet Finisher-Q1 PRO Booklet Finisher-N1 Staple-P1 ˔ Genuine Supplies Canon has developed and manufactured Toner, Parts, that you use Genuine Canon Toner, Parts, and Supplies. Contact your Canon Authorized Dealer or Service Provider for Genuine Canon Supplies. 138 - Canon imageRUNNER ADVANCE 8295 | imageRUNNER ADVANCE 8200 Srs Basic Operation Gu - Page 139
Unit of the Staple Finisher-Q1 PRO/Booklet Finisher-Q1 PRO 206 Saddle Stitcher Unit of the Booklet Finisher-Q1 PRO 209 Stapler Unit of the Staple Troubleshooting 222 Service Call Message 223 Contacting Your Local Authorized Canon Dealer 224 Setting the Limited Functions Mode from the Service - Canon imageRUNNER ADVANCE 8295 | imageRUNNER ADVANCE 8200 Srs Basic Operation Gu - Page 140
panel display. Check the location of the paper jam, and follow the instructions on the screen to clear the paper jam. The screen is displayed or paper. If you cannot remove the paper, contact your local authorized Canon dealer. • When removing paper which has become jammed inside the machine, - Canon imageRUNNER ADVANCE 8295 | imageRUNNER ADVANCE 8200 Srs Basic Operation Gu - Page 141
Troubleshooting Locations of Paper Jams Paper jams may occur in the following parts of the machine. See the applicable section to clear the paper jam. Duplex - Canon imageRUNNER ADVANCE 8295 | imageRUNNER ADVANCE 8200 Srs Basic Operation Gu - Page 142
Staple Finisher-Q1 PRO/Booklet Finisher-Q1 PRO (Optional) (p. 175) Document Insertion Unit-K1 (Optional) (p. 160) Paper Deck Unit-C1/POD Deck Lite-A1 (Optional) (p. 153) Paper Folding Unit-H1 (Optional) (p. 171) Professional Puncher Integration Unit-B1 (Optional) (p. 167) 142 - Canon imageRUNNER ADVANCE 8295 | imageRUNNER ADVANCE 8200 Srs Basic Operation Gu - Page 143
Troubleshooting Staple Finisher-N1 (Optional) (p. 189) Booklet Finisher-N1 (Optional) (p. 194) 143 - Canon imageRUNNER ADVANCE 8295 | imageRUNNER ADVANCE 8200 Srs Basic Operation Gu - Page 144
Main Unit If a paper jam occurs in the main unit area, a screen prompting you to remove the jammed paper appears on the touch panel display. Check the location of the paper jam, and follow the procedure described below, while referring to the directions that appear on the touch panel display, to - Canon imageRUNNER ADVANCE 8295 | imageRUNNER ADVANCE 8200 Srs Basic Operation Gu - Page 145
Troubleshooting 2 Remove any jammed paper from the lower right cover of the main unit. 1. attached, reconnect the Paper Deck Unit-C1/POD Deck Lite-A1 to the main unit. 3 Follow the instructions on the touch panel display. The screen indicating the directions on how to clear the paper jam is - Canon imageRUNNER ADVANCE 8295 | imageRUNNER ADVANCE 8200 Srs Basic Operation Gu - Page 146
transport unit. 1. Move the green lever in the direction of the arrow. 2. Pull out the fixing transport unit. 4 Remove any jammed paper from the left guide. 1. Open the left guide. 2. Remove any jammed paper. 146 - Canon imageRUNNER ADVANCE 8295 | imageRUNNER ADVANCE 8200 Srs Basic Operation Gu - Page 147
Troubleshooting 5 Remove any jammed paper from the fixing unit. If you cannot pull . 6 Remove any jammed paper from the lower guide. 1 Open the lower guide, holding by the green tab. 2 Remove any jammed paper. 3 Close the lower guide. When closing the guide, be careful not to get your fingers caught - Canon imageRUNNER ADVANCE 8295 | imageRUNNER ADVANCE 8200 Srs Basic Operation Gu - Page 148
to the left to remove any jammed paper. 3 Close the left guide. When closing the guide, be careful not to get your fingers caught, as this may result caught, as this may result in personal injury. 9 Follow the instructions on the touch panel display. The screen indicating the directions on how - Canon imageRUNNER ADVANCE 8295 | imageRUNNER ADVANCE 8200 Srs Basic Operation Gu - Page 149
Troubleshooting Paper Sources If a paper jam occurs in paper sources, a screen prompting you to remove the jammed paper appears on the touch panel display. Check the - Canon imageRUNNER ADVANCE 8295 | imageRUNNER ADVANCE 8200 Srs Basic Operation Gu - Page 150
Deck Unit-C1/POD Deck Lite-A1 is attached, reconnect the Paper Deck Unit-C1/POD Deck Lite-A1 to the main unit. 3 Follow the instructions on the screen. The screen indicating the directions on how to clear the paper jam is displayed repeatedly until the paper jam is cleared. 150 - Canon imageRUNNER ADVANCE 8295 | imageRUNNER ADVANCE 8200 Srs Basic Operation Gu - Page 151
Troubleshooting Paper Drawers 3 and 4 1 Remove any paper jammed in the paper drawer. 1 careful not to get your fingers caught, as this may result in personal injury. 3 Follow the instructions on the screen. The screen indicating the directions on how to clear the paper jam is displayed repeatedly - Canon imageRUNNER ADVANCE 8295 | imageRUNNER ADVANCE 8200 Srs Basic Operation Gu - Page 152
the paper drawer to its original position, be careful not to get your fingers caught, as this may result in personal injury. 3 Follow the instructions on the screen. The screen indicating the directions on how to clear the paper jam is displayed repeatedly until the paper jam is cleared. 152 - Canon imageRUNNER ADVANCE 8295 | imageRUNNER ADVANCE 8200 Srs Basic Operation Gu - Page 153
Troubleshooting Paper Deck Unit-C1/POD Deck Lite-A1 (Optional) 1 Move the paper deck away from the main unit. 1. Press the release button. 2. Move the paper - Canon imageRUNNER ADVANCE 8295 | imageRUNNER ADVANCE 8200 Srs Basic Operation Gu - Page 154
3 Reconnect the paper deck to the main unit. If the paper jam message is no longer displayed when you reconnect the paper deck, proceed to step 7. When reconnecting the paper deck to main unit, be careful not to get your fingers caught, as this may result in personal injury. 4 Open the paper deck. - Canon imageRUNNER ADVANCE 8295 | imageRUNNER ADVANCE 8200 Srs Basic Operation Gu - Page 155
Troubleshooting 6 Close the paper deck. When closing the paper deck, be careful not to get your fingers caught, as this may result in personal injury. 7 Follow the instructions on the screen. The screen indicating the directions on how to clear the paper jam is displayed repeatedly until the paper - Canon imageRUNNER ADVANCE 8295 | imageRUNNER ADVANCE 8200 Srs Basic Operation Gu - Page 156
the paper jam effectively in the paper drawers. : Do not apply (OK) : Apply (No Good (NG)) A paper jam occurs. 1. Check that there is a problem with paper. ˔ Paper is loaded diagonally. ˔ Paper appears dirty and has tears. ˔ Several sheets of paper are attached. ˔ Paper is already curled. Step - Canon imageRUNNER ADVANCE 8295 | imageRUNNER ADVANCE 8200 Srs Basic Operation Gu - Page 157
Troubleshooting Duplex Color Image Reader Unit-G1 (Optional) Check the location of the paper jam, and follow the procedure described below, while referring to the directions - Canon imageRUNNER ADVANCE 8295 | imageRUNNER ADVANCE 8200 Srs Basic Operation Gu - Page 158
4 Turn the green feed dial, and remove any jammed originals. 1. Turn the green feed dial. 2. Remove any jammed originals. 5 Close the inner cover and the feeder cover. 1. Close the inner cover. 2. Close the feeder cover. When closing the cover, be careful not to get your fingers caught, as this - Canon imageRUNNER ADVANCE 8295 | imageRUNNER ADVANCE 8200 Srs Basic Operation Gu - Page 159
Troubleshooting 6 Remove any jammed originals from the feeder. 1 Lift the feeder. 2 Remove and open the feeder cover and the inner cover, and then proceed to step 4. 7 Follow the instructions on the screen. The screen indicating the directions on how to clear the paper jam is displayed repeatedly - Canon imageRUNNER ADVANCE 8295 | imageRUNNER ADVANCE 8200 Srs Basic Operation Gu - Page 160
Document Insertion Unit-K1 (Optional) If a paper jam occurs inside the Document Insertion Unit-K1, a screen prompting you to remove the jammed paper appears on the touch panel display. Follow the procedure described below, while referring to the directions that appear on the touch panel display, to - Canon imageRUNNER ADVANCE 8295 | imageRUNNER ADVANCE 8200 Srs Basic Operation Gu - Page 161
Troubleshooting 2 Remove any paper jammed in the upper cover (I-I1) of the document insertion unit. 1. Open the upper cover (I-I1) of the document insertion unit. 2. Remove any jammed paper. 3 Remove any paper jammed in the guide (I-I2). 1. Open the guide (I-I2). 2. Remove any jammed paper. 4 - Canon imageRUNNER ADVANCE 8295 | imageRUNNER ADVANCE 8200 Srs Basic Operation Gu - Page 162
unit. 6 Remove any paper jammed in the guide (I-13). 1 Open the guide (I-13). 2 Remove any jammed paper. 7 Close the guide (I-13) and the document insertion unit. 1 Close the guide (I-13). 2 Close the document insertion unit. When closing the guide and the document insertion unit, be careful - Canon imageRUNNER ADVANCE 8295 | imageRUNNER ADVANCE 8200 Srs Basic Operation Gu - Page 163
Troubleshooting 8 Open the front cover of the Document Insertion Unit-K1. 9 Open the guide (I-A1). When opening the guide (l-A1), be careful not to get your fingers caught, as this may result in personal injury. 163 - Canon imageRUNNER ADVANCE 8295 | imageRUNNER ADVANCE 8200 Srs Basic Operation Gu - Page 164
10Remove any paper jammed in the guide (I-A1). 1 Remove any jammed paper. 2 Close the guide (I-A1). When closing the guide, be careful not to get your fingers caught, as this may result in personal injury. 11Open the guide (I-A2). When opening the guide (l-A2), be careful not to get your fingers - Canon imageRUNNER ADVANCE 8295 | imageRUNNER ADVANCE 8200 Srs Basic Operation Gu - Page 165
Troubleshooting 12Turn the dial (I-A3), and remove any jammed paper. 1 Turn the dial (I-A3) in the direction of the arrow (counterclockwise). 2 Remove any jammed paper. 13Close the guide (I-A2) and the front cover. 1 Close the guide (I-A2). 2 Close the front cover. When closing the guide and - Canon imageRUNNER ADVANCE 8295 | imageRUNNER ADVANCE 8200 Srs Basic Operation Gu - Page 166
14Reload the paper into the document insertion unit. 15Follow the instructions on the screen. The screen indicating the directions on how to clear the paper jam is displayed repeatedly until the paper jam is cleared. 166 - Canon imageRUNNER ADVANCE 8295 | imageRUNNER ADVANCE 8200 Srs Basic Operation Gu - Page 167
Troubleshooting Professional Puncher Integration Unit-B1 (Optional) If a paper jam occurs inside the Professional Puncher Integration Unit-B1, a screen prompting you to remove the jammed paper - Canon imageRUNNER ADVANCE 8295 | imageRUNNER ADVANCE 8200 Srs Basic Operation Gu - Page 168
Puncher Integration Unit-B1. 2 Remove any jammed paper from the guide (R-A). 1. Lift up the guide (R-A) until it clicks into place. 2. Remove any jammed paper. 3. Close the guide (R-A) until it clicks into place. When closing the guide, be careful not to get your fingers caught, as this may - Canon imageRUNNER ADVANCE 8295 | imageRUNNER ADVANCE 8200 Srs Basic Operation Gu - Page 169
Troubleshooting 4 Remove any jammed paper. 5 Turn the lever of the guide (R-B1) to the left until it clicks into place. When closing the guide, be careful not to get your fingers caught, as this may result in personal injury. 6 Open the guide (R-B2) until it clicks into place. 169 - Canon imageRUNNER ADVANCE 8295 | imageRUNNER ADVANCE 8200 Srs Basic Operation Gu - Page 170
the guide, be careful not to get your fingers caught, as this may result in personal injury. 9 Close the front cover of the Professional Puncher Integration Unit-B1. When closing the cover, be careful not to get your fingers caught, as this may result in personal injury. 10Follow the instructions on - Canon imageRUNNER ADVANCE 8295 | imageRUNNER ADVANCE 8200 Srs Basic Operation Gu - Page 171
Troubleshooting Paper Folding Unit-H1 (Optional) If a paper jam occurs inside the Paper Folding Unit-H1, a screen indicating the location of the paper jam and how - Canon imageRUNNER ADVANCE 8295 | imageRUNNER ADVANCE 8200 Srs Basic Operation Gu - Page 172
B2). 1. Pull out the paper folding unit (M-B1). 2. Open the left guide (M-B2). 3. Remove any jammed paper in the inside guide. 4. Remove any jammed paper in the outside guide. 5. Close the left guide (M-B2). When closing the guide, be careful not to get your fingers caught, as this may result in - Canon imageRUNNER ADVANCE 8295 | imageRUNNER ADVANCE 8200 Srs Basic Operation Gu - Page 173
Troubleshooting 5 Remove any paper jammed in the right guide (M-B3). 1. Open the right guide (MB3). Open the guide as far as it can go. 2. Remove any jammed paper in the inside guide. 3. Remove any jammed paper in the outside guide. 4. Close the right guide (MB3). When closing the guide, be - Canon imageRUNNER ADVANCE 8295 | imageRUNNER ADVANCE 8200 Srs Basic Operation Gu - Page 174
paper jam message is displayed even after the paper jam is cleared, check whether there is any paper left by opening the entrance guide. 8 Follow the instructions on the screen. The screen indicating the directions on how to clear the paper jam is displayed repeatedly until the paper jam is cleared - Canon imageRUNNER ADVANCE 8295 | imageRUNNER ADVANCE 8200 Srs Basic Operation Gu - Page 175
Troubleshooting Staple Finisher-Q1 PRO/Booklet Finisher-Q1 PRO (Optional) If a paper jam occurs in the Staple Finisher-Q1 PRO/Booklet Finisher-Q1 PRO, a screen prompting you to remove the jammed paper appears on the touch panel display. Check the location of the paper jam, and follow the procedure - Canon imageRUNNER ADVANCE 8295 | imageRUNNER ADVANCE 8200 Srs Basic Operation Gu - Page 176
position. This procedure is only required if the Puncher Unit-BS1 is attached, and the button (F-A1) on the Puncher UnitBS1 is protruding. 3 Open the guide (F-A2). 4 Remove any jammed paper. 176 - Canon imageRUNNER ADVANCE 8295 | imageRUNNER ADVANCE 8200 Srs Basic Operation Gu - Page 177
Troubleshooting 5 Close the guide (F-A2). When closing the guide, be careful not to get your fingers caught, as this may result in personal injury. 6 Remove any paper jammed in the upper cover (F-A3) of - Canon imageRUNNER ADVANCE 8295 | imageRUNNER ADVANCE 8200 Srs Basic Operation Gu - Page 178
7 Open the guide (F-A4). 8 Remove any jammed paper. 1. Remove any jammed paper. 2. Close the guide (F-A4). When closing the guide, be careful not to get your fingers caught, as this may result in personal injury. Close the guide until it clicks into place. 178 - Canon imageRUNNER ADVANCE 8295 | imageRUNNER ADVANCE 8200 Srs Basic Operation Gu - Page 179
Troubleshooting 9 Close the upper cover (F-A3) of the finisher. When closing the cover, then back ON. (See "Main Power and Energy Saver Key," on p. 12.) 10Remove any jammed paper in the guide (F-A5). 11Close the front cover of the finisher. When closing the cover, be careful not to get your fingers - Canon imageRUNNER ADVANCE 8295 | imageRUNNER ADVANCE 8200 Srs Basic Operation Gu - Page 180
12Follow the instructions on the touch panel display. The screen indicating the directions on how to clear the paper jam is displayed repeatedly until the paper jam is - Canon imageRUNNER ADVANCE 8295 | imageRUNNER ADVANCE 8200 Srs Basic Operation Gu - Page 181
Troubleshooting 2 Open the guide (F-B1). 3 Turn the dial (F-B2) in the direction of the arrow (clockwise) and remove any jammed paper. 1. Turn the dial (F-B2). 2. Remove any jammed paper. 4 Close the guide (F-B1). When closing the guide, be careful not to get your fingers caught, as this may result - Canon imageRUNNER ADVANCE 8295 | imageRUNNER ADVANCE 8200 Srs Basic Operation Gu - Page 182
cover of the finisher. When closing the cover, be careful not to get your fingers caught, as this may result in personal injury. 8 Follow the instructions on the touch panel display. The screen indicating the directions on how to clear the paper jam is displayed repeatedly until the paper jam is - Canon imageRUNNER ADVANCE 8295 | imageRUNNER ADVANCE 8200 Srs Basic Operation Gu - Page 183
Troubleshooting Saddle Stitcher Unit of the Booklet Finisher-Q1 PRO The following illustration indicates the location of the paper jam. Please refer to it to remove the jammed paper. *Front Cover 1 Open the front cover of the finisher. 183 - Canon imageRUNNER ADVANCE 8295 | imageRUNNER ADVANCE 8200 Srs Basic Operation Gu - Page 184
(F-C1). 3 Turn the dials to feed the jammed paper to the guide (F-C1). 1. Turn the upper dial (F-C2) in the direction of the arrow (clockwise) to feed the jammed paper to the guide (F-C1). 2. Turn the lower dial (F-C2) in the direction of the arrow (counterclockwise) to feed the jammed paper to - Canon imageRUNNER ADVANCE 8295 | imageRUNNER ADVANCE 8200 Srs Basic Operation Gu - Page 185
Troubleshooting 5 Close the guide (F-C1). When closing the guide, be careful not to get your fingers caught, as lamp turns off. * * Lamp Turning the dial (F-C3), feed the jammed paper to the delivery guide of the booklet tray. If the Booklet Trimmer-D1 is attached, turning the dial feeds the jammed - Canon imageRUNNER ADVANCE 8295 | imageRUNNER ADVANCE 8200 Srs Basic Operation Gu - Page 186
7 Remove any jammed paper protruding from the booklet tray. If the Booklet Trimmer-D1 is attached, remove any jammed paper protruding from the feeding belt. 8 Pull out the saddle stitcher unit (F-C4). 9 Remove any jammed paper inside the saddle stitcher unit. 1. Open the right cover of the saddle - Canon imageRUNNER ADVANCE 8295 | imageRUNNER ADVANCE 8200 Srs Basic Operation Gu - Page 187
Troubleshooting 10Turn the dial on the pressing unit (F-C6) in the direction of the arrow (counterclockwise), and push it as turns off. 2. Remove any jammed paper in the output area of the saddle stitcher unit. 12While opening the delivery guide (F-C8), remove any jammed paper. 1. Open the delivery - Canon imageRUNNER ADVANCE 8295 | imageRUNNER ADVANCE 8200 Srs Basic Operation Gu - Page 188
13Close the delivery guide (F-C8). When closing the guide, be careful not to get your fingers caught, careful not to get your fingers caught, as this may result in personal injury. 15Follow the instructions on the touch panel display. The screen indicating the directions on how to clear the paper - Canon imageRUNNER ADVANCE 8295 | imageRUNNER ADVANCE 8200 Srs Basic Operation Gu - Page 189
Troubleshooting Staple Finisher-N1 (Optional) If a paper jam occurs inside the Staple Finisher-N1, a screen to it to remove the jammed paper. B3 B1 A1 F A2 ** * B2 *Front Cover **Entrance Guide • The Staple Finisher-N1 is an optional product. 1 Open the front cover of the finisher. 189 - Canon imageRUNNER ADVANCE 8295 | imageRUNNER ADVANCE 8200 Srs Basic Operation Gu - Page 190
2 Slide the guide (F-A1) to align it with the mark. Slide the guide once to align with . This procedure is necesary only if the Puncher Unit-BF1 is attached. 3 Open the entrance guide. 190 - Canon imageRUNNER ADVANCE 8295 | imageRUNNER ADVANCE 8200 Srs Basic Operation Gu - Page 191
Troubleshooting 4 Remove any jammed paper. 1. Remove any jammed paper. 2. Close the entrance guide. When closing the guide, be careful not to get your fingers caught, as this may result in personal injury. 5 Open the guide (F-B1). 191 - Canon imageRUNNER ADVANCE 8295 | imageRUNNER ADVANCE 8200 Srs Basic Operation Gu - Page 192
6 Remove any jammed paper. 1 Remove any jammed paper. 2 Close the guide (F-B1). When closing the guide, be careful not to get your fingers caught, as this may result in personal injury. 7 Turn the lower dial (F-B2) in the direction of the arrow (counterclockwise). 192 - Canon imageRUNNER ADVANCE 8295 | imageRUNNER ADVANCE 8200 Srs Basic Operation Gu - Page 193
Troubleshooting 8 Remove any paper jammed in the guide (F-B3). 1 Open the guide (F-B3). 2 Remove any jammed paper. 3 Close the guide (F-B3). When closing the guide, be careful not to get your fingers caught, as this may result in personal injury. 9 Close the front cover of the finisher. When - Canon imageRUNNER ADVANCE 8295 | imageRUNNER ADVANCE 8200 Srs Basic Operation Gu - Page 194
Booklet Finisher-N1 (Optional) If a paper jam occurs inside the Booklet Finisher-N1, a screen prompting you to remove the jammed paper appears on the touch panel display. Follow the procedure described below, while referring to the directions that appear on the touch panel display, to remove the - Canon imageRUNNER ADVANCE 8295 | imageRUNNER ADVANCE 8200 Srs Basic Operation Gu - Page 195
Troubleshooting 2 Slide the guide (F-A1) to align it with the mark. Slide the guide once to align with . This procedure is not necessary only if the Puncher Unit-BF1 is attached. 3 Open the guide (F-B1). 195 - Canon imageRUNNER ADVANCE 8295 | imageRUNNER ADVANCE 8200 Srs Basic Operation Gu - Page 196
4 Remove any jammed paper. 1. Remove any jammed paper. 2. Close the guide (F-B1). When closing the guide, be careful not to get your fingers caught, as this may result in personal injury. 5 Open the guide (F-B2). 196 - Canon imageRUNNER ADVANCE 8295 | imageRUNNER ADVANCE 8200 Srs Basic Operation Gu - Page 197
Troubleshooting 6 Remove any jammed paper. 1 Remove any jammed paper. 2 Close the guide (F-B2). When closing the guide, be careful not to get your fingers caught, as this may result in personal injury. 7 Turn the lower dial (F-B3) in the direction of the arrow (counterclockwise). 197 - Canon imageRUNNER ADVANCE 8295 | imageRUNNER ADVANCE 8200 Srs Basic Operation Gu - Page 198
the guide (F-B4). When closing the guide, be careful not to get your fingers caught, as this may result in personal injury. 9 Close the front cover of the finisher. When closing the cover, be careful not to get your fingers caught, as this may result in personal injury. 10Follow the instructions on - Canon imageRUNNER ADVANCE 8295 | imageRUNNER ADVANCE 8200 Srs Basic Operation Gu - Page 199
Troubleshooting Saddle Stitcher Unit The following illustration indicates the location of the paper jam. Please refer to it to remove the jammed paper. C1 C2 C3 * C5 C4 ** C6 *Front Guide **Delivery Guide 1 Open the front cover of the finisher. 199 - Canon imageRUNNER ADVANCE 8295 | imageRUNNER ADVANCE 8200 Srs Basic Operation Gu - Page 200
paper. 1. Turn the lower dial (F-C3) in the direction of the arrow (counterclockwise). Jammed paper is fed to the guide (F-C2). 2. Remove any jammed paper. 3. Close the guide (F-C2). When closing the guide, be careful not to get your fingers caught, as this may result in personal injury. 200 - Canon imageRUNNER ADVANCE 8295 | imageRUNNER ADVANCE 8200 Srs Basic Operation Gu - Page 201
Troubleshooting 5 Close the guide (F-C1). When closing the guide, be careful not to get your fingers caught, as this may result in personal injury. 6 If the lamp is ON, while pushing in the dial (F- - Canon imageRUNNER ADVANCE 8295 | imageRUNNER ADVANCE 8200 Srs Basic Operation Gu - Page 202
8 Pull out the saddle stitcher unit (F-C5). 9 Remove any jammed paper from the right cover of the saddle stitcher unit (FC6). 1 Open the right cover (F-C6). 2 Remove any jammed paper. 3 Close the right cover (F-C6). When closing the cover, be careful not to get your fingers caught, as this may - Canon imageRUNNER ADVANCE 8295 | imageRUNNER ADVANCE 8200 Srs Basic Operation Gu - Page 203
Troubleshooting 10If parts of the paper are left on top of the feeding belt, open the guide, and remove any parts of the paper left. 1 Open the delivery guide, and remove any jammed paper. 2 Close the delivery guide. When closing the guide injury. 12Follow the instructions on the screen. The - Canon imageRUNNER ADVANCE 8295 | imageRUNNER ADVANCE 8200 Srs Basic Operation Gu - Page 204
the Frequency of Paper Jams If paper jams occur frequently, even though there is no apparent problem with the machine, either one of the following two reasons may be the cause. Follow the instructions described below to reduce the frequency of paper jams. ˔ There are torn pieces of paper left - Canon imageRUNNER ADVANCE 8295 | imageRUNNER ADVANCE 8200 Srs Basic Operation Gu - Page 205
modes or scanning originals, even if the jammed staple is not removed immediately. Troubleshooting Locations of Staple Jams For information on the parts of the machine in which staple jams occur and instructions on clearing staple jams, see the following. Saddle Stitcher Unit of the Booklet - Canon imageRUNNER ADVANCE 8295 | imageRUNNER ADVANCE 8200 Srs Basic Operation Gu - Page 206
other optional units are operating normally, and are not involved in the paper or staple jam removal procedure. The Staple Finisher-Q1 PRO and Booklet Finisher-Q1 PRO are optional products. 1 Open the front cover of the finisher. 2 Remove the paper waiting to be stapled from the delivery tray. 206 - Canon imageRUNNER ADVANCE 8295 | imageRUNNER ADVANCE 8200 Srs Basic Operation Gu - Page 207
Troubleshooting 3 Pull out the staple case. When the stapler unit is at the back and it is difficult to pull out the staple cartridge, turn the - Canon imageRUNNER ADVANCE 8295 | imageRUNNER ADVANCE 8200 Srs Basic Operation Gu - Page 208
6 Return the bracket on the staple case to its original position. 7 Gently push the staple case back into the stapler unit until it is securely in place. Always make sure to insert the staple case far as it can go. 8 Close the front cover of the finisher. When closing the cover, be careful not to - Canon imageRUNNER ADVANCE 8295 | imageRUNNER ADVANCE 8200 Srs Basic Operation Gu - Page 209
Troubleshooting Saddle Stitcher Unit of the Booklet Finisher-Q1 PRO Check the location of the staple jam, Before clearing the staple jam, remove all output sheets from the booklet tray. • The Booklet Finisher-Q1 PRO is an optional products. • If a paper jam occurs at the same time as a staple jam, - Canon imageRUNNER ADVANCE 8295 | imageRUNNER ADVANCE 8200 Srs Basic Operation Gu - Page 210
3 Hold the staple case by its left and right sides, and lower the bracket on the staple case. 4 Remove all of the jammed and protruding staples from the staple cartridge. 5 Return the bracket on the staple case to its original position. 210 - Canon imageRUNNER ADVANCE 8295 | imageRUNNER ADVANCE 8200 Srs Basic Operation Gu - Page 211
Troubleshooting 6 Return the staple case to its original position in the saddle stitcher unit. When returning the staple case, always make sure to the staple case - Canon imageRUNNER ADVANCE 8295 | imageRUNNER ADVANCE 8200 Srs Basic Operation Gu - Page 212
Stapler Unit of the Staple Finisher-N1/Booklet Finisher-N1 Check the location of the staple jam, and follow the procedure described below, and the procedure that appears on the touch panel display, to remove any jammed staples. Take care when handling the optional equipment that is attached to the - Canon imageRUNNER ADVANCE 8295 | imageRUNNER ADVANCE 8200 Srs Basic Operation Gu - Page 213
Troubleshooting 3 Pull out the staple case. 4 Push up the bracket on the staple case. 5 Remove all of the jammed and protruding staples from the staple cartridge. 213 - Canon imageRUNNER ADVANCE 8295 | imageRUNNER ADVANCE 8200 Srs Basic Operation Gu - Page 214
6 Return the bracket on the staple case to its original position. 7 Gently push the staple case back into the stapler unit until it is securely in place. Always make sure to insert the staple case far as it can go. 8 Close the front cover of the finisher. When closing the cover, be careful not to - Canon imageRUNNER ADVANCE 8295 | imageRUNNER ADVANCE 8200 Srs Basic Operation Gu - Page 215
Troubleshooting Saddle Stitcher Unit of the Booklet Finisher-N1 Check the location of the staple jam, and follow the procedure described below, while referring to the - Canon imageRUNNER ADVANCE 8295 | imageRUNNER ADVANCE 8200 Srs Basic Operation Gu - Page 216
3 Hold the staple case by its left and right sides, and lower the bracket on the staple case. 4 Remove the jammed and exposed staples from the staple case. 5 Return the bracket on the staple case to its original position. 216 - Canon imageRUNNER ADVANCE 8295 | imageRUNNER ADVANCE 8200 Srs Basic Operation Gu - Page 217
Troubleshooting 6 Return the staple case to its original position in the saddle stitcher unit. When returning the staple case, always make sure to the staple case - Canon imageRUNNER ADVANCE 8295 | imageRUNNER ADVANCE 8200 Srs Basic Operation Gu - Page 218
If Memory Becomes Full During Scanning The machine's memory can store up to approximately 20,200 pages of scanned images. Approximately 20,000 pages of that total is shared by the various functions, including the Copy; Fax; Scan and Send; Scan and Store (Store in Mail Box); Fax/I-Fax Inbox; and, - Canon imageRUNNER ADVANCE 8295 | imageRUNNER ADVANCE 8200 Srs Basic Operation Gu - Page 219
Troubleshooting For the Scan and Store Function Follow the directions below based on the message that appears on the touch panel display. ˔ If the message - Canon imageRUNNER ADVANCE 8295 | imageRUNNER ADVANCE 8200 Srs Basic Operation Gu - Page 220
Example of an Error Message on the Touch Panel Display Example of an Error Message on the Web Browser For information on error messages and instructions on resolving errors, see e-Manual > Problem Solving. 220 - Canon imageRUNNER ADVANCE 8295 | imageRUNNER ADVANCE 8200 Srs Basic Operation Gu - Page 221
Troubleshooting When an Error Code Is Displayed If a job or operation does not complete successfully, the error code is DEPT.ID ADDRESS BOOK DEPT.ID ADDRESS BOOK DEPT.ID ADDRESS BOOK RESULT For information on error codes and instructions on resolving errors, see e-Manual > Problem Solving. 221 - Canon imageRUNNER ADVANCE 8295 | imageRUNNER ADVANCE 8200 Srs Basic Operation Gu - Page 222
Printer/Fax Driver Troubleshooting See "Troubleshooting" in the driver help to resolve problems when using the printer driver or fax driver for Windows. The following screens indicate the directions on how to display "Troubleshooting" from the screen for the printer driver. The screens may differ, - Canon imageRUNNER ADVANCE 8295 | imageRUNNER ADVANCE 8200 Srs Basic Operation Gu - Page 223
Troubleshooting Service Call Message If a malfunction occurs and the machine cannot operate normally, a screen prompting you to contact your local authorized Canon dealer is displayed. If a screen such as the one above is displayed, contact your local authorized Canon dealer. (See "Contacting Your - Canon imageRUNNER ADVANCE 8295 | imageRUNNER ADVANCE 8200 Srs Basic Operation Gu - Page 224
Dealer If a screen prompting you to contact your local authorized Canon dealer is displayed, follow the procedure described below. 1 Turn OFF the main power of the main unit. 1. Open the main power switch cover. 2. Press the - Canon imageRUNNER ADVANCE 8295 | imageRUNNER ADVANCE 8200 Srs Basic Operation Gu - Page 225
Troubleshooting 3 If the machine still does not operate normally, follow the procedure below, and then contact your local authorized Canon dealer. in a fire or electrical shock. When you contact your local authorized Canon dealer, have the following information available: • Product name • Details - Canon imageRUNNER ADVANCE 8295 | imageRUNNER ADVANCE 8200 Srs Basic Operation Gu - Page 226
. If you set Limited Functions Mode to 'On' from the Service Call Message screen, the item corresponds to [Limited Functions Mode] in [Management Settings] (Settings/Registration) is also set to 'On'. (See e-Manual > Security.) 1 Press [Limited Functions Mode] [Yes]. A message prompting - Canon imageRUNNER ADVANCE 8295 | imageRUNNER ADVANCE 8200 Srs Basic Operation Gu - Page 227
Troubleshooting Functions Available When the Printer/Scanner Cannot Be Used Due to an Error You can use the following functions even when the Print and Scan - Canon imageRUNNER ADVANCE 8295 | imageRUNNER ADVANCE 8200 Srs Basic Operation Gu - Page 228
File screen is not available. *4 Document Scan Code Analyzer is included in the Document Scan Lock Kit. For more information, see e-Manual > Optional Products. *5 Available by installing each MEAP application. May not be available, depending on the restricted functions. *6 The registered button may - Canon imageRUNNER ADVANCE 8295 | imageRUNNER ADVANCE 8200 Srs Basic Operation Gu - Page 229
Troubleshooting MEMO 229 - Canon imageRUNNER ADVANCE 8295 | imageRUNNER ADVANCE 8200 Srs Basic Operation Gu - Page 230
. Use this section if you have trouble using the machine. Question Q1 I Can I move the Address Book registered on another Canon machine onto this machine? Q8 Can I forward the Q17 How do I access the Advanced Box from a computer? Q18 How do I forward received data to the Advanced Box? Q19 How do I - Canon imageRUNNER ADVANCE 8295 | imageRUNNER ADVANCE 8200 Srs Basic Operation Gu - Page 231
Troubleshooting Question Q29 Can I output paper to a different tray according to the function? Q30 What are the types of paper that I can use? Q31 How do I print data received via fax/I-fax on paper specified in advance do I solve this problem? Q37 Numbers, such as the previous imageRUNNER. I am - Canon imageRUNNER ADVANCE 8295 | imageRUNNER ADVANCE 8200 Srs Basic Operation Gu - Page 232
] [Job Build]. 2. Press [Close]. Additional Information You can scan the original even if the machine is waiting or printing (Reserved Copying). For more information, see e-Manual > Copy. 232 - Canon imageRUNNER ADVANCE 8295 | imageRUNNER ADVANCE 8200 Srs Basic Operation Gu - Page 233
Troubleshooting Additional Information The Job Build mode is useful if you cannot load can also send a job done notice to the specified e-mail address (Job Done Notice). For more information, see e-Manual > Scan and Send, or Fax. 4 Do I need to enter the address of the recipient every time? You can - Canon imageRUNNER ADVANCE 8295 | imageRUNNER ADVANCE 8200 Srs Basic Operation Gu - Page 234
[Register/Edit]. 2. Press [Register New Dest.] enter information following the instructions on the touch panel display press [OK]. 5 Can I send a fax screen or the Fax Basic Features screen. For more information, see e-Manual > Scan and Send, or Fax. ˙ Specifying Multiple Destinations from the - Canon imageRUNNER ADVANCE 8295 | imageRUNNER ADVANCE 8200 Srs Basic Operation Gu - Page 235
Troubleshooting ˙ the same time. For information on registering one-touch buttons, see e-Manual > Scan and Send, or Fax. Q&A 6 Can you give me Level> for the added users click [Share] [End]. 4. Click [Advanced Sharing] select [Share this folder] click [Permission]. 5. Add the users - Canon imageRUNNER ADVANCE 8295 | imageRUNNER ADVANCE 8200 Srs Basic Operation Gu - Page 236
Click [OK] [OK]. The item names may differ, depending on the type of operating system you are using. For more information, check the manual documentation for the personal computer operating system you are using. ˙ Specifying the File Server by Browsing: 1. Press [Scan and Send] [New Destination - Canon imageRUNNER ADVANCE 8295 | imageRUNNER ADVANCE 8200 Srs Basic Operation Gu - Page 237
Troubleshooting Q&A 7 Can I move the Address Book registered on another Canon machine onto this machine? You can use the import and export mode of the Remote UI to move the Address Book. ˙ Exporting the Address Book from Another Canon . For more information, see e-Manual > Security. • You can also export - Canon imageRUNNER ADVANCE 8295 | imageRUNNER ADVANCE 8200 Srs Basic Operation Gu - Page 238
Book, you can specify the address quickly. For more information, see e-Manual> Settings/ Registration. 9 When sending a fax, can the machine be Name Page Number 09/05/2012 TUE 15:00 FAX (404)XXX-XXXX CANON SALES Atlanta office 001/001 Sender Information ˙ Registering the sender's name: 1. - Canon imageRUNNER ADVANCE 8295 | imageRUNNER ADVANCE 8200 Srs Basic Operation Gu - Page 239
Troubleshooting 10 How do I change the default settings (scan settings and file format) of the Scan and Send Basic Features 2. Press [Change Default Settings] [Yes]. Before Change After Change Additional Information For more information on each file format, see e-Manual > Scan and Send. 239 - Canon imageRUNNER ADVANCE 8295 | imageRUNNER ADVANCE 8200 Srs Basic Operation Gu - Page 240
] [Preview] [Close]. 3.Press (Start). Additional Information • To perform this procedure, you must have administrator privileges. For more information, see e-Manual > Security. • You can also restrict sending to a destination that is not stored in the Address Book. For more information, see - Canon imageRUNNER ADVANCE 8295 | imageRUNNER ADVANCE 8200 Srs Basic Operation Gu - Page 241
Troubleshooting Additional Information If [Register Options Shortcuts] is selected from conditions. 4. Press [Close]. Additional Information For more information on the forwarding conditions, see e-Manual > Settings/ Registration. 14 How do I register/edit destinations in a one-touch button? - Canon imageRUNNER ADVANCE 8295 | imageRUNNER ADVANCE 8200 Srs Basic Operation Gu - Page 242
the subject. The default setting is 'Attached Image.' Additional Information • For information on how to register/edit a destination in a one-touch button, see e-Manual > Scan and Send, or Fax. • When registering from the Fax screen, you can only register fax destinations or groups that include fax - Canon imageRUNNER ADVANCE 8295 | imageRUNNER ADVANCE 8200 Srs Basic Operation Gu - Page 243
Troubleshooting 16 How erased press [OK]. Q&A 17 How do I access the Advanced Box from a computer? If the Advanced Box is opened with SMB, check the following. ˙ Checking the settings For more information, see e-Manual > Settings/Registration. Additional Information For more information, see - Canon imageRUNNER ADVANCE 8295 | imageRUNNER ADVANCE 8200 Srs Basic Operation Gu - Page 244
forwarding conditions. 4. Press [Forwarding Destination] [Address Book] specify the Advanced Box destination. Additional Information • For information on registering an Advanced Box destination in the Address Book, see e-Manual > Scan and Send. • For more information on forwarding settings, see - Canon imageRUNNER ADVANCE 8295 | imageRUNNER ADVANCE 8200 Srs Basic Operation Gu - Page 245
that was stored with the [Booklet Scan] mode set. • For details on the Booklet Scan mode settings, see e-Manual > Scan and Store. 20 I cannot print PDF files stored in the Advanced Box. Are optional products required? The following optional products are required to print PDF files: PS Printer Kit - Canon imageRUNNER ADVANCE 8295 | imageRUNNER ADVANCE 8200 Srs Basic Operation Gu - Page 246
Divided Booklet mode from the Macintosh printer driver. • For information on the number of sheets that can be saddle stitched at one time, see e-Manual > Optional Products/ Software. 22 The content of the reverse side appears on the copies. You can erase the background color of the original and - Canon imageRUNNER ADVANCE 8295 | imageRUNNER ADVANCE 8200 Srs Basic Operation Gu - Page 247
Troubleshooting ˙ Automatic gradation adjustment: If the Duplex Color Image Reader Unit-G1 is not attached Adjust] [Start]. Additional Information For more information on Automatic Gradation Adjustment, see e-Manual > Settings/Registration. Q&A 24 The printed paper is warped. If you print an - Canon imageRUNNER ADVANCE 8295 | imageRUNNER ADVANCE 8200 Srs Basic Operation Gu - Page 248
behind because the print job cannot be started until the password is entered on the touch panel display of the machine. For more information, see e-Manual > Practical Workflows. 248 - Canon imageRUNNER ADVANCE 8295 | imageRUNNER ADVANCE 8200 Srs Basic Operation Gu - Page 249
Troubleshooting Additional Information For instructions on installing the Network ScanGear Driver, see the Network ScanGear User's Guide different size originals press [OK]. Q&A Additional Information For more information, see e-Manual > Copy, or Fax. 28 Can I print on the reverse side of the - Canon imageRUNNER ADVANCE 8295 | imageRUNNER ADVANCE 8200 Srs Basic Operation Gu - Page 250
and tray priority for Tray A, B, and C press [OK]. 250 Additional Information For more information on setting the output tray for each function, see e-Manual > Settings/Registration. 30 What are the types of paper that I can use? You can load and print on the following paper: Paper Drawer 3 and - Canon imageRUNNER ADVANCE 8295 | imageRUNNER ADVANCE 8200 Srs Basic Operation Gu - Page 251
Troubleshooting 31 How do I print data received via fax/I-fax on paper specified in advance? You can change the paper source from [Paper Drawer Auto Selection On/Off] Additional Information For more information, see e-Manual > Settings/Registration. Additional Information For more information, see - Canon imageRUNNER ADVANCE 8295 | imageRUNNER ADVANCE 8200 Srs Basic Operation Gu - Page 252
/Registration). 2. Press [Function Settings] [Send] [Fax Settings]. 3. Press [Fax TX Report] [Off ] [OK]. Additional Information For more information, see e-Manual > Settings/Registration. 34 How do I print the data received from specific destinations only? You can set the Store/Print - Canon imageRUNNER ADVANCE 8295 | imageRUNNER ADVANCE 8200 Srs Basic Operation Gu - Page 253
, see Chapter 3, "Routine Maintenance." 36 A paper jam has occurred. How do I solve this problem? The procedure for clearing a paper jam is displayed on the touch panel display. Follow the instructions to clear the paper jam. Q&A ˙ Fixing Transport Unit (Inside the Main Unit) ˙ Feeder 253 - Canon imageRUNNER ADVANCE 8295 | imageRUNNER ADVANCE 8200 Srs Basic Operation Gu - Page 254
Q&A Additional Information If the problem is still not resolved, see Chapter 4, "Troubleshooting." t remove the toner cartridge after codes described in e-Manual > Problem Solving. Additional Information For instructions on using (Status Monitor/Cancel), see e-Manual > Status Monitor/Cancel - Canon imageRUNNER ADVANCE 8295 | imageRUNNER ADVANCE 8200 Srs Basic Operation Gu - Page 255
Troubleshooting 39 It seems as though turning OFF the machine is different from the previous imageRUNNER. I am afraid that this may be a wrong operation. For the previous imageRUNNER mode. However, for the imageRUNNER ADVANCE, you just need to Energy Saver mode, see e-Manual > Basic Operations. • - Canon imageRUNNER ADVANCE 8295 | imageRUNNER ADVANCE 8200 Srs Basic Operation Gu - Page 256
Report every time. Also, if the Fax Activity Report is set, you can output and check Fax Report from the past. For more information, see e-Manual > Basic Operations. 42 Can I restrict the number of copies/ prints? If Department ID Management is used, you can restrict the copy or print output within - Canon imageRUNNER ADVANCE 8295 | imageRUNNER ADVANCE 8200 Srs Basic Operation Gu - Page 257
specify the page limit settings press [OK]. Q&A Displayed Language: English Troubleshooting Additional Information To perform this procedure, you must have administrator privileges. For more information, see e-Manual > Security. 43 Can I change the language displayed on the touch panel display - Canon imageRUNNER ADVANCE 8295 | imageRUNNER ADVANCE 8200 Srs Basic Operation Gu - Page 258
the function key press [OK]. Additional Information To perform this procedure, you must have administrator privileges. For more information, see e-Manual > Security. You can also recall the settings that are previously stored as settings for frequently used functions from (Main Menu). For - Canon imageRUNNER ADVANCE 8295 | imageRUNNER ADVANCE 8200 Srs Basic Operation Gu - Page 259
Troubleshooting 45 I want to check the IP address for this machine to run the Remote UI, Information • To perform this procedure, you must have administrator privileges. For more information, see e-Manual > Security. • If you cannot start the Remote UI, specify the following settings. 1. Press - Canon imageRUNNER ADVANCE 8295 | imageRUNNER ADVANCE 8200 Srs Basic Operation Gu - Page 260
Q&A 46 Can I change the default settings of the printer driver? You can change the print settings of the printer driver from the computer you are using. ˙ Using Windows: 1. On the [Start] menu, click [Control Panel] [Printer]. 2. Right-click the printer icon click [Printing Preferences] - Canon imageRUNNER ADVANCE 8295 | imageRUNNER ADVANCE 8200 Srs Basic Operation Gu - Page 261
Troubleshooting Q&A 47 Is there a way to adjust the sound heard when fax sending/receiving is complete? You can use (Volume Settings) on the control panel to - Canon imageRUNNER ADVANCE 8295 | imageRUNNER ADVANCE 8200 Srs Basic Operation Gu - Page 262
? MEAP stands for Multifunctional Embedded Application Platform and is a software platform for the Canon multitasking machines. You can expand the functions or customize them by installing the MEAP Application Install Machine Additional Information For more information, see e-Manual > MEAP. 262 - Canon imageRUNNER ADVANCE 8295 | imageRUNNER ADVANCE 8200 Srs Basic Operation Gu - Page 263
- Canon imageRUNNER ADVANCE 8295 | imageRUNNER ADVANCE 8200 Srs Basic Operation Gu - Page 264
CHINA CO., LTD 15F Jinbao Building No.89 Jinbao Street, Dongcheng District, Beijing 100005, China CANON SINGAPORE PTE. LTD. 1 HarbourFront Avenue #04-01 Keppel Bay Tower, Singapore 098632 CANON HONGKONG CO., LTD 19/F., The Metropolis Tower, 10 Metropolis Drive, Hunghom, Kowloon, Hong Kong FT5-4682
-
 1
1 -
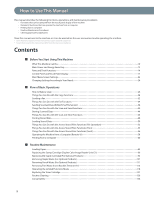 2
2 -
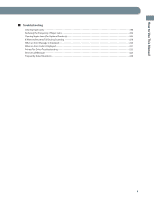 3
3 -
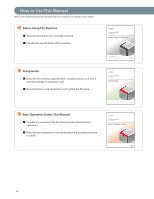 4
4 -
 5
5 -
 6
6 -
 7
7 -
8
-
9
-
10
-
11
-
12
-
13
-
14
-
15
-
16
-
17
-
18
-
19
-
20
-
21
-
22
-
23
-
24
-
25
-
26
-
27
-
28
-
29
-
30
-
31
-
32
-
33
-
34
-
35
-
36
-
37
-
38
-
39
-
40
-
41
-
42
-
43
-
44
-
45
-
46
-
47
-
48
-
49
-
50
-
51
-
52
-
53
-
54
-
55
-
56
-
57
-
58
-
59
-
60
-
61
-
62
-
63
-
64
-
65
-
66
-
67
-
68
-
69
-
70
-
71
-
72
-
73
-
74
-
75
-
76
-
77
-
78
-
79
-
80
-
81
-
82
-
83
-
84
-
85
-
86
-
87
-
88
-
89
-
90
-
91
-
92
-
93
-
94
-
95
-
96
-
97
-
98
-
99
-
100
-
101
-
102
-
103
-
104
-
105
-
106
-
107
-
108
-
109
-
110
-
111
-
112
-
113
-
114
-
115
-
116
-
117
-
118
-
119
-
120
-
121
-
122
-
123
-
124
-
125
-
126
-
127
-
128
-
129
-
130
-
131
-
132
-
133
-
134
-
135
-
136
-
137
-
138
-
139
-
140
-
141
-
142
-
143
-
144
-
145
-
146
-
147
-
148
-
149
-
150
-
151
-
152
-
153
-
154
-
155
-
156
-
157
-
158
-
159
-
160
-
161
-
162
-
163
-
164
-
165
-
166
-
167
-
168
-
169
-
170
-
171
-
172
-
173
-
174
-
175
-
176
-
177
-
178
-
179
-
180
-
181
-
182
-
183
-
184
-
185
-
186
-
187
-
188
-
189
-
190
-
191
-
192
-
193
-
194
-
195
-
196
-
197
-
198
-
199
-
200
-
201
-
202
-
203
-
204
-
205
-
206
-
207
-
208
-
209
-
210
-
211
-
212
-
213
-
214
-
215
-
216
-
217
-
218
-
219
-
220
-
221
-
222
-
223
-
224
-
225
-
226
-
227
-
228
-
229
-
230
-
231
-
232
-
233
-
234
-
235
-
236
-
237
-
238
-
239
-
240
-
241
-
242
-
243
-
244
-
245
-
246
-
247
-
248
-
249
-
250
-
251
-
252
-
253
-
254
-
255
-
256
-
257
-
258
-
259
-
260
-
261
-
262
-
263
-
264
 |
 |

ENG
Basic Operation Guide
After you finish reading this guide, store it in a safe place for future reference.