Casio EX-Z70 Owners Manual - Page 139
Displaying the 9-image View, In the PLAY mode, press the zoom button, to display the frame that
 |
UPC - 079767622251
View all Casio EX-Z70 manuals
Add to My Manuals
Save this manual to your list of manuals |
Page 139 highlights
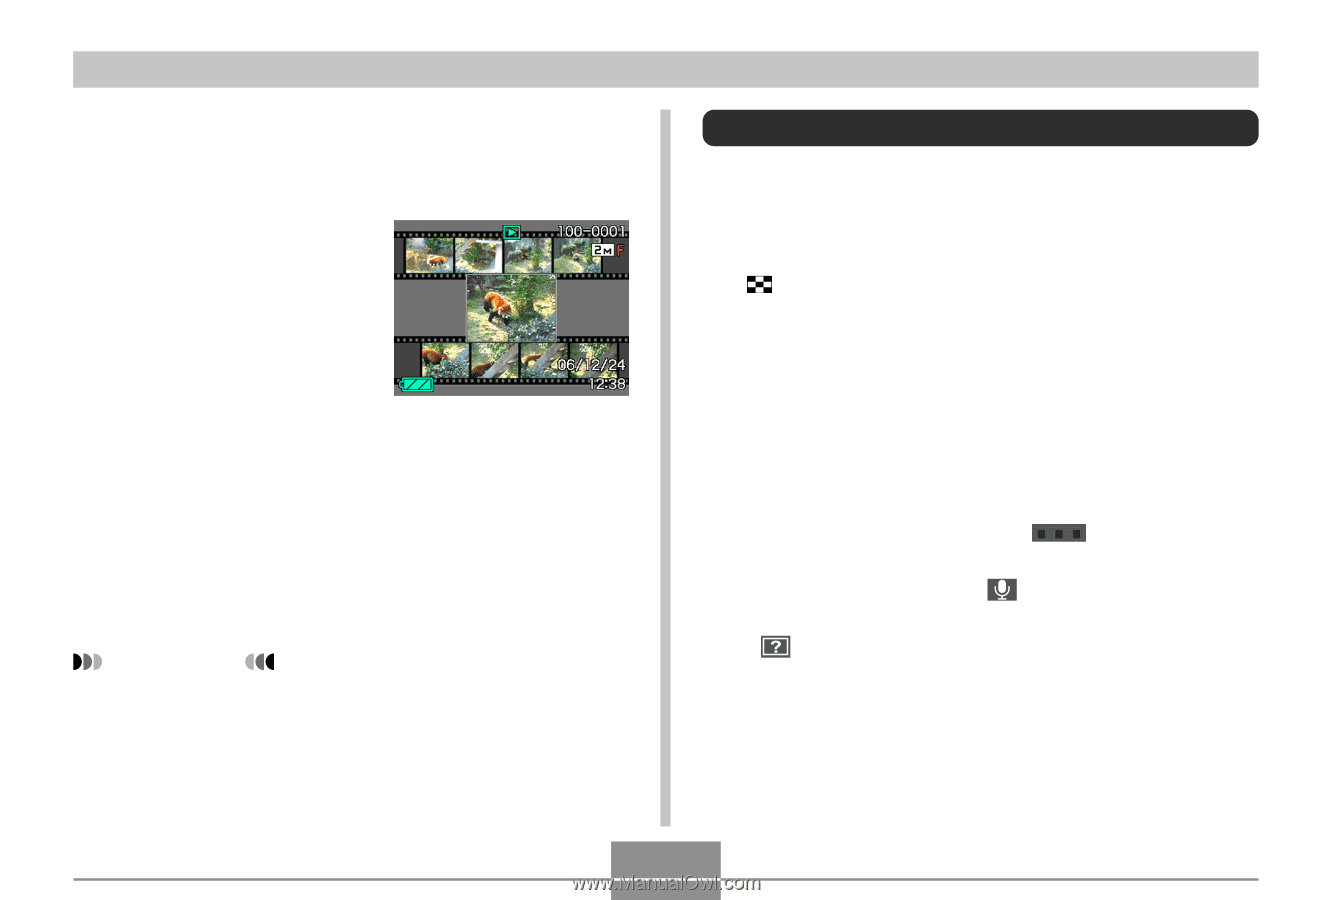
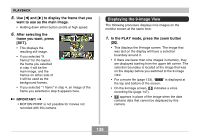
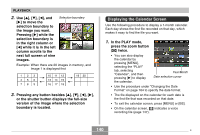
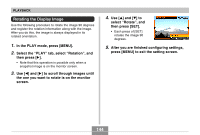
PLAYBACK 5. Use [̇] and [̈] to display the frame that you want to use as the main image. • Holding down either button scrolls at high speed. 6. After selecting the frame you want, press [SET]. • This displays the resulting still image. • If you selected "9 frames" for the layout, the frame you selected in step 4 will be the main image, and the frames on either side of it will be used as the background frames. • If you selected "1 frame" in step 4, an image of the frame you selected in step 6 appears here. IMPORTANT! • MOTION PRINT is not possible for movies not recorded with this camera. Displaying the 9-image View The following procedure displays nine images on the monitor screen at the same time. 1. In the PLAY mode, press the zoom button ( ). • This displays the 9-image screen. The image that was last on the display will have a selection boundary around it. • If there are fewer than nine images in memory, they are displayed starting from the upper left corner. The selection boundary is located at the image that was on the display before you switched to the 9-image view. • For a movie file (page 133), " " is displayed at the top and bottom of the screen. • On the 9-image screen, indicates a voice recording file (page 147). • appears in place of the image when the date contains data that cannot be displayed by this camera. 139
-
 1
1 -
2
-
3
-
4
-
5
-
6
-
7
-
8
-
9
-
10
-
11
-
12
-
13
-
14
-
15
-
16
-
17
-
18
-
19
-
20
-
21
-
22
-
23
-
24
-
25
-
26
-
27
-
28
-
29
-
30
-
31
-
32
-
33
-
34
-
35
-
36
-
37
-
38
-
39
-
40
-
41
-
42
-
43
-
44
-
45
-
46
-
47
-
48
-
49
-
50
-
51
-
52
-
53
-
54
-
55
-
56
-
57
-
58
-
59
-
60
-
61
-
62
-
63
-
64
-
65
-
66
-
67
-
68
-
69
-
70
-
71
-
72
-
73
-
74
-
75
-
76
-
77
-
78
-
79
-
80
-
81
-
82
-
83
-
84
-
85
-
86
-
87
-
88
-
89
-
90
-
91
-
92
-
93
-
94
-
95
-
96
-
97
-
98
-
99
-
100
-
101
-
102
-
103
-
104
-
105
-
106
-
107
-
108
-
109
-
110
-
111
-
112
-
113
-
114
-
115
-
116
-
117
-
118
-
119
-
120
-
121
-
122
-
123
-
124
-
125
-
126
-
127
-
128
-
129
-
130
-
131
-
132
-
133
-
 134
134 -
 135
135 -
 136
136 -
 137
137 -
 138
138 -
 139
139 -
 140
140 -
 141
141 -
 142
142 -
 143
143 -
 144
144 -
145
-
146
-
147
-
148
-
149
-
150
-
151
-
152
-
153
-
154
-
155
-
156
-
157
-
158
-
159
-
160
-
161
-
162
-
163
-
164
-
165
-
166
-
167
-
168
-
169
-
170
-
171
-
172
-
173
-
174
-
175
-
176
-
177
-
178
-
179
-
180
-
181
-
182
-
183
-
184
-
185
-
186
-
187
-
188
-
189
-
190
-
191
-
192
-
193
-
194
-
195
-
196
-
197
-
198
-
199
-
200
-
201
-
202
-
203
-
204
-
205
-
206
-
207
-
208
-
209
-
210
-
211
-
212
-
213
-
214
-
215
-
216
-
217
-
218
-
219
-
220
-
221
-
222
-
223
-
224
-
225
-
226
-
227
-
228
-
229
-
230
-
231
-
232
-
233
-
234
-
235
-
236
-
237
-
238
-
239
 |
 |