Casio EX-Z70 Owners Manual - Page 140
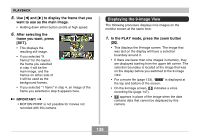
Displaying the Calendar Screen
 |
UPC - 079767622251
View all Casio EX-Z70 manuals
Add to My Manuals
Save this manual to your list of manuals |
Page 140 highlights
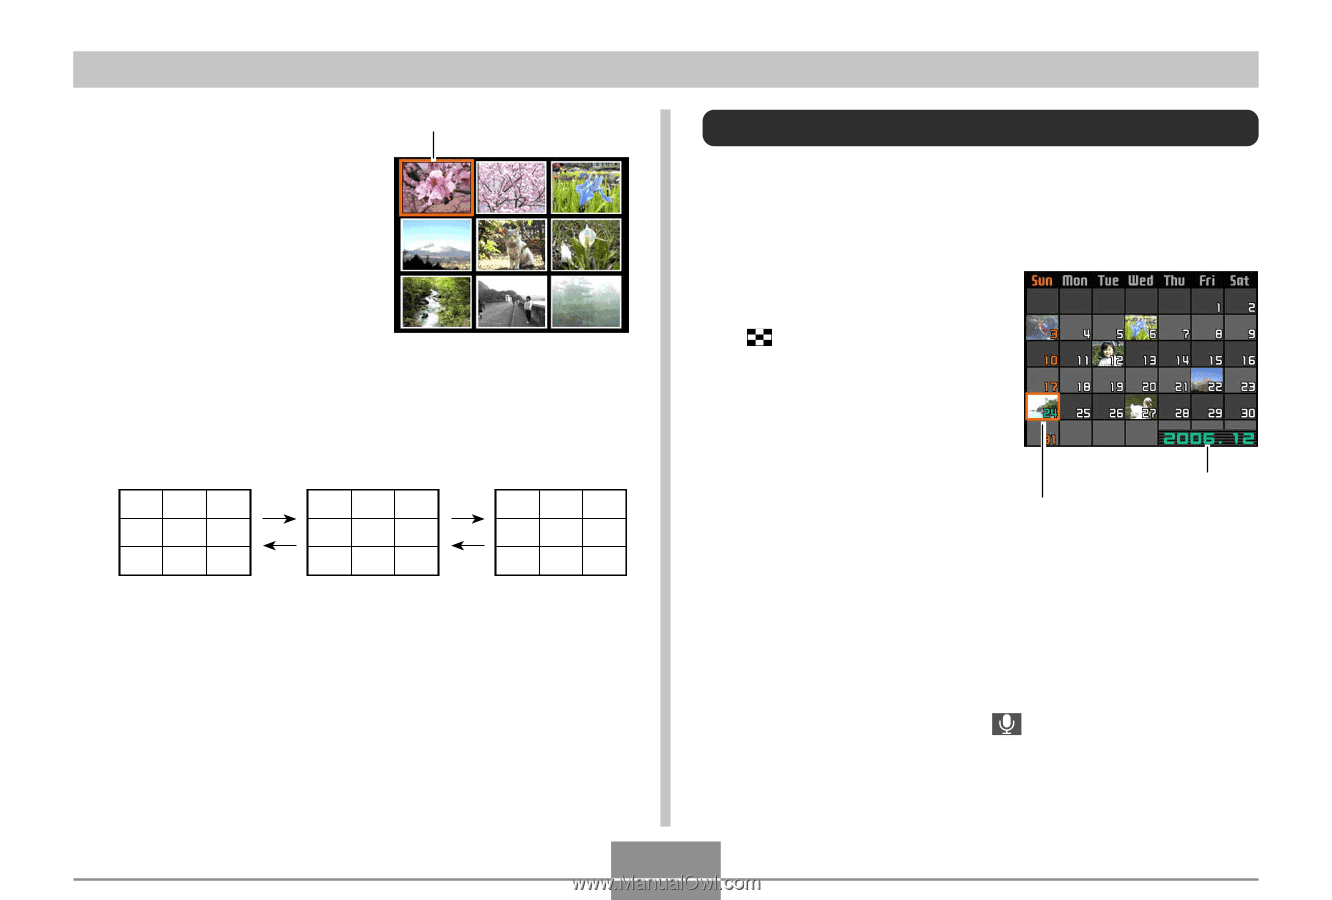
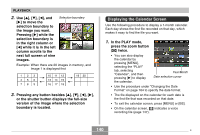
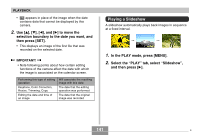
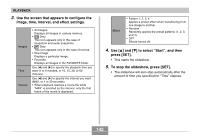
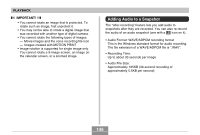
PLAYBACK 2. Use and [̈] to move the selection boundary to the image you want. Pressing [̈] while the selection boundary is in the right column or [̇] while it is in the left column scrolls to the next full screen of nine images. Selection boundary Example: When there are 20 images in memory, and Image 1 is displayed first 123 456 789 10 11 12 13 14 15 16 17 18 19 20 3. Pressing any button besides or the shutter button displays the full-size version of the image where the selection boundary is located. Displaying the Calendar Screen Use the following procedure to display a 1-month calendar. Each day shows the first file recorded on that day, which makes it easy to find the file you want. 1. In the PLAY mode, press the zoom button ( ) twice. • You can also display the calendar by pressing [MENU], selecting the "PLAY" tab, selecting "Calendar", and then pressing [̈] to display the calendar. Year/Month Date selection cursor • Use the procedure under "Changing the Date Format" on page 164 to specify the date format. • The file displayed on the calendar for each date is the first file that was recorded on that date. • To exit the calendar screen, press [MENU] or [BS]. • On the calendar screen, indicates a voice recording file (page 147). 140 B
-
 1
1 -
2
-
3
-
4
-
5
-
6
-
7
-
8
-
9
-
10
-
11
-
12
-
13
-
14
-
15
-
16
-
17
-
18
-
19
-
20
-
21
-
22
-
23
-
24
-
25
-
26
-
27
-
28
-
29
-
30
-
31
-
32
-
33
-
34
-
35
-
36
-
37
-
38
-
39
-
40
-
41
-
42
-
43
-
44
-
45
-
46
-
47
-
48
-
49
-
50
-
51
-
52
-
53
-
54
-
55
-
56
-
57
-
58
-
59
-
60
-
61
-
62
-
63
-
64
-
65
-
66
-
67
-
68
-
69
-
70
-
71
-
72
-
73
-
74
-
75
-
76
-
77
-
78
-
79
-
80
-
81
-
82
-
83
-
84
-
85
-
86
-
87
-
88
-
89
-
90
-
91
-
92
-
93
-
94
-
95
-
96
-
97
-
98
-
99
-
100
-
101
-
102
-
103
-
104
-
105
-
106
-
107
-
108
-
109
-
110
-
111
-
112
-
113
-
114
-
115
-
116
-
117
-
118
-
119
-
120
-
121
-
122
-
123
-
124
-
125
-
126
-
127
-
128
-
129
-
130
-
131
-
132
-
133
-
134
-
 135
135 -
 136
136 -
 137
137 -
 138
138 -
 139
139 -
 140
140 -
 141
141 -
 142
142 -
 143
143 -
 144
144 -
 145
145 -
146
-
147
-
148
-
149
-
150
-
151
-
152
-
153
-
154
-
155
-
156
-
157
-
158
-
159
-
160
-
161
-
162
-
163
-
164
-
165
-
166
-
167
-
168
-
169
-
170
-
171
-
172
-
173
-
174
-
175
-
176
-
177
-
178
-
179
-
180
-
181
-
182
-
183
-
184
-
185
-
186
-
187
-
188
-
189
-
190
-
191
-
192
-
193
-
194
-
195
-
196
-
197
-
198
-
199
-
200
-
201
-
202
-
203
-
204
-
205
-
206
-
207
-
208
-
209
-
210
-
211
-
212
-
213
-
214
-
215
-
216
-
217
-
218
-
219
-
220
-
221
-
222
-
223
-
224
-
225
-
226
-
227
-
228
-
229
-
230
-
231
-
232
-
233
-
234
-
235
-
236
-
237
-
238
-
239
 |
 |