Casio EX-Z70 Owners Manual - Page 46
Configuring Display Language and Clock Settings, Perform one of the following operations
 |
UPC - 079767622251
View all Casio EX-Z70 manuals
Add to My Manuals
Save this manual to your list of manuals |
Page 46 highlights
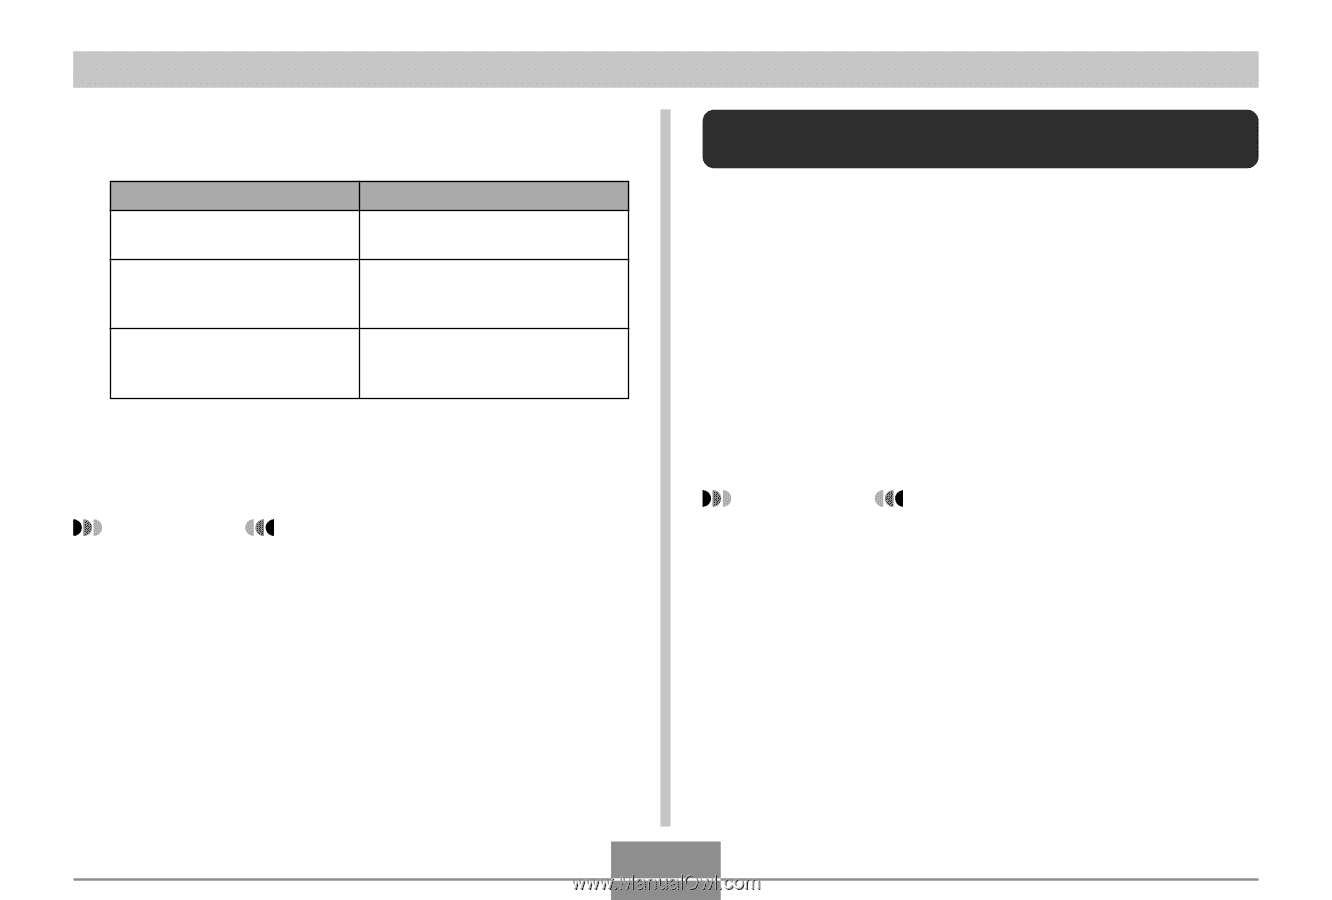
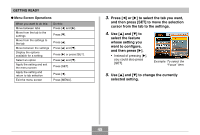
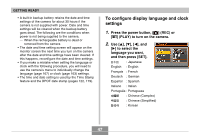
GETTING READY 6. Perform one of the following operations to apply the setting you configured. To do this: Apply the setting and exit the menu screen. Apply the setting and return to feature selection in step 4*. Apply the setting and return to tab selection in step 3. Perform this key operation: Press [SET]. Press [̇]. 1. Press [̇]. 2. Use [̆] to move back up to tab selection. * In the case of easy Mode (page 55), pressing [̇] will apply the setting and exit the setting screen without returning to feature selection in step 4. IMPORTANT! • See "Menu Reference" on page 220 for more information about menus. • Entering the easy mode (page 55) changes display contents to four menu items each, using larger size characters. The easy mode also displays simple onscreen help. Configuring Display Language and Clock Settings Be sure to configure the following settings before using the camera to record images. • Display language • Home city • Date Style • Date and time Note that the current date and time settings are used by the camera to generate the date and time that are stored along with image data, etc. IMPORTANT! • Recording images without configuring the clock settings causes incorrect time information to be registered. Be sure to configure the clock settings before using the camera. 46
-
 1
1 -
2
-
3
-
4
-
5
-
6
-
7
-
8
-
9
-
10
-
11
-
12
-
13
-
14
-
15
-
16
-
17
-
18
-
19
-
20
-
21
-
22
-
23
-
24
-
25
-
26
-
27
-
28
-
29
-
30
-
31
-
32
-
33
-
34
-
35
-
36
-
37
-
38
-
39
-
40
-
 41
41 -
 42
42 -
 43
43 -
 44
44 -
 45
45 -
 46
46 -
 47
47 -
 48
48 -
 49
49 -
 50
50 -
 51
51 -
52
-
53
-
54
-
55
-
56
-
57
-
58
-
59
-
60
-
61
-
62
-
63
-
64
-
65
-
66
-
67
-
68
-
69
-
70
-
71
-
72
-
73
-
74
-
75
-
76
-
77
-
78
-
79
-
80
-
81
-
82
-
83
-
84
-
85
-
86
-
87
-
88
-
89
-
90
-
91
-
92
-
93
-
94
-
95
-
96
-
97
-
98
-
99
-
100
-
101
-
102
-
103
-
104
-
105
-
106
-
107
-
108
-
109
-
110
-
111
-
112
-
113
-
114
-
115
-
116
-
117
-
118
-
119
-
120
-
121
-
122
-
123
-
124
-
125
-
126
-
127
-
128
-
129
-
130
-
131
-
132
-
133
-
134
-
135
-
136
-
137
-
138
-
139
-
140
-
141
-
142
-
143
-
144
-
145
-
146
-
147
-
148
-
149
-
150
-
151
-
152
-
153
-
154
-
155
-
156
-
157
-
158
-
159
-
160
-
161
-
162
-
163
-
164
-
165
-
166
-
167
-
168
-
169
-
170
-
171
-
172
-
173
-
174
-
175
-
176
-
177
-
178
-
179
-
180
-
181
-
182
-
183
-
184
-
185
-
186
-
187
-
188
-
189
-
190
-
191
-
192
-
193
-
194
-
195
-
196
-
197
-
198
-
199
-
200
-
201
-
202
-
203
-
204
-
205
-
206
-
207
-
208
-
209
-
210
-
211
-
212
-
213
-
214
-
215
-
216
-
217
-
218
-
219
-
220
-
221
-
222
-
223
-
224
-
225
-
226
-
227
-
228
-
229
-
230
-
231
-
232
-
233
-
234
-
235
-
236
-
237
-
238
-
239
 |
 |