Cisco 5505 Administration Guide - Page 29
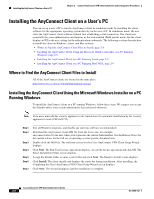
Installing the AnyConnect Client and Configuring the Security Appliance with ASDM - ssl vpn
 |
UPC - 882658082252
View all Cisco 5505 manuals
Add to My Manuals
Save this manual to your list of manuals |
Page 29 highlights
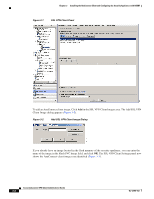
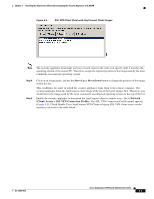
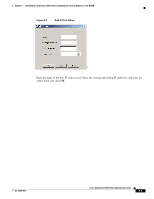
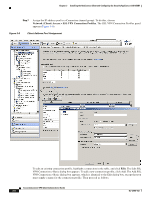
3 C H A P T E R Installing the AnyConnect Client and Configuring the Security Appliance with ASDM Installing the client on the security appliance consists of copying a client image to the security appliance and identifying the file to the security appliance as a client image. With multiple clients, you must also assign the order in which the security appliance loads the clients to the remote PC. Note The AnyConnect client configuration uses the same parameters as the SSL VPN Client. Many of the file names, panel names, and ASDM navigation elements, as well as most of the CLI commands include the prefix svc, indicating this similarity. Perform the following steps to install the client: Step 1 Step 2 Step 3 Load the AnyConnect client images to the security appliance. On the ASDM toolbar, click Configuration. The navigation pane displays features to configure. In the navigation pane, click Remote Access VPN. The navigation pane displays VPN features. Choose Network (Client) Access > Advanced > SSL VPN > Client Settings. The SSL VPN Client Settings panel displays. (Figure 3-1). This panel lists any AnyConnect client files that have been identified as AnyConnect client images. The order in which they appear in the table reflects the order in which they download to the remote computer. OL-12950-012 Cisco AnyConnect VPN Client Administrator Guide 3-1
-
 1
1 -
2
-
3
-
4
-
5
-
6
-
7
-
8
-
9
-
10
-
11
-
12
-
13
-
14
-
15
-
16
-
17
-
18
-
19
-
20
-
21
-
22
-
23
-
 24
24 -
 25
25 -
 26
26 -
 27
27 -
 28
28 -
 29
29 -
 30
30 -
 31
31 -
 32
32 -
 33
33 -
 34
34 -
35
-
36
-
37
-
38
-
39
-
40
-
41
-
42
-
43
-
44
-
45
-
46
-
47
-
48
-
49
-
50
-
51
-
52
-
53
-
54
-
55
-
56
-
57
-
58
-
59
-
60
-
61
-
62
-
63
-
64
-
65
-
66
-
67
-
68
-
69
-
70
-
71
-
72
-
73
-
74
-
75
-
76
-
77
-
78
-
79
-
80
-
81
-
82
-
83
-
84
-
85
-
86
-
87
-
88
-
89
-
90
-
91
-
92
-
93
-
94
-
95
-
96
-
97
-
98
-
99
-
100
-
101
-
102
-
103
-
104
-
105
-
106
-
107
-
108
-
109
-
110
-
111
-
112
-
113
-
114
-
115
-
116
-
117
-
118
 |
 |
