Compaq ProLiant 8000 ProLiant 8000 Servers Maintenance and Service Guide - Page 96
Safety Interlock Switches, Cover and Side Panel Switches
 |
View all Compaq ProLiant 8000 manuals
Add to My Manuals
Save this manual to your list of manuals |
Page 96 highlights
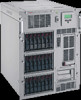
3-2 Compaq ProLiant 8000 Servers Maintenance and Service Guide Safety Interlock Switches Some earlier ProLiant 8000 upgraded servers contain safety interlock switches. These switches are located under the top cover at the top of the chassis. One safety interlock switch is located beside the removable media bay. When the cover or one of the side panels is removed from the server, the main power supply output will be disabled; however, auxiliary power (+5V) will still remain in the exposed areas. The following procedures are for ProLiant 8000 upgraded servers with safety interlock switches. NOTE: This interlocking feature may be disabled upon upgrading. See the ProLiant 7000 8-way Pentium II/III Xeon Server upgrade manual for more information. Cover and Side Panel Switches To remove the cover and side panel safety interlock switches: 1. Perform the preparation procedures. See "Preparation Procedures" in Chapter 2. 2. Remove the top access panel. See "Top Access Panel" in Chapter 2. 3. Remove the screw on the bracket holding the interlock switch. If you are removing the top access panel interlock switch, remove the nut . 4. Remove the switch assembly from the bracket. 5. Disconnect the interlock cable connector from the I/O board . 2 Top Cover Switch 1 Left Side Access Panel Switch Figure 3-1. Removing the cover and side panel switches Reverse steps 1 through 5 to replace the cover and side panel safety interlock switches.
-
 1
1 -
2
-
3
-
4
-
5
-
6
-
7
-
8
-
9
-
10
-
11
-
12
-
13
-
14
-
15
-
16
-
17
-
18
-
19
-
20
-
21
-
22
-
23
-
24
-
25
-
26
-
27
-
28
-
29
-
30
-
31
-
32
-
33
-
34
-
35
-
36
-
37
-
38
-
39
-
40
-
41
-
42
-
43
-
44
-
45
-
46
-
47
-
48
-
49
-
50
-
51
-
52
-
53
-
54
-
55
-
56
-
57
-
58
-
59
-
60
-
61
-
62
-
63
-
64
-
65
-
66
-
67
-
68
-
69
-
70
-
71
-
72
-
73
-
74
-
75
-
76
-
77
-
78
-
79
-
80
-
81
-
82
-
83
-
84
-
85
-
86
-
87
-
88
-
89
-
90
-
 91
91 -
 92
92 -
 93
93 -
 94
94 -
 95
95 -
 96
96 -
 97
97 -
 98
98 -
 99
99 -
 100
100 -
 101
101 -
102
-
103
-
104
-
105
-
106
-
107
-
108
-
109
-
110
-
111
-
112
-
113
-
114
-
115
-
116
-
117
-
118
-
119
-
120
-
121
-
122
-
123
-
124
-
125
-
126
-
127
-
128
-
129
-
130
-
131
-
132
-
133
-
134
-
135
-
136
-
137
-
138
-
139
-
140
-
141
-
142
-
143
-
144
-
145
-
146
-
147
-
148
-
149
-
150
-
151
-
152
-
153
-
154
-
155
-
156
-
157
-
158
-
159
-
160
-
161
-
162
-
163
-
164
-
165
-
166
-
167
-
168
-
169
-
170
-
171
-
172
-
173
-
174
-
175
-
176
-
177
-
178
-
179
-
180
-
181
-
182
-
183
-
184
-
185
-
186
-
187
-
188
-
189
-
190
-
191
-
192
-
193
-
194
-
195
-
196
-
197
-
198
-
199
-
200
-
201
-
202
-
203
-
204
-
205
-
206
-
207
-
208
-
209
-
210
-
211
-
212
-
213
-
214
-
215
 |
 |
