Dell DR4000 Administrator Guide - Page 19
Setting Up the DR4000 System, Interacting with the DR4000 System, Networking Preparations for - capacity
 |
View all Dell DR4000 manuals
Add to My Manuals
Save this manual to your list of manuals |
Page 19 highlights
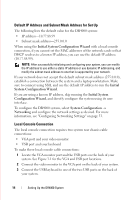
3 Setting Up the DR4000 System Interacting with the DR4000 System You interact with the system using the web-based DR4000 system GUI using a browser-based connection. The system provides a single, comprehensive data management interface that lets you create new data containers, modify or delete already existing containers, and perform a number of data-related operations using its features and settings. The containers you can manage is a defined space where you can store your backup and deduplication data. A data container is a shared file system that is imported using a client, and is accessible via NFS or CIFS filesystem protocols. The system provides real-time summary tables, detail tables, and graphs that let you monitor the status of the data capacity, storage savings, and the throughput of the containers you are managing using its features. Networking Preparations for the DR4000 System Before you can start using the system, ensure that: • An active network is available using Ethernet cables and connections. NOTE: If your DR4000 system is equipped with a 10-GbE NIC, you must use CAT6 copper cables. • IP addresses are assigned to the DR4000 system. The system ships with a default IP address and subnet mask address, which should only be used for an initial system configuration. To perform an initial configuration, you need: NOTE: Have an IP address available to replace the default IP address if you choose the static mode of IP addressing, or select to use the DHCP mode of IP addressing. - An IP address for the system - A subnet mask address - A default gateway address DELL CONFIDENTIAL - PRELIMINARY 1/10/12 - FOR PROOF ONLY Setting Up the DR4000 System 11
-
 1
1 -
2
-
3
-
4
-
5
-
6
-
7
-
8
-
9
-
10
-
11
-
12
-
13
-
 14
14 -
 15
15 -
 16
16 -
 17
17 -
 18
18 -
 19
19 -
 20
20 -
 21
21 -
 22
22 -
 23
23 -
 24
24 -
25
-
26
-
27
-
28
-
29
-
30
-
31
-
32
-
33
-
34
-
35
-
36
-
37
-
38
-
39
-
40
-
41
-
42
-
43
-
44
-
45
-
46
-
47
-
48
-
49
-
50
-
51
-
52
-
53
-
54
-
55
-
56
-
57
-
58
-
59
-
60
-
61
-
62
-
63
-
64
-
65
-
66
-
67
-
68
-
69
-
70
-
71
-
72
-
73
-
74
-
75
-
76
-
77
-
78
-
79
-
80
-
81
-
82
-
83
-
84
-
85
-
86
-
87
-
88
-
89
-
90
-
91
-
92
-
93
-
94
-
95
-
96
-
97
-
98
-
99
-
100
-
101
-
102
-
103
-
104
-
105
-
106
-
107
-
108
-
109
-
110
-
111
-
112
-
113
-
114
-
115
-
116
-
117
-
118
-
119
-
120
-
121
-
122
-
123
-
124
-
125
-
126
-
127
-
128
-
129
-
130
-
131
-
132
 |
 |
