Dell DR4000 Administrator Guide - Page 26
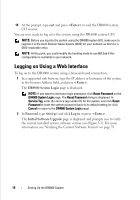
Logging on Using a Web Interface - default login
 |
View all Dell DR4000 manuals
Add to My Manuals
Save this manual to your list of manuals |
Page 26 highlights
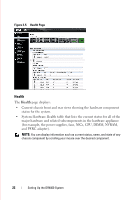
FILE LOCATION: C:\Users\bruce_wylie\Desktop\Dell Docs\~Sidewinder_Docs_DR4000\FRAME_Conversion_DR4000_AdminGuide\~DR4000_AG_F 14 At the prompt, type exit and press to end the DR4000 system CLI session. You are now ready to log in to the system using the DR4000 system GUI. NOTE: Before you log into the system using the DR4000 system GUI, make sure to register it in the local Domain Name System (DNS) for your network so that it is a DNS-resolvable entry. NOTE: At this point, you could modify the bonding mode to use 802.3ad if this configuration is available in your network. Logging on Using a Web Interface To log on to the DR4000 system using a browser-based connection: 1 In a supported web browser, type the IP address or hostname of the system in the browser Address field, and press . The DR4000 System Login page is displayed. NOTE: If you want to reset your login password, click Reset Password on the DR4000 System Login page. The Reset Password dialog is displayed. In Service Tag, enter the service tag number ID for the system, and click Reset Password to reset the system password back to its default setting (or click Cancel to return to the DR4000 System Login page). 2 In Password, type St0r@ge! and click Log in or press . The Initial Software Upgrade page is displayed and prompts you to verify the current installed system software version (see Figure 3-3). For more information, see "Verifying the Current Software Version" on page 78. DELL CONFIDENTIAL - PRELIMINARY 1/10/12 - FOR PROOF ONLY 18 Setting Up the DR4000 System
-
 1
1 -
2
-
3
-
4
-
5
-
6
-
7
-
8
-
9
-
10
-
11
-
12
-
13
-
14
-
15
-
16
-
17
-
18
-
19
-
20
-
 21
21 -
 22
22 -
 23
23 -
 24
24 -
 25
25 -
 26
26 -
 27
27 -
 28
28 -
 29
29 -
 30
30 -
 31
31 -
32
-
33
-
34
-
35
-
36
-
37
-
38
-
39
-
40
-
41
-
42
-
43
-
44
-
45
-
46
-
47
-
48
-
49
-
50
-
51
-
52
-
53
-
54
-
55
-
56
-
57
-
58
-
59
-
60
-
61
-
62
-
63
-
64
-
65
-
66
-
67
-
68
-
69
-
70
-
71
-
72
-
73
-
74
-
75
-
76
-
77
-
78
-
79
-
80
-
81
-
82
-
83
-
84
-
85
-
86
-
87
-
88
-
89
-
90
-
91
-
92
-
93
-
94
-
95
-
96
-
97
-
98
-
99
-
100
-
101
-
102
-
103
-
104
-
105
-
106
-
107
-
108
-
109
-
110
-
111
-
112
-
113
-
114
-
115
-
116
-
117
-
118
-
119
-
120
-
121
-
122
-
123
-
124
-
125
-
126
-
127
-
128
-
129
-
130
-
131
-
132
 |
 |