Dell EqualLogic PS6210XS EqualLogic Host Integration Tools for Microsoft Editi - Page 28
Initialize an Array and Add It to an Existing Group, Troubleshoot RSW
 |
View all Dell EqualLogic PS6210XS manuals
Add to My Manuals
Save this manual to your list of manuals |
Page 28 highlights
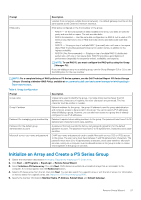
6. Select the Create a new group option, then click Next. 7. Typethe group information in the required fields, then click Next. 8. Click OK. The next screen displays a message stating that the array has been successfully initialized and the PS Series group has been created. 9. Click Finish to exit the wizard. • Click View Log to view a summary of the array configuration. • Click Next to configure additional arrays. NOTE: If a problem occurs during the RSW setup, see Troubleshoot RSW. Initialize an Array and Add It to an Existing Group 1. Obtain the information described in Information Required for Initializing a PS Series Array. 2. Click Start → All Programs → EqualLogic → Remote Setup Wizard. 3. Select Initialize a PS Series array, then click Next. RSW discovers and lists all uninitialized arrays that are accessible to the computer. If no arrays appear, click the Rediscover button. 4. Select a PS Series array from the list, then click Next. You can also search for a specific array or sort the list of arrays. For information on how to search for a specific array, see Search for a PS Series Array Using RSW. 5. Specify the member information (Member Name, IP Address, Subnet Mask, and Default Gateway). 6. Select the Join an existing group option, then click Next. 7. Type the group name, IP address, and membership password, then click Next. When the array joins the group, a message is displayed stating that the new member was successfully added to the group. 8. Perform one of the following steps: • Click Yes to open the Group Manager GUI so that you can configure a RAID policy for the new member. • Click No to configure RAID at a later time. Use the Group Manager GUI or CLI to set the RAID policy for the new group member. For more information, see the Dell EqualLogic Group Manager Administrator's Guide or Dell EqualLogic Group Manager CLI Reference Guide. 9. Click Finish to exit the wizard. • Click View Log to view a summary of the array configuration. • Click Next to initialize additional arrays. NOTE: If a problem occurs during the RSW setup, see Troubleshoot RSW. When you exit RSW, it configures the group IP address as an iSCSI target discovery address. This configuration enables the computer to discover volumes and snapshots (iSCSI targets) in the group. Troubleshoot RSW If the Remote Setup Wizard is interrupted while initializing an array and the operation fails, you must reset the array before running the wizard again. To reset an array: 1. Connect the serial cable that shipped with the array between the active control module and a console terminal, or a computer running a terminal emulator. 2. Enter the reset command and wait for the reset operation to complete. 3. Disconnect the serial cable, and launch the Remote Setup Wizard from the computer where it is installed. 28 Remote Setup Wizard
-
 1
1 -
2
-
3
-
4
-
5
-
6
-
7
-
8
-
9
-
10
-
11
-
12
-
13
-
14
-
15
-
16
-
17
-
18
-
19
-
20
-
21
-
22
-
 23
23 -
 24
24 -
 25
25 -
 26
26 -
 27
27 -
 28
28 -
 29
29 -
 30
30 -
 31
31 -
 32
32 -
 33
33 -
34
-
35
-
36
-
37
-
38
-
39
-
40
-
41
-
42
-
43
-
44
-
45
-
46
-
47
-
48
-
49
-
50
-
51
-
52
-
53
-
54
-
55
-
56
-
57
-
58
-
59
-
60
-
61
-
62
-
63
-
64
-
65
-
66
-
67
-
68
-
69
 |
 |
